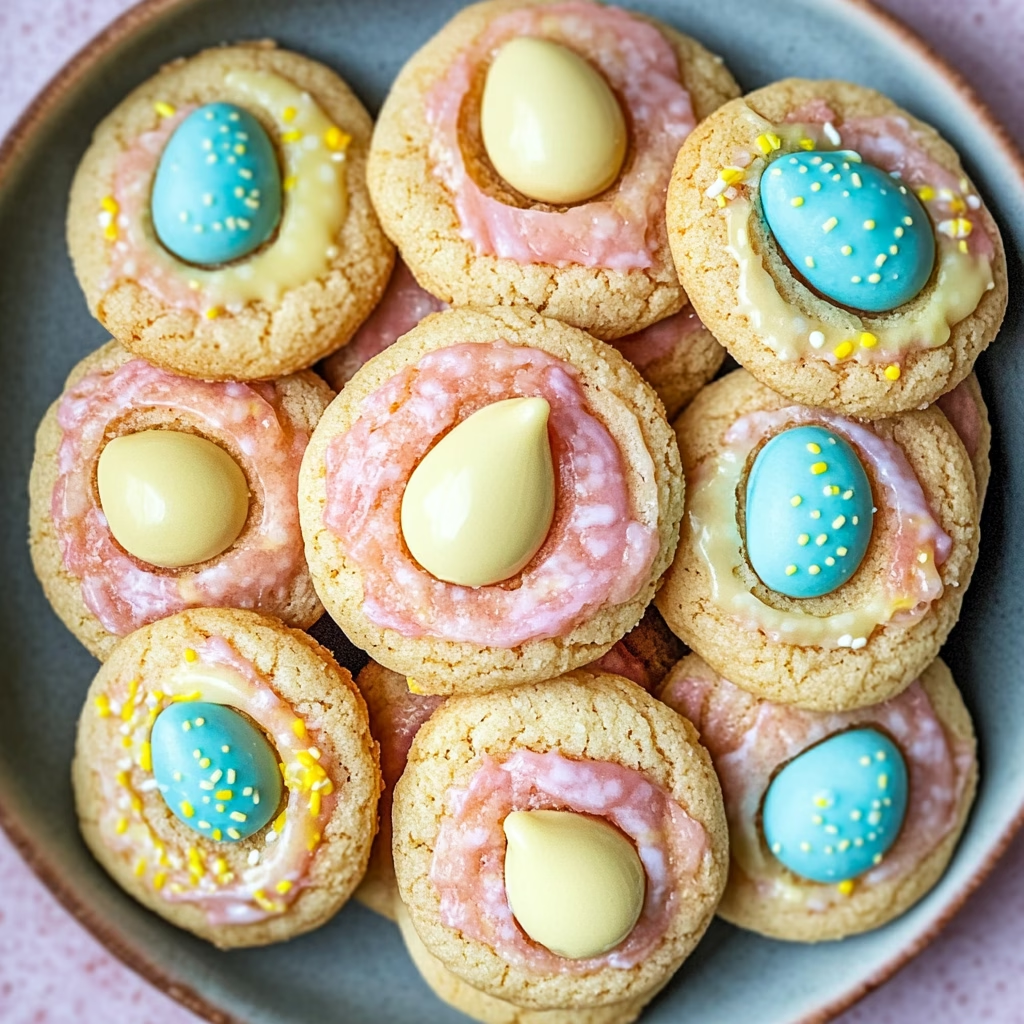
Oh, friends! Easter is just around the corner, and you know what that means—it’s time for some delightful baking! If you’re looking for a fun and festive treat to whip up for the occasion, look no further than these whimsical **Easter Blossom Cookies**.
I’ve been making these colorful little wonders for years, and they never fail to bring a smile to everyone’s face. There’s something special about unwrapping a Hershey’s Kiss and finding a hidden treasure inside a soft, sugary cookie. Plus, the vibrant colors and cheerful vibe of these cookies make them perfect for the holiday. I remember the first time I made them with my kids; we ended up with a flour fight in the kitchen, but it was all worth it for those sweet, cookie-filled memories!
So, let’s get our aprons on and dive into the world of colorful cookies, shall we?
What’s in Easter Blossom Cookies?
Unsalted Butter: The star of the show! Butter keeps the cookies rich and adds that melt-in-your-mouth goodness. I always prefer unsalted so I can control the saltiness of my baked goods.
Granulated Sugar: This is your classic sweetener, giving the cookies that delightful sweetness we all crave. It also helps aerate the butter when creamed together.
Brown Sugar: Packed with moisture and flavor, brown sugar adds depth and a hint of caramel! It’s what makes these cookies chewy on the inside.
Large Egg: Eggs are a must for binding the ingredients together and adding richness to each bite.
Vanilla Extract: Oh, the aroma! Vanilla brings warmth and enhances the overall flavor of the cookies, making them feel homemade and cozy.
All-Purpose Flour: The backbone of your cookie, flour provides structure. It’s what holds everything together nicely.
Baking Powder: This little magic powder is essential for making your cookies rise to perfection without being flattened.
Salt: Just a pinch! It helps balance the sweetness and brings out all the other flavors.
Food Coloring: We’ll use blue, pink, green, and yellow for that festive Easter look! It’s all about fun and color in this recipe.
Granulated Sugar (for rolling): Dusting the cookie balls in sugar before baking gives them a lovely sugary crust that’s oh-so-satisfying.
Unwrapped Hershey’s Kisses or other chocolate candies: The delectable surprise! These little kisses melt perfectly in the center, creating a delicious chocolatey bite.
Optional White Chocolate: If you want to take these cookies to the next level, drizzling some melted white chocolate over the top is a show-stopper!
Is Easter Blossom Cookies Good for You?
Now, let’s read the fine print! While these cookies are more of a treat than a health snack, they do bring a little joy (which is absolutely necessary!). Here are some things to consider:
Butter and Sugars: These cookies are indulgent, thanks to the butter and sugars. While they do have fats and sugars that can provide quick energy, moderation is key, so maybe save these for special occasions!
Eggs: Eggs provide protein and essential nutrients, making them a richer addition to your baking.
White Chocolate: If you choose to drizzle white chocolate, remember it adds extra calories and sugar, but hey, life’s about balance, right? Treat yourself!
Ingredients
– 1/2 cup unsalted butter, softened
– 1 cup granulated sugar
– 1/4 cup brown sugar, packed
– 1 large egg
– 1 tsp vanilla extract
– 1 1/2 cups all-purpose flour
– 1 tsp baking powder
– 1/4 tsp salt
– Food coloring (blue, pink, green, and yellow)
– 1/4 cup granulated sugar (for rolling)
– 20-24 unwrapped Hershey’s Kisses or other chocolate candies
– Optional: 1/4 cup white chocolate for drizzling
– Makes about 20-24 cookies
How to Make Easter Blossom Cookies?
1. Preheat your oven to 350°F (175°C) and line a baking sheet with parchment paper. The smell of baking cookies is too good to miss!
2. In a large bowl, cream together the softened butter, granulated sugar, and brown sugar until mixture is light and fluffy. I love watching it turn creamy—it’s almost magical!
3. Beat in the egg and add the vanilla extract until everything is combined nicely.
4. In a separate bowl, whisk together the flour, baking powder, and salt. Slowly add this dry mix into the wet ingredients, gently folding until just combined.
5. Now comes the fun part! Divide your dough into four equal portions. Add a few drops of food coloring to each portion and mix until you achieve beautiful vibrant colors!
6. Roll tablespoon-sized balls of dough in your hands and then coat them in the extra granulated sugar, making them sparkle.
7. Place the dough balls on the prepared baking sheet, spacing them about 2 inches apart, as they will spread a bit.
8. Bake in the preheated oven for about 10-12 minutes or until the edges are set and the tops look crinkly—a sure sign they’re ready!
9. As soon as you pull them out, gently press a Hershey’s Kiss into the center of each cookie. Let that chocolate melt just a touch!
10. If you want an elegant touch, melt the white chocolate and drizzle it over the cookies. You’ll impress everyone!
11. Allow cooling on the baking sheet for a few minutes before transferring them to wire racks to cool completely. Grab a glass of milk and enjoy!
Sweet Tips for Your Easter Baking Adventure
– **Variations:** Feel free to swap out the chocolate kisses for other candies or even mini eggs for a twist!
– **Storage:** Keep these cookies in an airtight container; they stay fresh for up to a week (if they last that long!).
– **Decorating Fun:** Get the kids involved and hand them some extra sprinkles or colored sugar to sprinkle on top before baking.
I can almost taste these delicious Easter Blossom Cookies just writing this! I hope you all try making them this holiday season; they’re such a joy to create, and I guarantee they’ll make your Easter celebrations a little sweeter. If you do make them, I’d love to hear how they turn out—happy baking and happy Easter!


