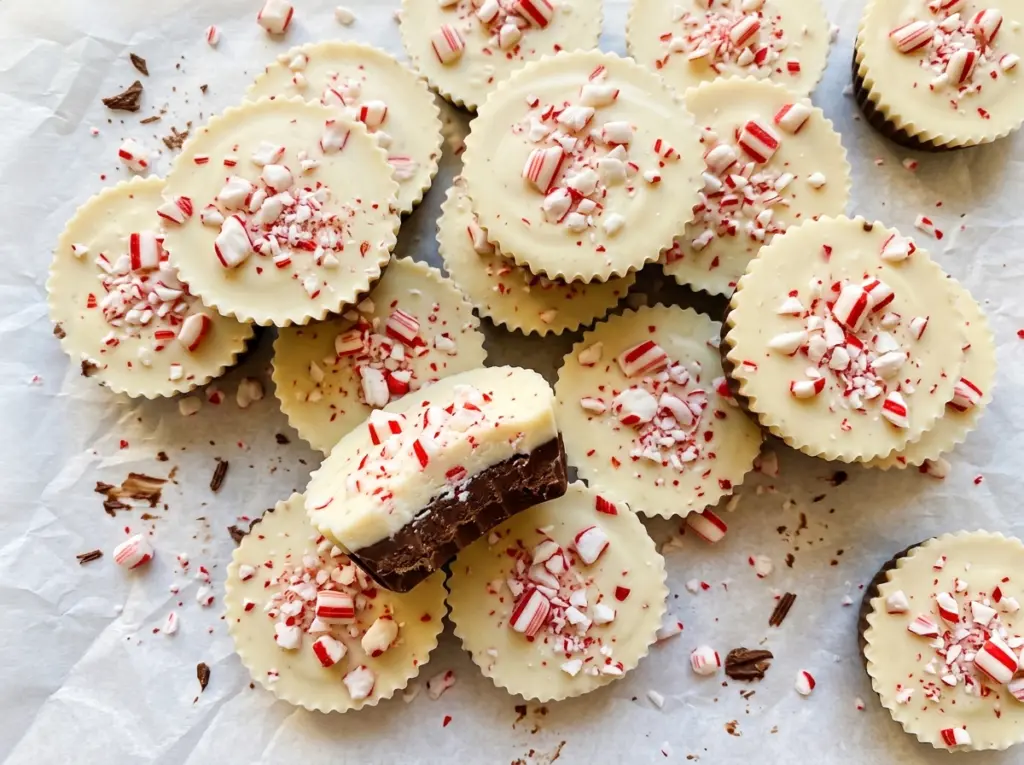
A spoonful of melted semisweet chocolate looks almost too small in the bottom of a muffin liner, but spreading it into a thin, even base is what makes these peppermint bark cups easy to bite through. The first layer chills while the white chocolate melts, so there’s no need to rush from one bowl to the next. That pause also gives each cup a firm foundation for its peppermint top.
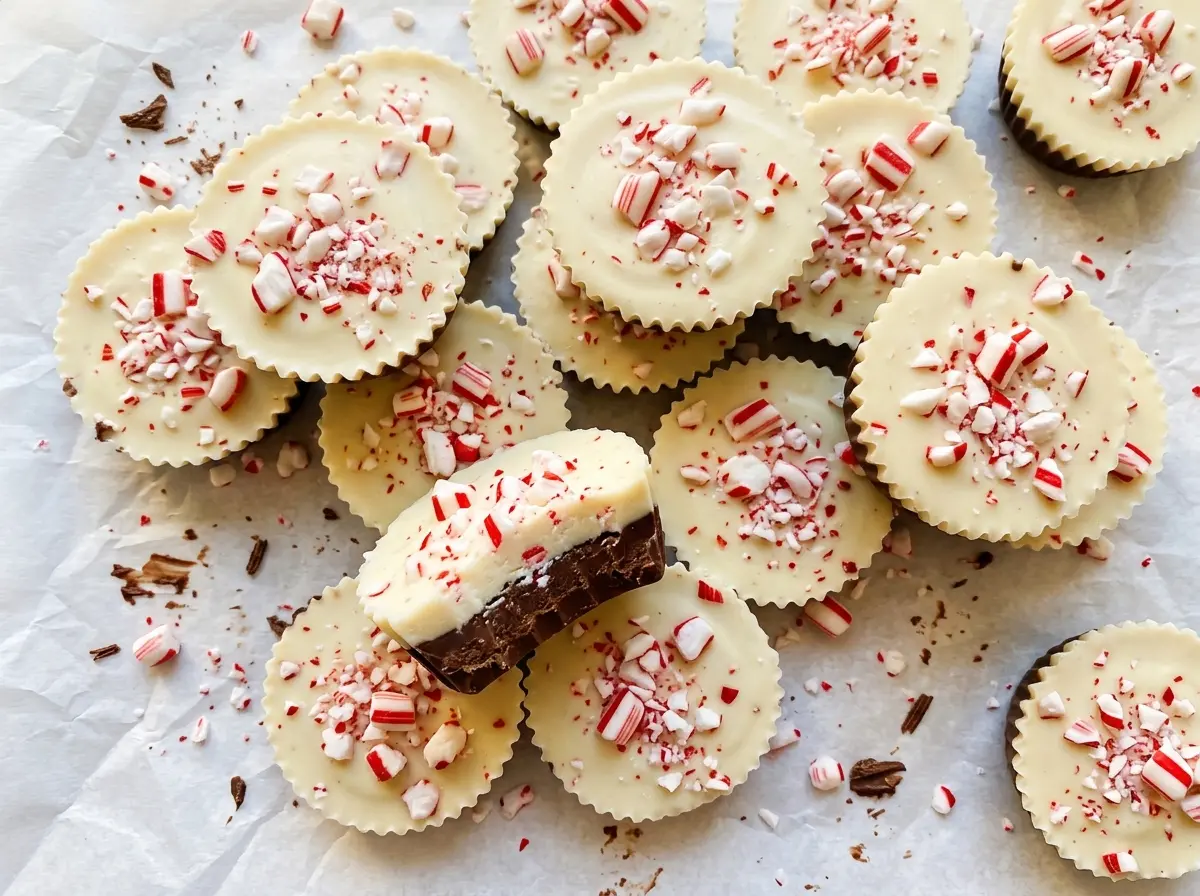
I like this version because the layers stay distinct: smooth semisweet chocolate underneath, creamy white chocolate above, and candy cane pieces on top. Finely chopped chocolate melts more evenly in the microwave, and short bursts with a stir between them give you a chance to catch it while it’s still glossy. Once set, the cups peel cleanly from their liners and make a tidy little piece of peppermint bark with no knife required.
Kitchen Note
Keep the candy cane pieces fine enough to sit neatly on each cup, but not so powdered that they disappear into the white chocolate. A few small flakes give you a clearer peppermint crunch in every bite.
Save these peppermint bark cups for a make-ahead treat with two chocolate layers and a bright candy cane finish.
The Thin Chocolate Base Keeps These from Eating Like Fudge
Peppermint bark is usually broken into pieces, so it’s easy to make the layers thicker than they need to be when you turn it into cups. Here, each layer is deliberately modest. The result is a cup that holds its shape but doesn’t ask you to bite through a heavy block of chocolate. That balance matters even more when the white chocolate is sweet and the candy cane topping adds its own sugar.
The two-stage chill gives the layers separate jobs. The semisweet chocolate firms into a base before the white chocolate goes on, rather than blending into a marbled middle. Then the finished cups chill until the top layer is fully set. You get the familiar contrast of peppermint bark in a portion that’s already sized and easy to handle. Keep the layers level as you spread them; an uncovered patch at the bottom or a lopsided top makes the finished cup less sturdy.
Why Finely Chopped Chocolate Makes These Layers Easier to Control

- Semisweet chocolate — This makes the darker base and keeps the overall sweetness in check. Finely chop it so smaller pieces melt at a similar rate; an everyday baking bar works well, so there’s no need to buy a premium bar just for this. Bittersweet chocolate is a useful swap if you prefer a deeper, less sweet base.
- White chocolate — The white layer brings the creamy contrast that makes the cups read as peppermint bark. Choose a bar labeled white chocolate when possible; some white baking chips contain stabilizers and can melt thicker, making an even layer harder to spread. If chips are what you have, stir patiently and expect a less fluid texture.
- Crushed candy canes — They provide the peppermint flavor and the crisp finish, so use candy canes that still taste fresh. Finely crushed peppermint hard candies can stand in, though their pieces may be harder and their sweetness can vary. Crush them before you start melting the chocolate so the topping is ready when the white layer is spread.
Melt and Layer the Chocolate Without Losing the Clean Stripe
Line the Pan and Get the Chocolate Ready
Set paper liners into a standard 12-cup muffin pan, then finely chop the semisweet chocolate. Smaller, fairly even pieces melt at a more consistent pace than a bowl of large chunks. Have the candy canes crushed before you begin the chocolate layers; once the white chocolate is spread, you’ll want the topping close at hand.
Melt the Semisweet Chocolate Gently
Put the semisweet chocolate in a microwave-safe bowl and heat it at 50% power in 20-second bursts, stirring after each one. The total microwave time is 1 to 2 minutes, but the visual cue matters more than pushing through a burst schedule: stop when the chocolate is smooth. If a few small pieces remain, stir and let the warm chocolate finish melting them rather than overheating the bowl.
Spread the Base and Let It Firm
Divide the melted chocolate evenly among the liners, using about 1 tablespoon per cup, and spread it to cover each bottom. A small spoonful can be nudged outward until it reaches the paper without leaving bare spots. Refrigerate the pan for 10 to 15 minutes, until the chocolate is firm. If the base is still soft, the white layer can disturb it as you spread.
Add the Peppermint Layer While It’s Smooth
In a clean microwave-safe bowl, melt the white chocolate at 50% power in 20-second bursts, stirring after each, for 1 to 2 minutes total, until smooth. Divide it over the set bases, using about 1 tablespoon per cup, and spread to cover. Sprinkle each cup with 1 teaspoon of crushed candy canes while the surface is still soft enough for the pieces to settle into it.
Chill Until Set, Then Release the Liners
Refrigerate the cups for 20 to 25 minutes, until fully set. The top should feel firm rather than tacky when gently touched. Let the cups stand at room temperature for 5 minutes before peeling away the liners; pulling paper from chocolate that’s still refrigerator-cold can make the cups crack more easily. Peel slowly, keeping the paper close to the chocolate as it comes away.
Two Simple Changes for Different Peppermint Bark Cups
Use a Bittersweet Chocolate Base
Swap the semisweet chocolate for the same amount of bittersweet chocolate for a darker, less sweet base beneath the white layer. Chop it finely and use the same melting and chilling method; the peppermint topping will stand out more against the stronger chocolate.
Make a Dairy-Free Batch
Choose dairy-free semisweet chocolate and dairy-free white chocolate bars, along with candy canes that contain no dairy ingredients. Keep the same quantities and melting approach, but expect some dairy-free white chocolate brands to be thicker once melted, so spread it carefully across each base.
Storage and Serving
- Refrigerator: Store the fully set cups in an airtight container for up to 2 weeks. Keeping them covered protects the chocolate from moisture and refrigerator odors.
- Freezer: Freeze in an airtight container for up to 2 months. Thaw in the refrigerator before opening the container to reduce condensation on the chocolate.
- Serving: These are best served cool; don’t heat them, since softened layers can smear and lose their clean edges.
Questions That Come Up with the Chocolate and Peppermint
Peppermint Bark Cups
Ingredients
Equipment
Method
- Line a standard 12-cup muffin pan with paper liners.
- Microwave the semisweet chocolate in a microwave-safe bowl at 50% power in 20-second bursts, stirring after each, for 1-2 minutes total, until smooth.
- Divide the melted chocolate evenly among the liners, using about 1 tablespoon per cup, and spread it to cover the bottom.
- Refrigerate for 10-15 minutes, until the chocolate is firm.
- Microwave the white chocolate in a clean microwave-safe bowl at 50% power in 20-second bursts, stirring after each, for 1-2 minutes total, until smooth.
- Divide the white chocolate evenly over the set chocolate layers, using about 1 tablespoon per cup, and spread to cover.
- Sprinkle each cup with 1 teaspoon crushed candy canes.
- Refrigerate for 20-25 minutes, until fully set.
- Let the cups stand at room temperature for 5 minutes.
- Peel away the liners.


