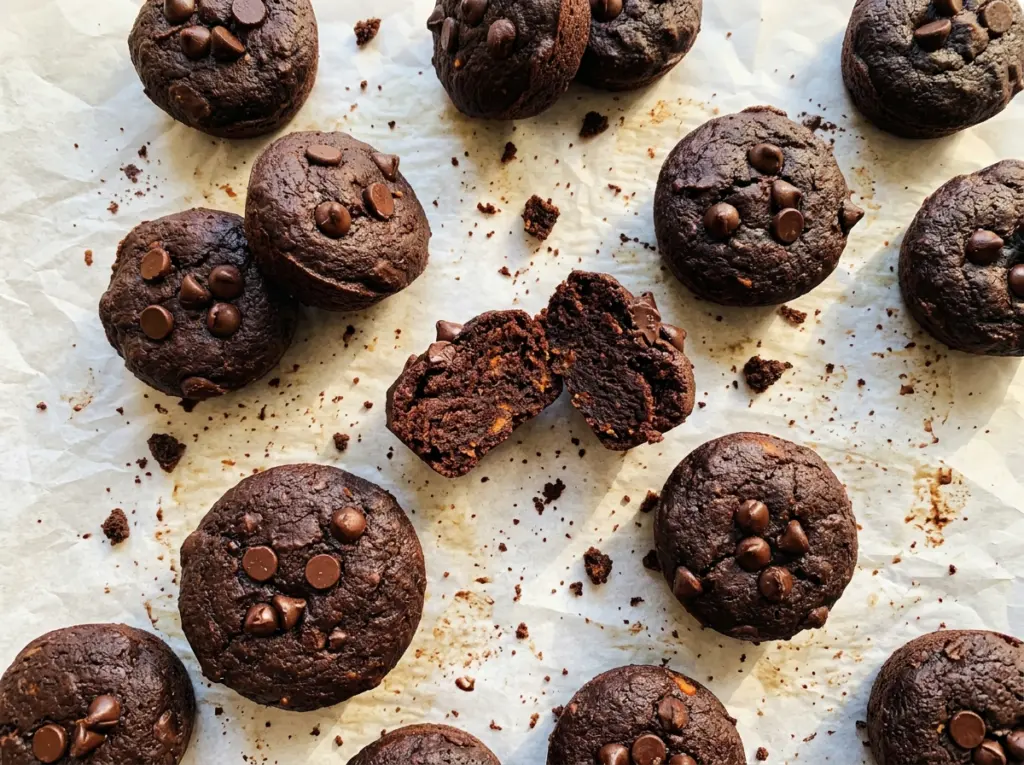
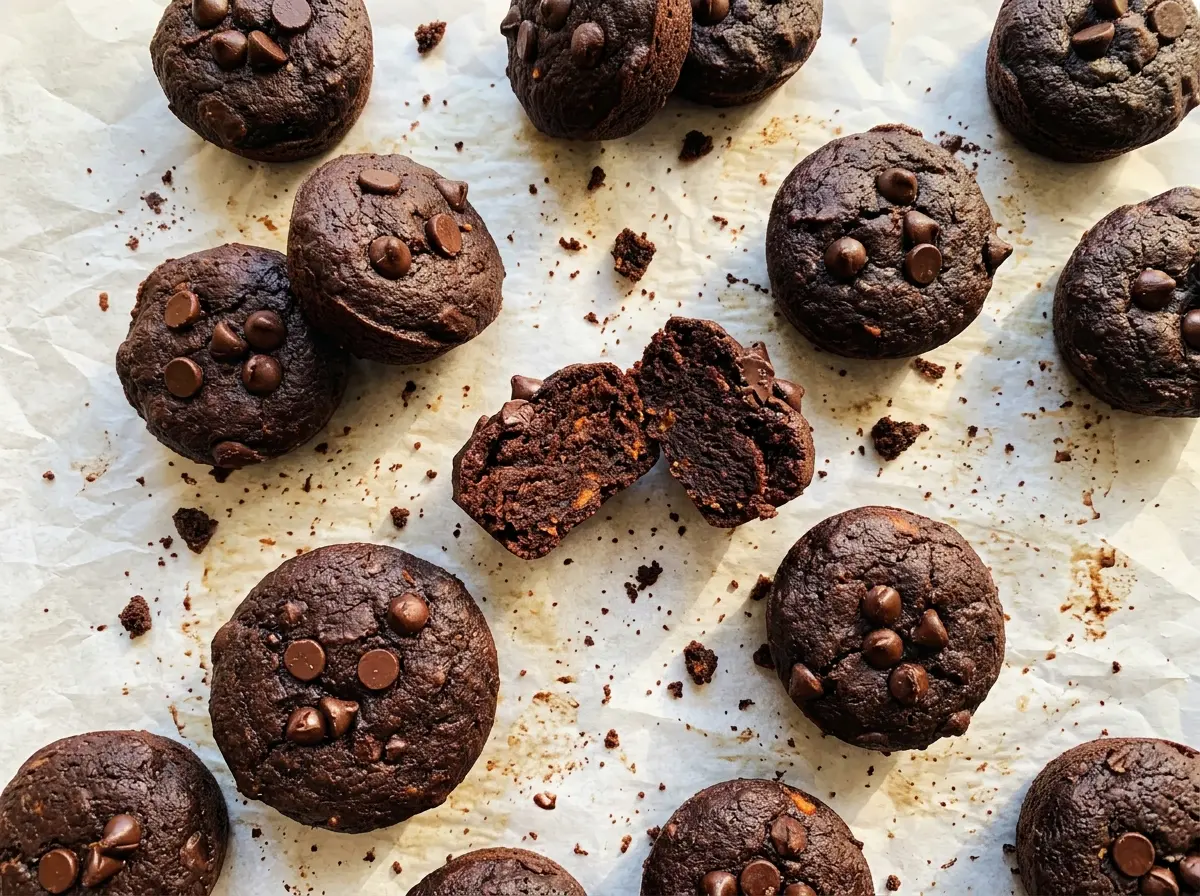
A toothpick pulled from a mini brownie can fool you: if it comes out spotless, the bites have likely baked longer than they need to. I look for tops that have just set and a few moist crumbs clinging to the pick. That cue keeps these avocado sweet potato brownie bites tender instead of dry, even around their small edges.
The two purees make the batter soft and rich, but these are still brownies, with melted butter, cocoa, and chocolate chips doing plenty of work. I microwave the sweet potato until it’s very tender, then mash it with ripe avocado until the wet mixture looks smooth. Fold in the flour only until the dry streaks disappear, and you’ll get compact little bites with soft centers and chocolate in every mouthful.
Kitchen Note
Let the microwaved sweet potato cool until it’s easy to handle before peeling and mashing. Hot potato is awkward to work with, and a patient cool-down makes it easier to measure the mash neatly.
Save these avocado sweet potato brownie bites for a fudgy, chocolate-chip-filled treat that bakes in a mini muffin pan.
Why These Brownie Bites Need Both Purees Before the Flour Goes In
Sweet potato and avocado each bring moisture, but they don’t do the same job. The sweet potato gives the batter body, while ripe avocado blends into the wet ingredients and helps the finished bites stay soft. Neither one replaces the butter or turns this into a flourless brownie; together, they make a thick, moist base that still needs flour to hold its shape in the mini muffin wells.
That balance is why the order and texture matter. Get the sweet potato and avocado smooth with the butter, sugar, eggs, and vanilla first. Once flour enters the bowl, switch to folding and stop as soon as no dry streaks remain. If you keep beating at that point, you develop the flour more than this tender little crumb needs. A few lumps of puree in the wet mixture are worth working out before the flour goes in, not after.
What the Avocado and Sweet Potato Bring That Cocoa Can’t

- Sweet potato — Choose a small potato that feels firm, with no soft or damaged spots. A standard orange-fleshed sweet potato works well; there isn’t a direct swap that keeps the same texture, so cook and mash the potato rather than reaching for a different puree.
- Ripe avocado — It should yield gently when pressed and mash without hard pieces. An underripe avocado stays lumpy and won’t blend smoothly into the batter. There’s no exact stand-in here: the recipe is built around mashed avocado, not avocado oil or a different fruit puree.
- Unsweetened cocoa powder — Use regular unsweetened cocoa, not sweetened hot cocoa mix; the mix brings extra sugar and other ingredients that change the batter. A basic grocery-store cocoa works, so there’s no need for a specialty brand.
- All-purpose flour — Ordinary all-purpose flour gives the bites enough structure to release from the mini muffin wells and hold their shape. For a gluten-free version, use a measure-for-measure gluten-free baking blend as described below; avoid swapping in a single starch or nut flour.
- Unsalted butter — Melt it and let it cool slightly before mixing it with the eggs. A standard store-brand butter is fine; the important detail is that it isn’t hot when it meets the eggs.
- Semisweet chocolate chips — They add little pockets of chocolate without making each bite too sweet. Use a brand you enjoy eating, or switch to bittersweet chips for a more pronounced cocoa taste; milk chocolate chips make the bites sweeter.
- Large eggs and granulated sugar — Use large eggs for the batter proportions to stay balanced. Plain granulated sugar dissolves readily when whisked with the melted butter, so specialty sugars aren’t needed here.
From Tender Sweet Potato to Set Centers: The Mini-Bite Timing
Microwave the Potato Until It Gives Easily
Pierce the sweet potato several times, then microwave it on high for 5 to 7 minutes, turning it halfway through. It should be very tender when pressed; a firm center needs more time before it can be mashed smoothly. Let it cool until easy to handle, peel it, and mash enough to measure 1/2 cup. Keep the mash free of large pieces so it blends evenly with the avocado.
Make a Smooth, Moist Base
Heat the oven to 350°F and coat all 24 wells of a mini muffin pan with nonstick cooking spray. In a large bowl, whisk the melted, slightly cooled butter with the sugar, then whisk in the eggs and vanilla. Mix in the mashed sweet potato and avocado until smooth. If the butter is still hot, give it another moment to cool before the eggs go in.
Fold in the Dry Ingredients Gently
Whisk the flour, cocoa powder, and salt together in a medium bowl so the cocoa doesn’t stay in clumps. Fold that mixture into the wet base just until you can’t see dry streaks. The batter will be thick; don’t try to beat it loose. Fold in the chocolate chips last, distributing them without working the flour any further.
Fill the Wells and Watch the Centers
Divide the batter among the prepared mini muffin wells, filling each about two-thirds full. Bake for 13 to 16 minutes, until the tops look set. A toothpick inserted into a bite should come out with a few moist crumbs, not wet batter and not completely clean. Start checking at the shorter end of the range, since a small brownie can go from tender to dry quickly.
Let the Bites Set Before Unmolding
Cool the bites in the pan for 10 minutes, then loosen them and move them to a rack to cool completely. Their edges are delicate while hot, so work around each bite gently rather than pulling it straight out. Letting them cool on the rack keeps the bottoms from staying damp in the pan. They’ll firm up as they cool.
Three Swaps That Change the Chocolate or Make These Gluten-Free
Use a measure-for-measure gluten-free blend
Replace the all-purpose flour with the same volume of a gluten-free 1:1 baking blend that’s made for baking. The bites may have a slightly different crumb, but the blend provides the structure that a single gluten-free flour or starch won’t.
Choose bittersweet chips for a darker bite
Swap the semisweet chips for bittersweet chocolate chips. You’ll get a sharper chocolate contrast against the sweet potato and sugar, with the same easy fold-in method.
Try mini chips for chocolate in more bites
Replace the semisweet chips with mini semisweet chips. Their smaller size spreads the chocolate through the batter more evenly, so you get little chocolate bits in more of the mini brownies.
Storage and Reheating
- Refrigerator: Store cooled bites in an airtight container for up to 4 days. They’ll become a little firmer when chilled.
- Freezer: Freeze the cooled bites in a single layer until firm, then transfer them to an airtight freezer container for up to 2 months. Thaw in the refrigerator.
- Reheating: Warm a bite in the microwave for about 5 to 10 seconds if you want it soft again. Longer heating can dry the edges, so use short bursts.
Questions That Come Up With These Mini Brownies
Avocado Sweet Potato Brownie Bites
Ingredients
Equipment
Method
- Pierce the sweet potato several times.
- Microwave on high until very tender, 5 to 7 minutes, turning it halfway through.
- Let it cool until easy to handle.
- Peel and mash enough sweet potato to measure 1/2 cup.
- Heat the oven to 350°F.
- Coat the wells of a 24-cup mini muffin pan with nonstick cooking spray.
- In a large bowl, whisk the melted butter and sugar.
- Whisk in the eggs and vanilla.
- Mix in the mashed sweet potato and avocado until smooth.
- In a medium bowl, whisk the flour, cocoa powder, and salt.
- Fold the dry mixture into the wet mixture just until no dry streaks remain.
- Fold in the chocolate chips.
- Divide the batter among the muffin wells, filling each about two-thirds full.
- Bake for 13 to 16 minutes, until the tops look set and a toothpick inserted in a bite comes out with a few moist crumbs.
- Cool in the pan for 10 minutes.
- Loosen the bites and transfer them to a rack to cool completely.


