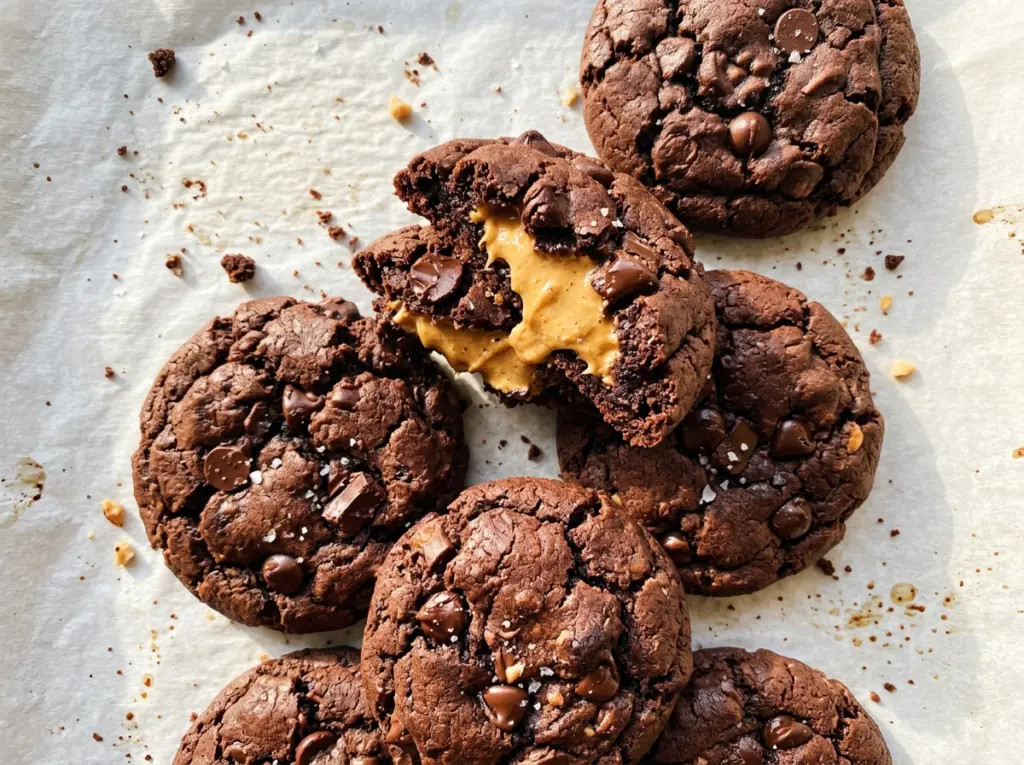
The first thing I check when these come out of the oven is the edge, not the center. The chocolate tops should stop looking wet while the cookies still feel soft; a firm center at that point usually means the peanut butter won’t have much contrast with the cookie. These chocolate peanut butter stuffed cookies bake up with a tender cocoa shell and a distinct, sweet peanut butter middle.
I make the filling first, roll it into portions, and let it chill while I mix the dough. Then the dough gets a short rest in the refrigerator, which makes it easier to flatten around each filling ball without tearing. Pinch the seam closed and you’ll keep the peanut butter tucked inside as the cookies bake. Once cooled, they’re easy to pick up, with a soft chocolate bite around the center.
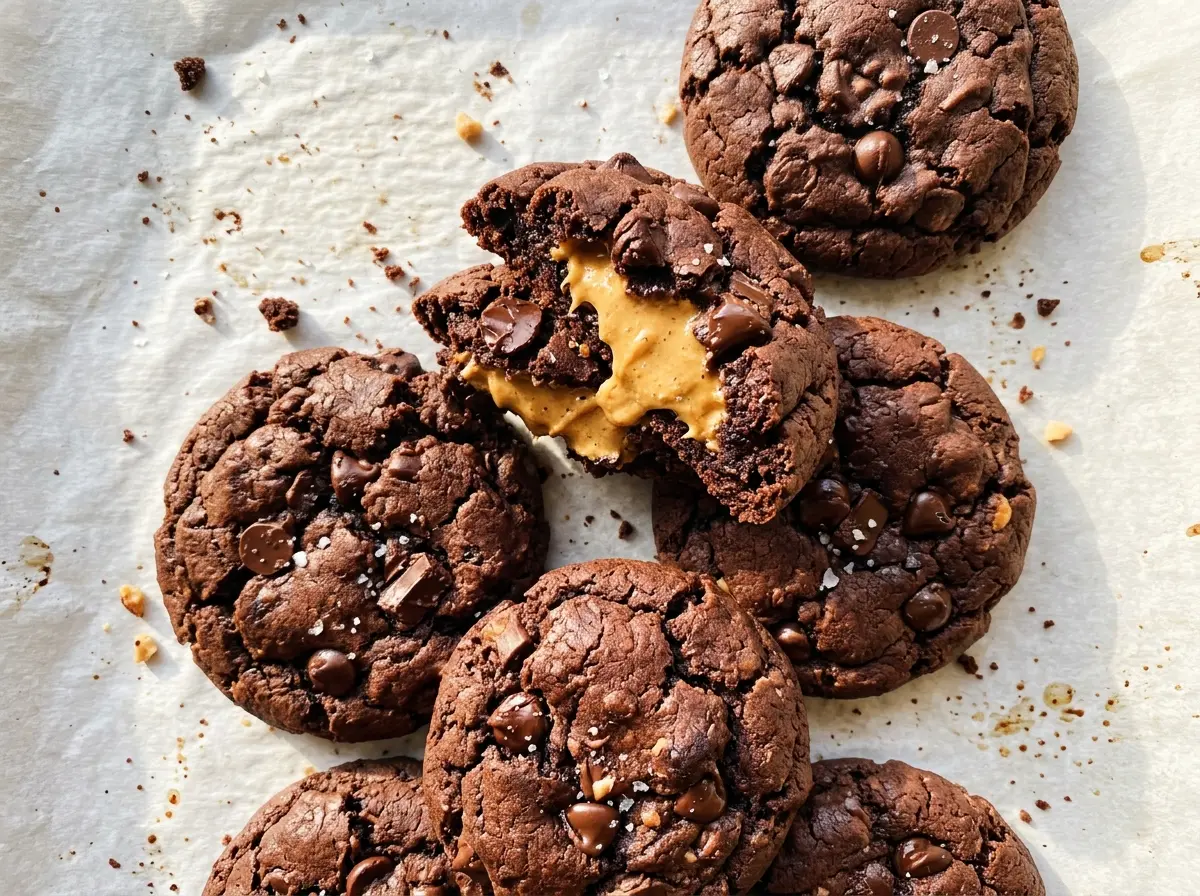
Kitchen Note
I keep the filling portions rounded and even, then roll each one into a compact ball. That makes it easier to center the filling and close the dough all the way around it without leaving a thin spot.
Save these chocolate peanut butter stuffed cookies for a bake day when you want a soft cocoa cookie with a peanut butter center in every bite.
Why the Dough Needs a Short Chill Before You Stuff It
Chocolate dough can feel soft and sticky just after mixing, especially when you’re trying to flatten it into a neat disk. A brief refrigerator rest firms the butter and gives the dough enough body to wrap around the filling instead of smearing across your hands. It also helps you make a shell that’s reasonably even, so one side doesn’t bake thin while the opposite side stays thick.
That rest is short by design. The dough should be easier to handle, not hard like a cold block; if it firms up more than expected, give it a few minutes at room temperature before portioning. The peanut butter filling chills at the same time, so both parts are ready to assemble together. Keeping those textures manageable makes the shaping calmer and helps each cookie hold its round shape on the baking sheet.
What the Cocoa, Sugars, and Peanut Butter Each Bring

- Creamy peanut butter — A smooth, conventional creamy peanut butter gives the filling an even texture that’s easy to portion and roll. Natural peanut butter with separated oil can make the mixture looser and harder to shape, so I stick with a well-stirred creamy style here.
- Powdered sugar — This sweetens and thickens the peanut butter into a filling that holds together as a ball. Granulated sugar won’t dissolve or bind in the same way, so it isn’t a useful one-for-one swap.
- Unsweetened cocoa powder — Cocoa supplies the cookie’s chocolate flavor and dry structure. A fresh, fragrant cocoa makes a noticeable difference here; use unsweetened cocoa rather than hot cocoa mix, which contains sugar and other ingredients.
- Light brown and granulated sugars — Using both gives the dough sweetness with a little extra moisture from the brown sugar. Dark brown sugar can stand in for light brown sugar if that’s what’s in your pantry; expect a deeper molasses note.
- Softened unsalted butter — Soft butter creams smoothly with the sugars and helps the dough hold air. It should yield when pressed but shouldn’t look shiny or melted; melted butter changes the dough’s texture and makes shaping harder.
- All-purpose flour — Flour gives the cocoa dough enough structure to enclose the filling. Spoon it lightly into the measuring cup and level it rather than packing it down, since too much flour can leave the cookies dry and difficult to seal.
- Egg and vanilla — The egg brings the dough together, while vanilla rounds out the cocoa and peanut butter. Use a large egg for the intended dough consistency.
From Mixing the Dough to Sealing Each Center
Cream the Butter and Sugars
Beat the softened butter with the light brown and granulated sugars on medium speed until creamy, about 2 minutes. Scrape the bowl if butter or sugar is clinging to the sides, then beat in the egg and vanilla until combined. The mixture should look cohesive rather than streaked with egg. Starting with butter that’s too warm can leave the mixture greasy, so use softened—not melted—butter.
Mix in the Cocoa Dough and Chill
Whisk the flour, cocoa powder, baking soda, and fine salt together in a separate bowl before adding them to the butter mixture. Mix on low speed just until no dry streaks remain; stop once the cocoa and flour disappear so the dough doesn’t get overworked. Cover the bowl and refrigerate the dough for 20 minutes. Meanwhile, the peanut butter filling can stay chilled until you’re ready to assemble.
Wrap the Filling Completely
Heat the oven to 350°F and position racks in the upper and lower thirds. Line two 18×13-inch rimmed baking sheets with parchment paper, then divide the dough into 18 portions and flatten each into a disk. Set a peanut butter ball in the middle, bring the dough up and around it, and pinch the seam closed; if the seam is left open, filling can escape as the cookie bakes. Arrange 9 cookies on each sheet with at least 2 inches between them.
Bake Until the Tops Lose Their Wet Look
Bake for 10–12 minutes, swapping the sheets between racks and rotating them front to back halfway through. Look for set edges and tops that no longer look wet; the cookies will still be soft when they come out. Leave them on the baking sheets for 10 minutes before moving them to a wire rack to cool completely. Lifting them too soon can break the soft shells.
Easy Changes for the Filling, Sugar, and Flour
Use Crunchy Peanut Butter for a Little Texture
Swap creamy peanut butter for the same amount of conventional crunchy peanut butter. The filling will have small peanut pieces and won’t roll quite as smoothly, but it still pairs well with the soft chocolate shell.
Make the Chocolate Dough with Dark Brown Sugar
Replace the light brown sugar with dark brown sugar in the same amount. The cookies take on a stronger molasses note, while the peanut butter center stays the same.
Make a Gluten-Free Batch
Use a cup-for-cup gluten-free baking flour blend that includes xanthan gum in place of the all-purpose flour. The dough may be a little more delicate to seal, so handle the disks gently; the chocolate and peanut butter flavors remain unchanged.
Storage and Reheating
- Room temperature: Keep cooled cookies in an airtight container for up to 4 days. They’ll soften a little as they sit.
- Freezer: Freeze cooled cookies in an airtight freezer container for up to 2 months, with parchment between layers. Thaw at room temperature before serving.
- Reheating: These are good at room temperature; for a slightly warm cookie, microwave one for about 5 seconds. Don’t heat it for long, since the peanut butter center can become much hotter than the cookie.
Questions That Come Up When Making Stuffed Cookies
Chocolate Peanut Butter Stuffed Cookies
Ingredients
Equipment
Method
- Stir the peanut butter and powdered sugar in a medium bowl until smooth and thick.
- Divide the filling into 18 rounded tablespoon portions and roll them into balls.
- Refrigerate the filling balls while you make the dough.
- In a large bowl, beat the softened butter, brown sugar, and granulated sugar with an electric mixer on medium speed until creamy, about 2 minutes.
- Beat in the egg and vanilla.
- In a separate bowl, whisk together the flour, cocoa powder, baking soda, and salt.
- Mix the dry ingredients into the butter mixture on low speed just until no dry streaks remain.
- Cover and refrigerate the dough for 20 minutes.
- Heat the oven to 350°F and arrange racks in the upper and lower thirds.
- Line two 18x13-inch rimmed baking sheets with parchment paper.
- Divide the dough into 18 portions and flatten each into a disk.
- Place a peanut butter ball in the center of each disk and wrap the dough around it, pinching the seam closed.
- Arrange 9 cookies on each baking sheet, at least 2 inches apart.
- Bake for 10–12 minutes, swapping the sheets between racks and rotating them front to back halfway through, until the edges are set and the tops no longer look wet.
- Cool the cookies on the baking sheets for 10 minutes.
- Transfer the cookies to a wire rack to cool completely.


