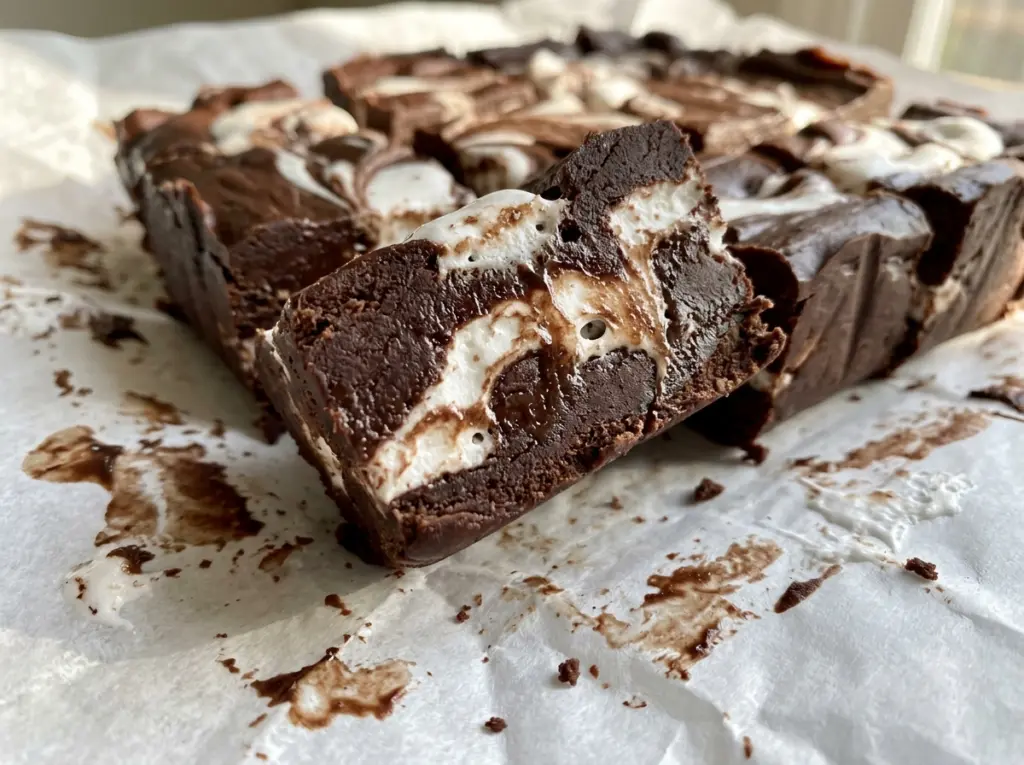
The sugar mixture goes from quiet to actively bubbling in a hurry, and the chocolate chips melt into it almost as soon as the pan leaves the burner. That’s the moment this marshmallow swirl fudge starts to come together: a smooth semisweet base with soft white ribbons running through it. I like this version because the swirl stays distinct instead of disappearing into the chocolate, and the squares slice neatly once they’ve had time to set.
The contrast comes from keeping the chocolate mixture and marshmallow creme separate until the fudge is in the pan. The creme only needs a few seconds in the microwave to become easy to spoon, then a thin knife makes the marbled pattern without blending the two together. Give the pan a few hours on the counter, and you’ll have firm squares with a creamy-looking swirl and a rich chocolate bite.
Kitchen Note
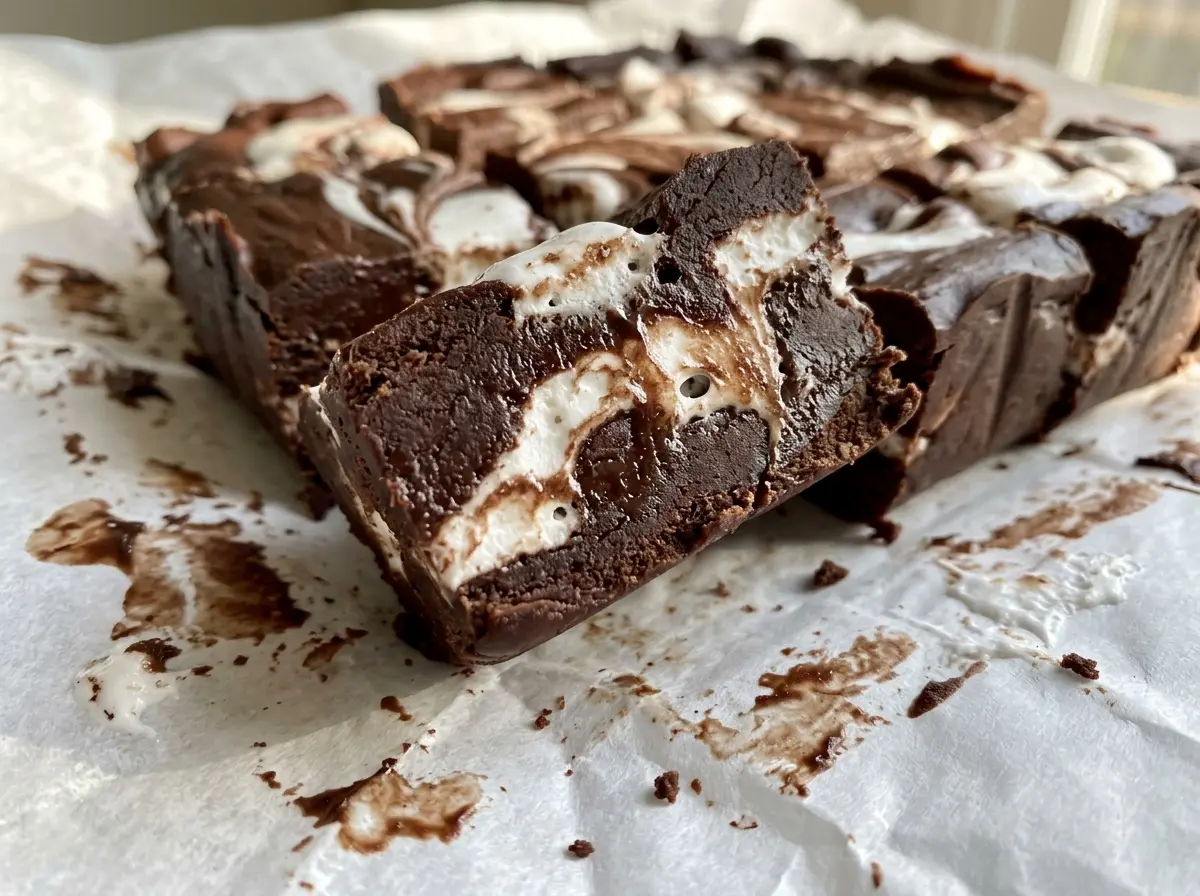
I keep the knife shallow and make just a few gentle passes through the marshmallow creme. Too much swirling blends the white ribbons into the chocolate, and you lose that pretty contrast in every square.
Save this marshmallow swirl fudge for a chocolate treat with a soft, clearly defined marshmallow ribbon in every square.
Why the Sugar Base Needs to Reach 234°F Before the Chocolate Goes In
Fudge isn’t just melted chocolate with marshmallow on top. The sugar, butter, and evaporated milk cook together first, and that cooked base is what gives the finished squares their set. Stop short of the target temperature, and the fudge can stay too soft to cut cleanly; push it higher, and the texture can turn firmer and less creamy.
That’s why I treat the thermometer reading as the deciding cue, not the clock. The 4-to-5-minute estimate starts after the mixture reaches a full boil, but burner strength and the pan can affect how quickly it gets there. Keep stirring constantly over medium heat and watch for the temperature to reach 234°F. The chocolate goes in only after you take the saucepan off the heat, so it melts from the hot sugar mixture rather than cooking directly over the burner.
There’s a useful rhythm to the whole batch: cook the base carefully, then work efficiently once it’s ready. Have the chips and vanilla ready before you start the final stretch at the stove, and prepare the pan ahead of time. That way, the fudge can go from saucepan to pan while it’s still smooth and easy to spread.
What Each Ingredient Brings to the Chocolate and Marshmallow Swirl

- Granulated sugar — It gives the cooked base its structure, so this isn’t a good place to swap in a liquid sweetener or a different kind of sugar. Regular store-brand granulated sugar works well; just measure it evenly rather than packing it down.
- Unsalted butter — Butter brings richness and helps the base cook smoothly. If salted butter is what you have, use it and leave out the added salt; the finished fudge will taste a little more seasoned.
- Evaporated milk — Its concentrated milk solids add a creamy quality without the extra water in regular milk. Use evaporated milk, not sweetened condensed milk, which contains added sugar and would change the balance of the base.
- Semisweet chocolate chips — They give the fudge its chocolate flavor and melt easily into the hot mixture. You can replace them with an equal weight of chopped semisweet chocolate; a good-quality bar is nice here, but standard semisweet chips work just fine.
- Vanilla extract — Vanilla rounds out the semisweet chocolate. Pure or imitation vanilla both work, so there’s no need to use a special bottle for this batch.
- Marshmallow creme — The jarred creme is soft enough to spoon and swirl into ribbons. Mini marshmallows don’t make the same smooth, spoonable swirl, so stick with marshmallow creme for this finish.
From Bubbling Sugar Base to Defined Marshmallow Ribbons
Line the Pan Before You Start Cooking
Line a 9×13-inch baking pan with parchment paper, leaving an overhang on two sides. Those edges give you a way to lift the set fudge out later without digging into the corners. Press the parchment into the pan so it sits flat; loose folds can leave ridges along the edges of the slab.
Cook the Base to the Right Temperature
Combine the sugar, butter, evaporated milk, and salt in a 3-quart heavy-bottomed saucepan. Cook over medium heat, stirring constantly, until the mixture reaches a full boil. Keep cooking and stirring until it reaches 234°F, which takes about 4 to 5 minutes after it comes to a boil. Don’t rely on the elapsed time alone; the temperature is the clearest cue that the base is ready.
Melt the Chocolate Off the Heat
Remove the saucepan from the heat before adding the semisweet chocolate chips. Stir until they’re melted and the mixture looks smooth, then stir in the vanilla. If the chocolate still looks streaky, keep stirring until those streaks disappear; the residual heat in the saucepan does the melting.
Swirl and Let the Slab Set
Transfer the marshmallow creme to a microwave-safe bowl and microwave it for 10 to 15 seconds, until it’s soft and easy to spoon. Pour the fudge into the prepared pan and spread it evenly, then drop small spoonfuls of creme over the surface. Gently swirl with a thin knife, taking care not to blend the creme all the way into the chocolate. Let the pan stand at room temperature for about 3 hours, until firm, then lift out the fudge with the parchment and cut it into squares.
Three Practical Ways to Adapt This Fudge
Use Chopped Semisweet Chocolate
Swap the chips for the same weight of chopped semisweet chocolate. Chop it into small, fairly even pieces so they melt readily in the hot base; the flavor stays in the same chocolate range, with a smooth finish.
Make a Half Batch
For a smaller pan of fudge, halve every ingredient and use an 8-inch square pan. That means 1½ cups sugar, 6 tablespoons butter, ⅓ cup evaporated milk, ⅛ teaspoon salt, 6 ounces chocolate chips, ½ teaspoon vanilla, and 3½ ounces marshmallow creme. Cook the base to the same 234°F target rather than relying on the original timing; the smaller quantity can reach temperature at a different pace.
Use Salted Butter Instead
Replace the unsalted butter with the same amount of salted butter and omit the separate salt. The chocolate will taste a touch more savory, but the fudge will still set with the same soft marshmallow swirl.
Storage and Reheating
- Room temperature: Store the cut squares in an airtight container in a cool spot for up to 1 week.
- Refrigerator: Keep the fudge airtight for up to 2 weeks. It will be firmer straight from the fridge, so let a piece sit at room temperature briefly before eating.
- Freezer: Freeze the squares in an airtight container with parchment between layers for up to 2 months. Thaw them in the container so condensation forms on the container rather than on the fudge.
- Reheating: This fudge doesn’t need reheating. Don’t microwave it; warming can soften the set and make the marshmallow swirl sticky.
Questions That Come Up When Making Marshmallow Swirl Fudge
Marshmallow Swirl Fudge
Ingredients
Equipment
Method
- Line a 9x13-inch baking pan with parchment paper, leaving overhang on two sides.
- Combine the sugar, butter, evaporated milk, and salt in a 3-quart heavy-bottomed saucepan.
- Cook over medium heat, stirring constantly, until the mixture reaches a full boil.
- Continue cooking and stirring until it reaches 234°F, about 4 to 5 minutes.
- Remove the pan from the heat.
- Stir in the chocolate chips until melted and smooth, then stir in the vanilla.
- Pour the fudge into the prepared pan and spread it evenly.
- Transfer the marshmallow creme to a microwave-safe bowl.
- Microwave for 10 to 15 seconds, until soft and easy to spoon.
- Drop small spoonfuls over the fudge.
- Gently swirl with a thin knife.
- Let the fudge stand at room temperature for about 3 hours, until firm.
- Lift it out using the parchment and cut into squares.


