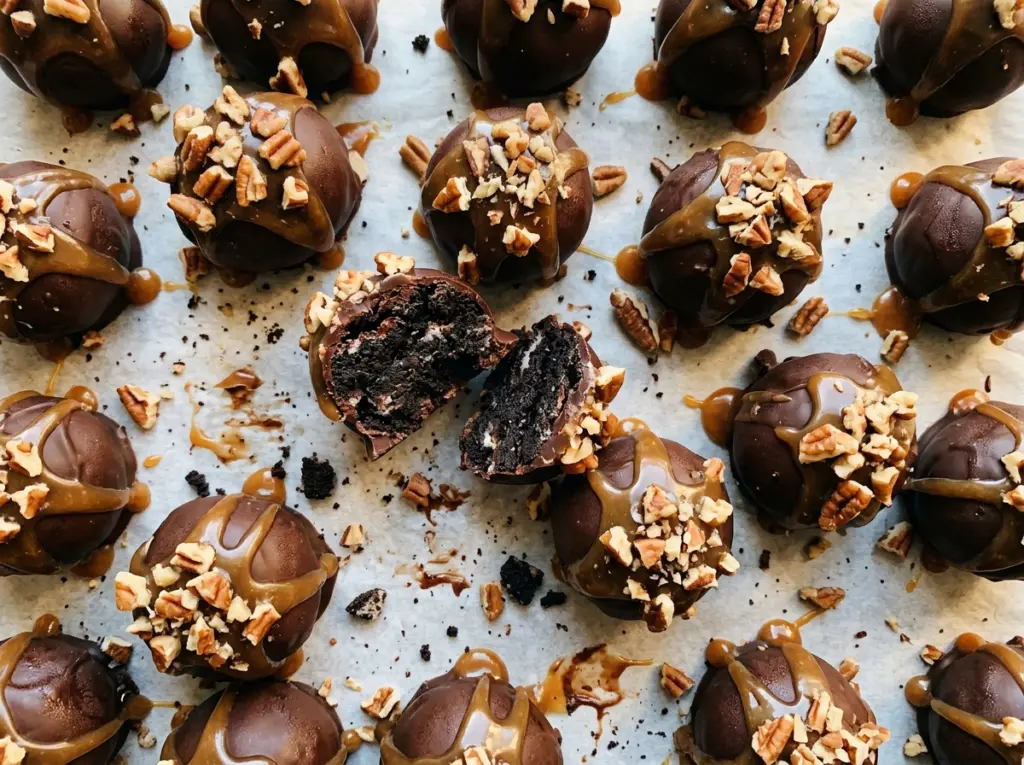
The chocolate coating is the first thing you notice when you lift one of these from the tray, but the center is what makes Turtle Oreo Balls more than a chocolate-covered cookie. It’s a soft, dark Oreo-and-cream-cheese middle tucked inside a chocolate shell, finished with caramel and pecans. The one-inch size keeps each bite easy to pick up, and the topping gives every piece that familiar turtle-candy combination.
I like that the centers can be shaped and chilled before the chocolate comes out. That little pause makes dipping much less fussy, and the whole batch comes together without baking. The finished balls are rich, so they’re right at home on a dessert tray or tucked into a covered container in the refrigerator for a sweet bite later. Keep the Oreo crumbs fine and the layers distinct, and you’ll get a smooth center under the chocolate, with caramel and pecans on top.
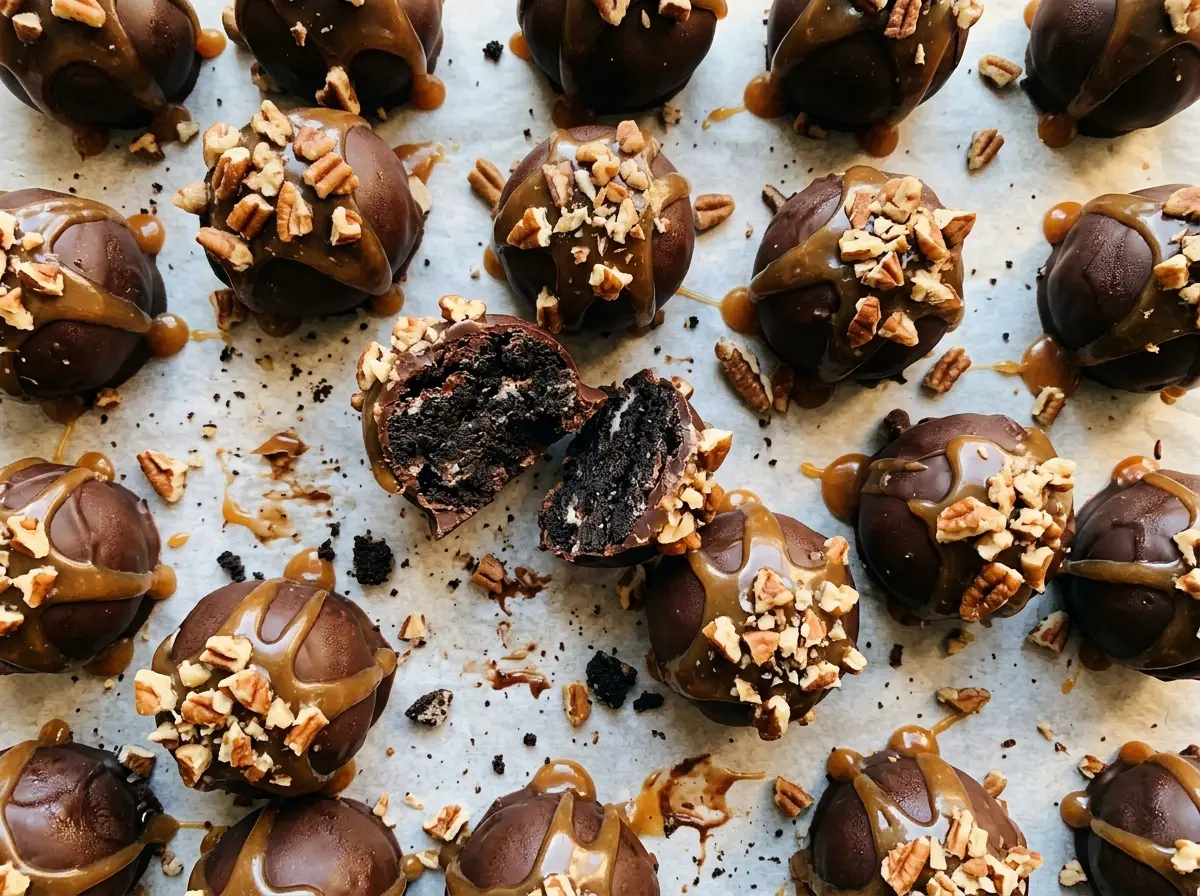
Kitchen Note
Sprinkle the pecans on as soon as you drizzle the caramel. They cling best while the caramel is still tacky, so I finish each ball before moving on to the next.
Save these Turtle Oreo Balls for a dessert tray or a make-ahead chocolate treat with caramel and pecans.
Why One-Inch Centers Make the Topping Taste Balanced
These are easiest to enjoy when the cookie center, chocolate, caramel, and pecans all show up in the same bite. Scooping the mixture into one-inch balls helps keep that balance consistent from the first piece to the last. If some are much larger than the others, they’ll be harder to coat evenly, and the topping won’t feel as proportional to the center.
The one-inch size also gives you a useful visual cue while you scoop: aim for balls that look alike, rather than packing extra mixture onto the scoop to make a few oversized pieces. The batch makes 36, so you can line them up on the parchment and quickly spot any that need reshaping before they chill. Smooth, even rounds are easier to handle at the dipping stage, too. It’s a small detail, but it gives the finished tray a neat, consistent look without extra decorating work.
Try not to press the mixture hard while shaping. A gentle roll is enough to bring each portion together, leaving a tidy surface for the chocolate to cover. If a ball looks rough, roll it once more between your palms before placing it on the sheet.
The Ingredients That Give Turtle Oreo Balls Their Layers

- Oreo cookies — The chocolate wafers and sweet filling both become part of the center, so use the full cookies rather than scraping out the filling. A similar chocolate sandwich cookie can work, but cookies that differ a lot in size or filling may change how the mixture comes together.
- Cream cheese — Softened block cream cheese binds the fine crumbs into a mixture that can be rolled. Let it soften before processing so it blends evenly. Tub-style whipped cream cheese is looser and isn’t a reliable one-for-one swap; block-style Neufchâtel is the closest alternative, though the centers may be a little less rich.
- Semisweet chocolate melting wafers — These make a coating that melts smoothly for dipping and balance the sweeter center and toppings. Use a fresh package so the wafers melt without clumps. Chocolate chips can be used in a pinch, but they tend to make a thicker, less predictable coating.
- Caramel sauce — A pourable sauce makes the thin finishing ribbons. Warm it only until it flows easily; a sauce that’s already runny doesn’t need much heating. If you’d rather skip it, the balls still work as chocolate-coated Oreo centers, though you lose the caramel layer.
- Pecans — Chop them finely so they sit neatly on the caramel instead of tumbling off. Walnuts are a workable swap with a similar crunch, or leave the nuts off for a pecan-free finish.
From Fine Oreo Crumbs to a Set Chocolate Shell
Process the Cookies and Cream Cheese Together
Process the Oreo cookies until the crumbs are fine and even, with no large cookie pieces left. Add the softened cream cheese and process again until the mixture is evenly combined and holds together when pressed. If the crumbs are coarse, the centers can have a patchy texture instead of a smooth, cohesive bite. Stop once the mixture looks uniform; it doesn’t need extra processing after that.
Shape the Centers and Chill Until Firm
Scoop the mixture into one-inch balls and arrange them on a parchment-lined baking sheet. Refrigerate them for one hour, until firm. The chilled centers should feel set enough to lift and dip without losing their shape. Don’t skip the chill: a soft center is more likely to shift as it meets the melted coating.
Melt the Wafers and Dip Each Ball
Put the melting wafers in a microwave-safe bowl and heat them in 30-second intervals, stirring after each one. Continue until the chocolate is smooth, rather than leaving unmelted pieces that can make the coating lumpy. Dip each chilled ball, then let the excess chocolate drip back into the bowl before returning it to the parchment. That pause keeps a thick pool of chocolate from collecting under each ball.
Drizzle, Top, and Let the Shell Set
Warm the caramel sauce in the microwave for about 10 seconds, just until it’s pourable. Drizzle it over the coated balls, then sprinkle on the finely chopped pecans right away. Refrigerate the tray for at least 15 minutes, until the chocolate is set. Store the finished balls covered in the refrigerator.
Simple Ways to Change the Finish or Adapt the Cookies
Use gluten-free chocolate sandwich cookies
Swap in gluten-free chocolate sandwich cookies for the Oreos and choose cookies close in size so the center mixture stays familiar. The exact crumb texture can vary by brand. Check that the chocolate wafers and caramel sauce are also suitable for a gluten-free batch.
Make a pecan-free finish
Leave the pecans off and keep the caramel drizzle for a smooth-topped version. It still has the chocolate shell and caramel finish, just without the nutty crunch. This is a pecan-free variation, not automatically a safe choice for someone with a tree-nut allergy.
Skip the caramel for a simpler chocolate bite
Leave off both the caramel and pecans, and keep the chocolate coating as the only finish. The Oreo center and semisweet shell make a less elaborate version that’s easier to stack on a dessert tray.
Storage and Reheating
- Refrigerator: Keep the balls covered and refrigerated for up to 4 days. The pecans may soften a little as they sit.
- Freezer: Freeze them in a single layer until firm, then transfer to an airtight container for up to 2 months. Thaw in the refrigerator; the toppings may be a little less crisp.
- Reheating: These are served chilled and don’t need reheating. Don’t microwave them, because the chocolate shell softens and the caramel can run.
Questions That Come Up While Making Turtle Oreo Balls
Turtle Oreo Balls
Ingredients
Equipment
Method
- Line a baking sheet with parchment paper and set it aside.
- Process the Oreo cookies into fine crumbs in a food processor, then add the cream cheese and process until evenly combined.
- Scoop the mixture into 1-inch balls, arrange them on the prepared baking sheet, and refrigerate for 1 hour, until firm.
- Melt the chocolate wafers in a microwave-safe bowl in 30-second intervals, stirring after each interval, until smooth.
- Dip each chilled ball in the melted chocolate, letting excess chocolate drip back into the bowl, and return it to the parchment-lined baking sheet.
- Warm the caramel sauce in the microwave for about 10 seconds, just until pourable, then drizzle it over the balls and immediately sprinkle with the pecans.
- Refrigerate the balls for at least 15 minutes, until the chocolate is set.
- Store the balls covered in the refrigerator.


