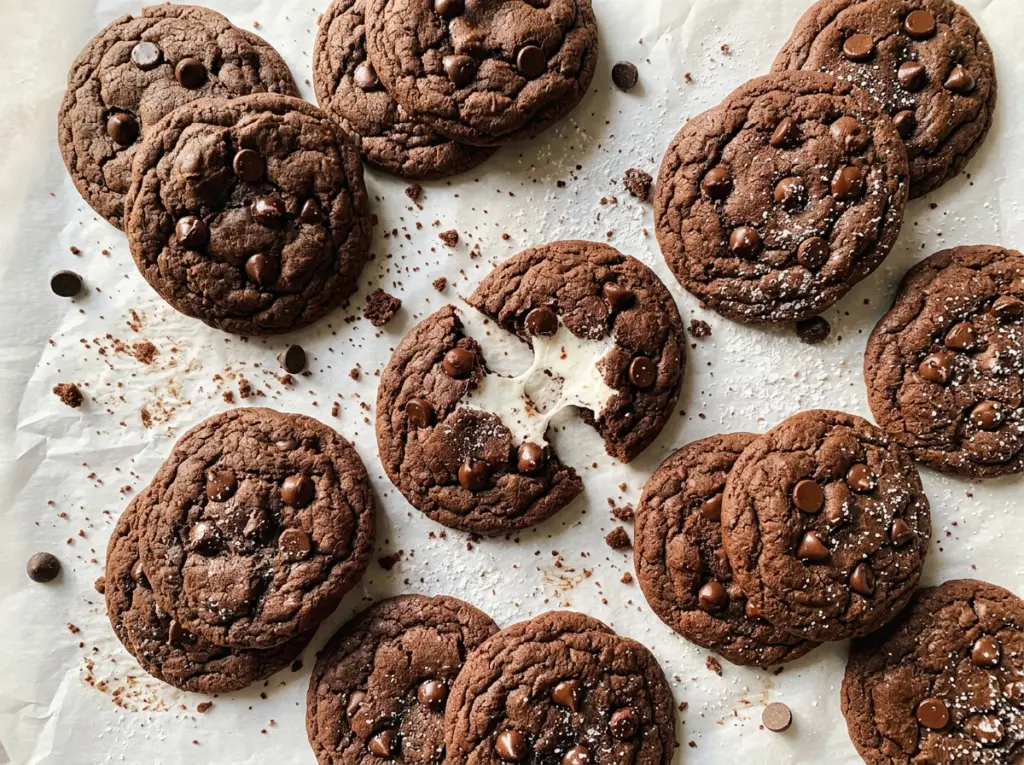
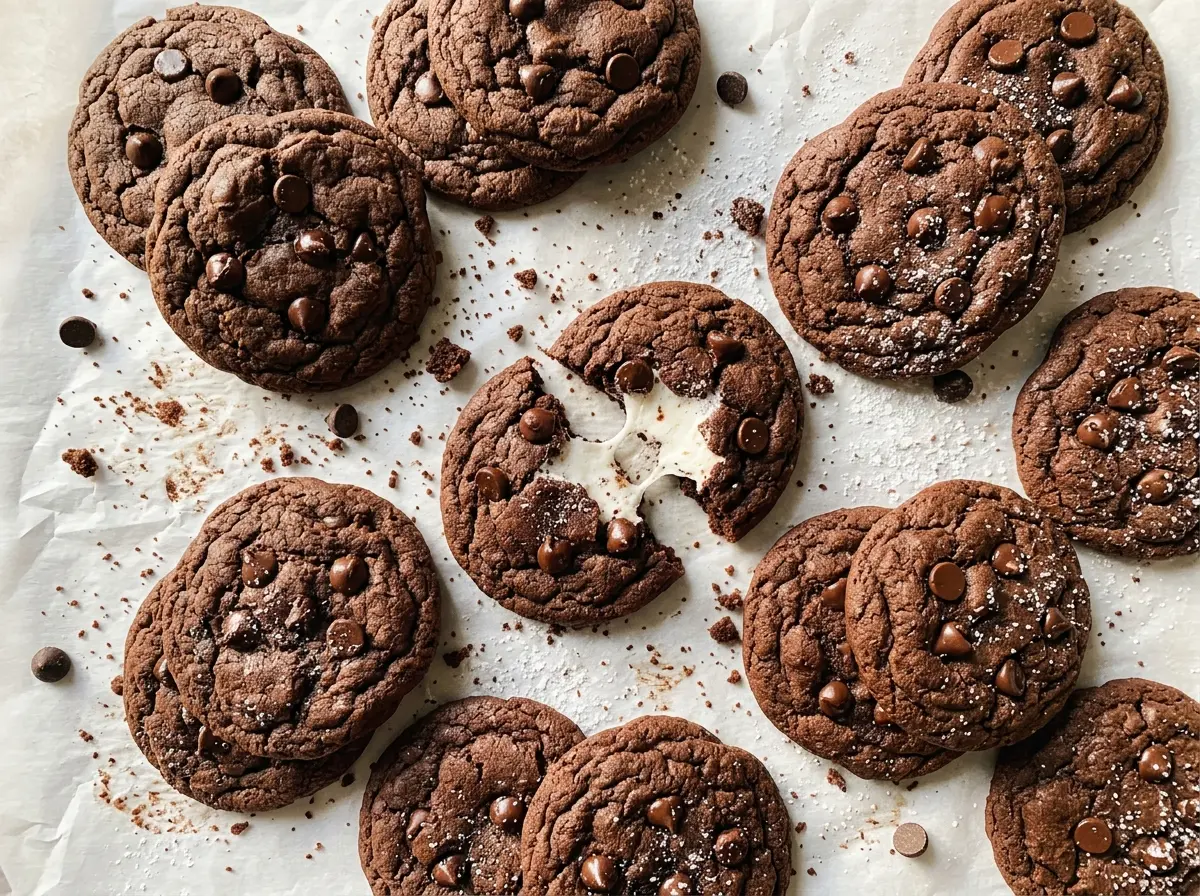
The first tray tells you what to watch for: the edges set before the middle looks completely firm, and the tops turn dry rather than shiny. That’s the moment these Marshmallow Surprise Hot Cocoa Cookies are ready to come out. The marshmallow stays tucked inside a soft cocoa cookie, so each one has a sweet, stretchy center instead of a marshmallow sitting on top.
I like that the dough is made with everyday baking ingredients, then shaped around half a large marshmallow. It gives you a clear filling in every cookie without needing to make a separate ganache or filling. The dough is soft after mixing, so a short rest in the refrigerator makes the portions easier to handle and helps them keep their shape. You get tender chocolate cookies with a hidden marshmallow middle and a gentle cocoa flavor.
Kitchen Note
I start the oven before I mix the dough and wait for it to reach 350°F before the trays go in. A fully heated oven gives both sheets a consistent start, which matters when they’re baking on separate racks.
Save these Marshmallow Surprise Hot Cocoa Cookies for a bake with a soft cocoa outside and a marshmallow tucked in the middle.
Why a Short Chill Helps These Filled Cookies Hold Their Shape
Once the dough is wrapped around a marshmallow, it needs to stay closed as it bakes. The dough starts out soft because the butter is softened for creaming, and shaping warms it further in your hands. Refrigerating the filled portions for 20 minutes firms the butter again, making the dough less likely to spread quickly before the outside has set.
That pause also gives you a chance to check each cookie for gaps. A seam that looks closed when the dough is cool and firm is less likely to open in the oven than a thin spot pressed together while the dough is warm. Don’t try to compensate by adding extra flour; that can make the cookies dry and harder to wrap. Keep the dough portions even, cover the marshmallow completely, and let the shaped cookies chill on their baking sheets.
The goal isn’t a hard dough ball. After the refrigerator rest, the portions should still be easy to bake, but firm enough to move without losing their shape. That balance keeps the filling inside while the cookie edges set around it.
What the Cocoa, Butter, and Marshmallow Each Bring

- Unsalted butter — Softened butter traps air as it’s beaten with the sugar, giving the dough a lighter start than melted butter would. If salted butter is what you have, use it and leave out the added salt; the cookies may taste a little saltier depending on the brand.
- Granulated sugar — It helps the butter become light and fluffy and gives the cookie edges a little structure as they bake. Keep it granulated here; swapping in a liquid sweetener would change the dough’s moisture and make it harder to seal around the filling.
- Egg and vanilla — The egg brings the dough together, while vanilla rounds out the cocoa. Use regular vanilla extract if you have it; there’s no need for a specialty bottle for this bake. Beat the egg and vanilla in until they’re evenly combined before adding the dry ingredients.
- All-purpose flour and unsweetened cocoa powder — Flour gives the dough enough body to wrap around the marshmallow, and cocoa supplies the chocolate flavor. Plain unsweetened cocoa powder is the right choice; sweetened hot cocoa mix has added sugar and other ingredients that would change the dough.
- Large marshmallows — Halving large marshmallows gives each portion one substantial center that’s straightforward to enclose. Keep the marshmallow pieces ready before shaping so the dough doesn’t sit around while you work.
From Fluffy Butter to a Sealed Marshmallow Center
Cream the Butter and Sugar Until Light
Beat the softened butter and granulated sugar in a large bowl for about 2 minutes, until the mixture looks light and fluffy. If the butter is too firm, it won’t blend smoothly; if it’s melted, it won’t cream properly. Scrape the bowl if butter is clinging to the sides, then beat in the egg and vanilla until combined.
Mix the Cocoa Dough Just Until It Comes Together
Whisk the flour, cocoa powder, baking soda, and salt in a separate bowl so the cocoa doesn’t stay in dark clumps. Add the dry mixture to the butter mixture and mix only until no dry streaks remain. Stop there, even if the dough looks a little soft; mixing longer can make the cookies tougher.
Wrap Each Marshmallow Half Completely
Divide the dough into 18 portions, about 1 1/2 tablespoons each, and flatten each one. Set a marshmallow half in the middle, bring the dough around it, and seal the dough completely with no exposed marshmallow. Arrange 9 cookies on each parchment-lined baking sheet, spacing them about 2 inches apart, then refrigerate for 20 minutes.
Bake Both Sheets and Let the Cookies Set
Bake at 350°F with the racks in the upper and lower thirds. At the halfway point, swap the baking sheets’ rack positions so both trays bake evenly. The cookies are ready after 10–12 minutes, when the edges are set and the tops look dry. Let them cool on the baking sheets for 10 minutes before transferring them to a wire rack.
Two Easy Ways to Change the Cocoa Cookies
Make Them Gluten-Free
Replace the all-purpose flour with the same amount of a cup-for-cup gluten-free baking flour blend that includes xanthan gum. The dough may feel a little different as you shape it, so seal each portion gently rather than pressing hard and squeezing the marshmallow through the seam.
Give Them a Peppermint Note
For a mint-chocolate variation, use 1/4 teaspoon peppermint extract in place of the vanilla extract. Peppermint extract is potent, so a smaller amount keeps it from overpowering the cocoa. Leave the rest of the dough and shaping method unchanged.
Storage and Reheating
- Room temperature: Store the cooled cookies in an airtight container for up to 3 days. The marshmallow center will become less stretchy as the cookies sit.
- Freezer: Freeze cooled cookies in an airtight container with parchment between layers for up to 2 months. Let them thaw at room temperature before serving.
- Reheating: Warm one cookie in the microwave for about 5 seconds, then add a few seconds if needed. Don’t heat it for too long; the marshmallow can become extremely hot before the cookie feels warm.
Questions That Come Up When Baking Marshmallow Cocoa Cookies
Marshmallow Surprise Hot Cocoa Cookies
Ingredients
Equipment
Method
- Heat the oven to 350°F.
- Position racks in the upper and lower thirds.
- Line two baking sheets with parchment paper.
- In a large bowl, beat the butter and sugar until light and fluffy, about 2 minutes.
- Beat in the egg and vanilla until combined.
- In a medium bowl, whisk together the flour, cocoa powder, baking soda, and salt.
- Add the dry ingredients to the butter mixture and mix just until no dry streaks remain.
- Divide the dough into 18 portions, about 1 1/2 tablespoons each, and flatten each portion.
- Wrap each portion around a marshmallow half and seal the dough completely.
- Arrange 9 cookies on each baking sheet, spacing them about 2 inches apart.
- Refrigerate the cookies for 20 minutes.
- Bake both sheets for 10–12 minutes, swapping their rack positions halfway through, until the cookie edges are set and the tops look dry.
- Let the cookies cool on the baking sheets for 10 minutes.
- Transfer the cookies to a wire rack to cool.


