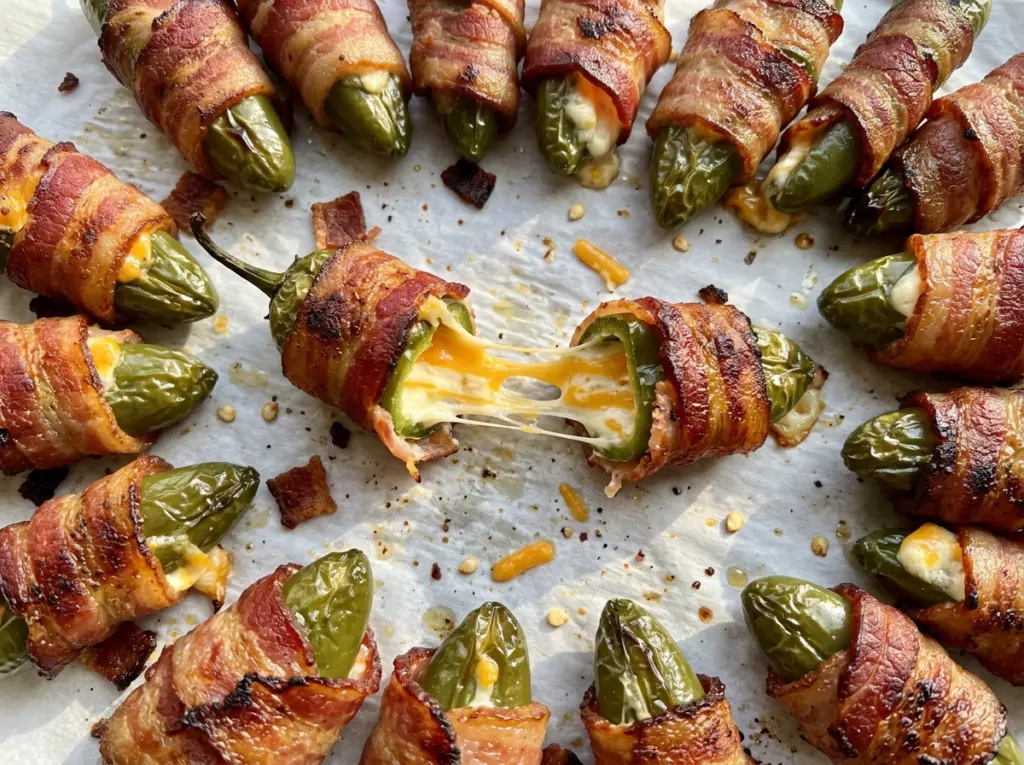
The bacon should be browned and crisp when the jalapeño halves are tender, but getting both right depends on how the poppers sit in the oven. When they bake flat on a pan, bacon fat can collect underneath instead of draining away. I use a wire rack set over a rimmed baking sheet so the heat reaches around each pepper and the drippings have somewhere to go.
For these jalapeno poppers with bacon, softened cream cheese blends easily with sharp cheddar, garlic powder, and salt, making a filling that’s simple to spoon into each half. I scrape out the seeds and membranes before filling; that keeps the peppers from overwhelming the cheese, though jalapeños still vary in heat. A half-slice of regular-cut bacon wraps each one, and the seam goes underneath so it stays in place while the bacon cooks. The finished poppers are tender, cheesy, and crisp where the bacon browns.
Kitchen Note
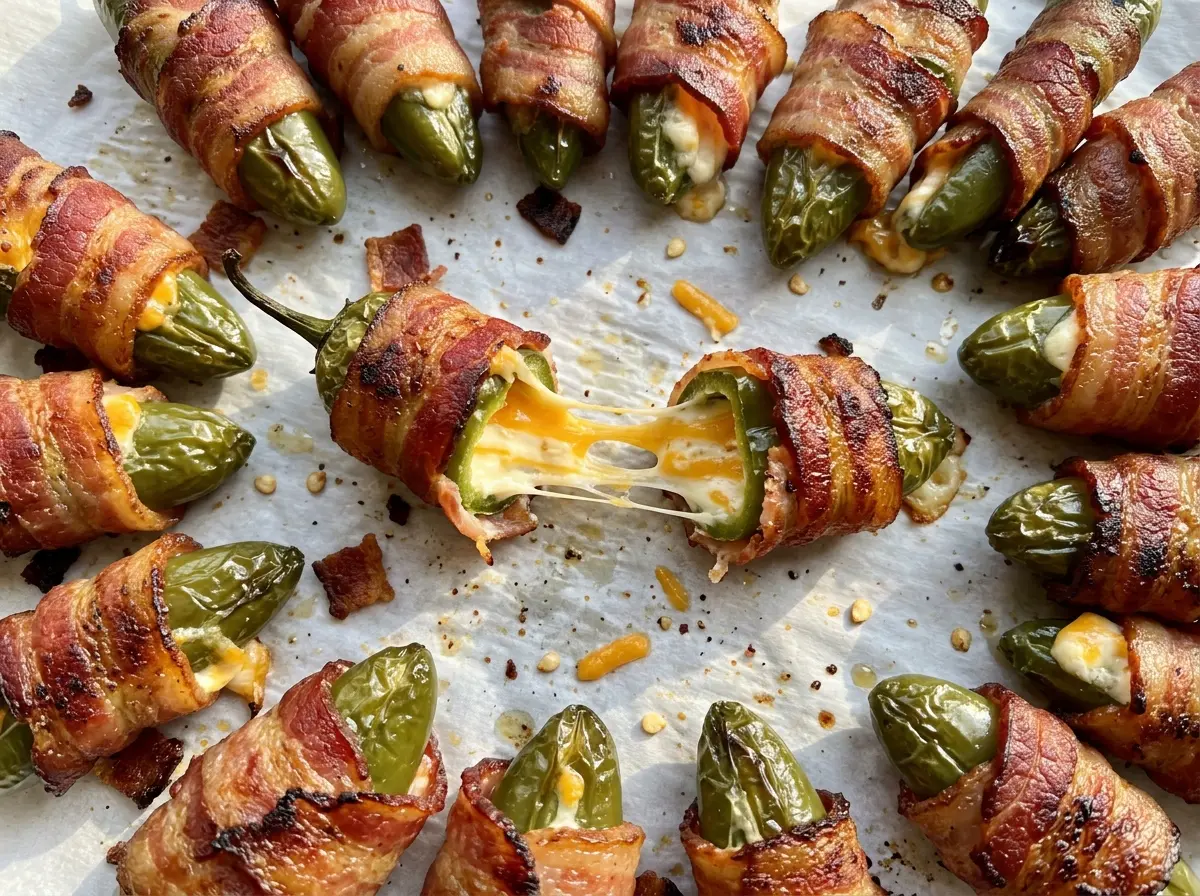
Give the poppers the full five-minute rest on the rack before serving. The filling is molten when they leave the oven, and that short pause helps it settle so it stays tucked inside when you pick one up.
Save these jalapeno poppers with bacon for a party snack with crisp bacon, tender peppers, and a creamy cheddar filling.
A Wire Rack Keeps the Bacon From Sitting in Its Own Drippings
These poppers have two different jobs happening at once: the peppers need time in the oven to turn tender, while the bacon needs enough dry heat to brown and crisp. A wire rack helps those jobs line up. Set inside a rimmed baking sheet, it lifts the peppers above the pan so hot air can move underneath and the bacon fat can drip down instead of pooling around the bottoms.
That matters most where the bacon wraps around the pepper. A puddle of drippings can leave that section soft even when the top looks browned. The rack also gives the filling a steadier place to sit; the peppers aren’t swimming in rendered fat as they bake. Use a rimmed sheet beneath it to catch the drips, and arrange the poppers in a single layer with a little room between them. If the rack is crowded, the bacon won’t brown as evenly, and you’ll have a harder time judging doneness from one pepper to the next.
The rack doesn’t replace checking the food itself. Bacon color and pepper tenderness are the cues to follow, since jalapeños can vary a bit in size. Pull them when both are where you want them, then let them rest before serving.
Why Sharp Cheddar and Softened Cream Cheese Work as a Pair

- Cream cheese — Softened cream cheese makes the filling easy to stir and spread into the pepper halves. Cold cream cheese tends to stay in firm lumps, which makes it harder to distribute the cheddar evenly. Plain cream cheese gives the filling its smooth, rich base.
- Sharp cheddar — Sharp cheddar brings a distinct savory cheese flavor that still comes through alongside the bacon and jalapeño. Freshly shredded cheese usually blends more smoothly; pre-shredded cheddar works when convenience matters, though the filling may feel a little less cohesive.
- Jalapeños — Medium peppers give you halves large enough to hold a spoonful of filling while still being easy to wrap. Choose peppers that feel firm and have unbroken skins. The seeds and pale membranes carry much of the pepper’s heat, so scrape them out for the milder version.
- Regular-cut bacon — Regular-cut slices are flexible enough to wrap around each half and brown during the same bake that tenderizes the peppers. Thick-cut bacon is less reliable here because it can need more time to crisp.
- Garlic powder and kosher salt — These season the cheese without adding moisture to the filling. Garlic powder distributes evenly through the cream cheese mixture, while kosher salt sharpens the cheddar’s flavor.
From Clean Pepper Halves to Bacon That Browns
Set Up and Prepare the Jalapeños
Heat the oven to 400°F and set a wire rack inside a rimmed baking sheet. If you’d like to protect your hands, put on disposable gloves before handling the peppers. Halve each jalapeño lengthwise, then scrape out the seeds and membranes. Arrange the halves cut side up on the rack so they’re ready to fill.
Stir the Filling and Wrap Each Half
In a medium bowl, stir the softened cream cheese with the shredded sharp cheddar, garlic powder, and kosher salt until the mixture is evenly combined. If you see streaks of plain cream cheese or pockets of cheddar, keep stirring until the filling looks consistent. Spoon the mixture into each jalapeño half without piling it into a tall mound. Wrap each filled half with a half-slice of bacon, then place it seam side down on the rack so the bacon end stays underneath.
Bake Until the Bacon Is Crisp
Bake for 25 to 30 minutes, watching for browned, crisp bacon and tender peppers. The bacon is the clearest visual cue; the peppers should soften rather than collapse. If the bacon hasn’t browned and crisped by the earlier end of the range, keep baking and check again before removing the pan. Let the poppers rest on the rack for five minutes before serving so the hot filling settles.
Three Ways to Shift the Heat or Cheese
Use pepper jack for a livelier cheese filling
Replace the sharp cheddar with the same amount of shredded pepper jack. It melts into the cream cheese and adds a gentle chile kick, though you’ll lose some of the cheddar’s sharper, more pronounced flavor.
Leave a little membrane for more heat
For a hotter batch, scrape out the seeds but leave a narrow strip of pale membrane in each pepper half. The heat will be more noticeable and less uniform from popper to popper, since jalapeños naturally differ in spice.
Make a dairy-free batch
Use dairy-free cream cheese and shredded dairy-free cheddar in place of the dairy cheeses. The filling will still be savory and creamy, but its texture and melt depend on the products you use and may be less smooth than the original.
Storage and Reheating
- Refrigerator: Store cooled leftovers in an airtight container for 3 to 4 days. The peppers soften in storage, and the bacon won’t stay as crisp.
- Freezer: Freeze in a single layer until firm, then transfer to an airtight freezer container for up to 2 months for best quality. Thaw overnight in the refrigerator; expect softer peppers and less crisp bacon.
- Reheating: Warm in a 350°F oven until the centers reach 165°F. The oven brings the bacon back better than a microwave, which tends to leave it soft.
Questions That Come Up Before the Poppers Go in the Oven
Jalapeno Poppers with Bacon
Ingredients
Equipment
Method
- Heat the oven to 400°F and set a wire rack inside a rimmed baking sheet.
- Wearing disposable gloves if desired, halve the jalapeños lengthwise and scrape out the seeds and membranes; arrange them cut side up on the rack.
- Stir together the cream cheese, cheddar, garlic powder, and salt in a medium bowl until evenly combined.
- Fill each jalapeño half with the cheese mixture, then wrap each with a half-slice of bacon and place it seam side down on the rack.
- Bake for 25 to 30 minutes, until the bacon is browned and crisp and the peppers are tender.
- Let the poppers rest on the rack for 5 minutes before serving.


