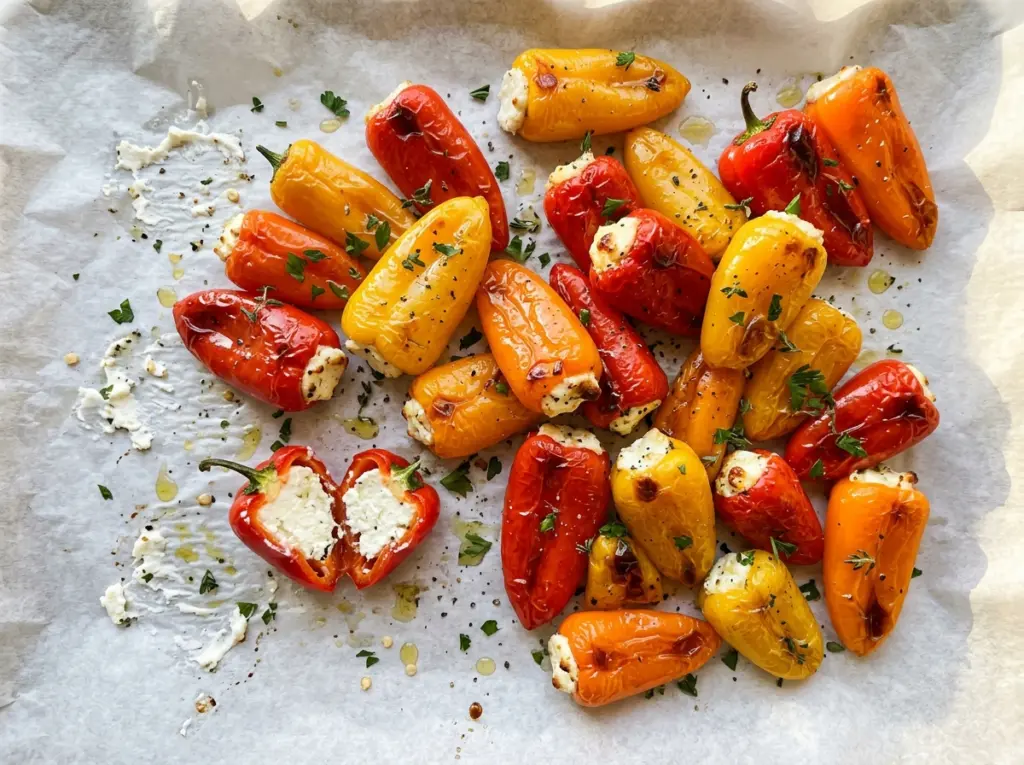
As the mini peppers roast, their edges soften and the cheese filling warms into a creamy, tangy center. Goat Cheese Stuffed Mini Peppers are a good appetizer when you want something colorful that still feels simple to serve: each half is its own little portion, and the lemon and chives keep the rich cheese from feeling heavy.
I like how the filling gets a little golden where it meets the oven, while the peppers stay tender enough to bite cleanly. The mixture combines goat cheese with cream cheese, so it has the tang I want without turning too sharp or crumbly. A small amount of garlic and black pepper rounds it out, and fresh chives bring a mild, green onion note. Serve the peppers after their short rest, when the centers are warm and the peppers have softened.
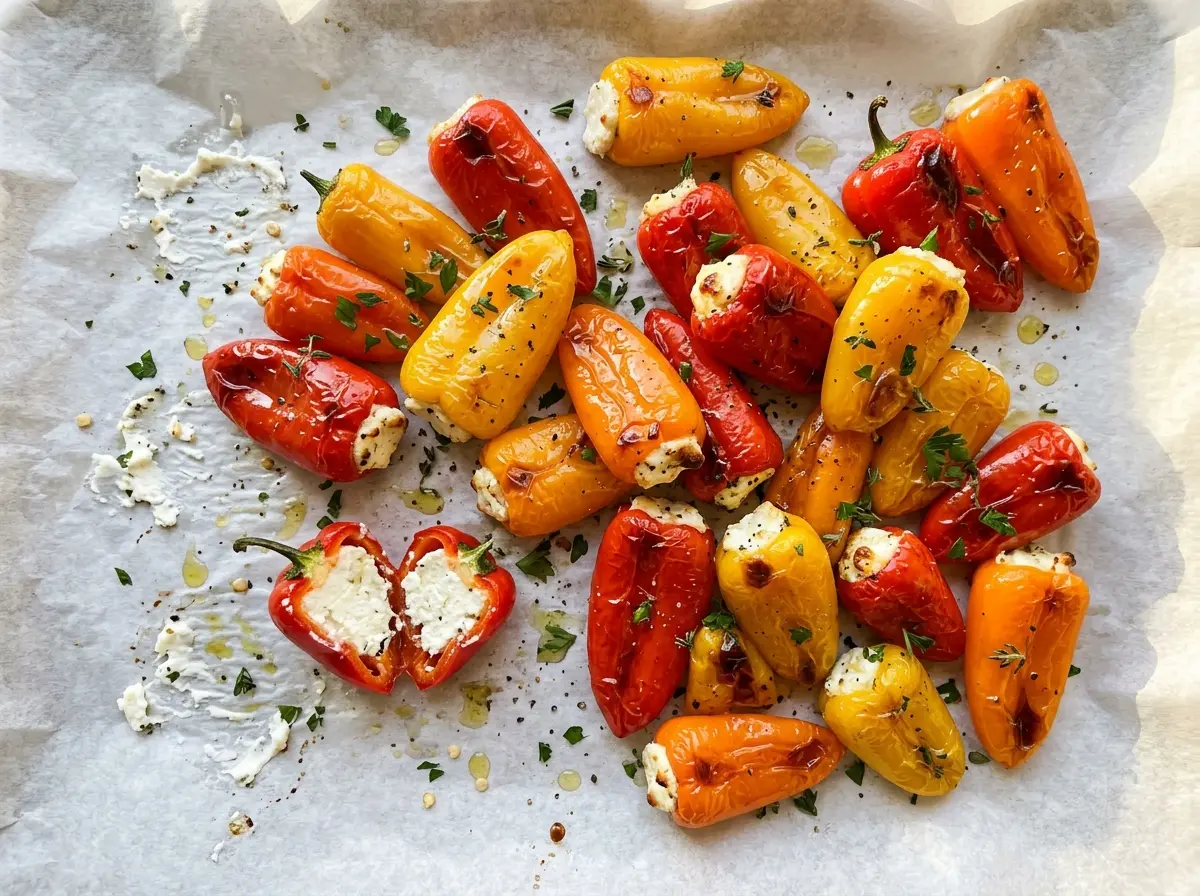
Kitchen Note
Finely grate the lemon zest before it goes into the bowl. Fine flecks spread through the cheese filling, so you get a little citrus in each bite instead of a concentrated patch.
Save these Goat Cheese Stuffed Mini Peppers for a party tray with warm, tangy centers and tender, lightly blistered edges.
Why halving mini peppers makes a better cheese-filled bite
Whole mini peppers are easy to pick up, but they leave you with a small opening and a filling that’s difficult to distribute evenly. Cutting them lengthwise gives each pepper a shallow cup, with enough room for the cheese mixture and a broad surface that warms in the oven. The halves also sit steadily on a rimmed baking sheet when they’re arranged cut-side up.
That open shape helps the cheese and pepper cook together rather than leaving a cool pocket in the middle. It also gives you a clear visual cue: the pepper flesh should be softened, with light blistering on its surface, while the filling stays creamy. Keep the halves facing up as you fill them so the mixture stays in place on the way to the oven.
Mini sweet peppers vary a little in width, so spoon the filling evenly rather than piling it high in the largest ones. The goal is a filled center that follows the shape of each pepper, not a tall mound that can slide off as the peppers soften. That balance makes these easy to lift and eat while still giving every bite a generous amount of cheese.
Why goat cheese needs cream cheese beside it

- Goat cheese — It gives the filling its distinct tang and creamy body. Choose a plain goat cheese with a texture that stirs smoothly; the character of the cheese comes through clearly in this short ingredient list.
- Cream cheese — This softens the sharper goat cheese flavor and helps the mixture hold together as a spoonable filling. Both cheeses need to be softened so they combine without stubborn lumps.
- Fresh chives — Their mild onion flavor adds a fresh note without competing with the goat cheese. Chop them finely so they distribute through the filling instead of clumping together.
- Lemon zest and garlic — The zest adds a fragrant citrus lift, while minced garlic brings a savory edge. Use the finely grated zest and mince the garlic small enough to blend evenly into the cheese.
- Mini sweet peppers — Pick peppers that feel firm and have intact skins. Their sweet, mild flavor balances the tangy filling, and their size makes the lengthwise halves easy to serve as individual bites.
- Olive oil and kosher salt — Tossing the pepper halves with oil helps coat their surfaces, and the salt seasons the peppers themselves. The filling is seasoned separately with black pepper, so both parts taste balanced.
How to fill the pepper halves without losing the cheese
Get the oven and pan ready
Heat the oven to 400°F and line a rimmed baking sheet with parchment paper. Set up the pan before you start filling so the prepared peppers can go straight onto it. The rim helps keep the peppers contained as you move the tray. The parchment makes serving and cleanup easier.
Stir the cheese filling until smooth
In a medium bowl, stir together the softened goat cheese and cream cheese with the chives, lemon zest, minced garlic, and black pepper. Work the mixture until it looks evenly combined, with no large streaks of either cheese. If the cheeses are still cold and firm, they’ll be harder to blend smoothly. Keep stirring rather than leaving visible pockets of plain cheese in the filling.
Halve, seed, and season the peppers
Cut the mini sweet peppers in half lengthwise, then remove the seeds and membranes. Toss the halves with the olive oil and kosher salt so the cut surfaces and skins are lightly coated. Handle them gently as you clean them; intact halves are easier to fill. Arrange them cut-side up on the prepared baking sheet.
Fill, bake, and let the centers settle
Spoon the cheese filling evenly into the pepper halves. Bake for 18 to 22 minutes, until the peppers are softened and lightly blistered. The pepper flesh should no longer look firm and raw, but it shouldn’t collapse into a flat, over-soft shell. Let the peppers rest on the baking sheet for 5 minutes before serving.
Make-ahead options and a gluten-free serving
Mix the cheese filling ahead
Stir the filling together earlier, cover it, and keep it refrigerated until you’re ready to fill the peppers. Let it soften enough to spoon easily before assembling. This shifts the bowl work out of the last few minutes without changing the pepper-and-cheese combination.
Prepare the pepper halves separately
Halve and clean the peppers ahead, then refrigerate them in a covered container until you’re ready to toss them with olive oil and kosher salt. Keeping the peppers separate from the filling preserves the simple assembly order and leaves the cut halves easy to arrange on the baking sheet.
A naturally gluten-free appetizer
The ingredients in this pepper-and-cheese filling don’t rely on flour or breadcrumbs, so the dish is naturally gluten-free as listed. There’s no texture tradeoff or replacement ingredient to work around; the peppers still hold the same creamy filling.
Storage and Reheating
- Refrigerator: Store leftovers in a covered airtight container and use within 3 to 4 days. The peppers soften more as they sit, but the filling stays creamy.
- Freezer: Freezing isn’t recommended. The pepper flesh tends to lose its texture after thawing, so the baked halves won’t be as pleasant to pick up.
- Reheating: Warm them in a 400°F oven until heated through. Avoid leaving them in longer than needed; the pepper halves will soften further.
Questions that come up when making stuffed mini peppers
Goat Cheese Stuffed Mini Peppers
Ingredients
Equipment
Method
- Heat the oven to 400°F.
- Line a rimmed baking sheet with parchment paper.
- In a medium bowl, stir together the goat cheese, cream cheese, chives, lemon zest, garlic, and black pepper until smooth.
- Cut the peppers in half lengthwise and remove the seeds and membranes.
- Toss the peppers with the olive oil and kosher salt.
- Arrange the peppers cut-side up on the baking sheet.
- Spoon the cheese filling evenly into the peppers.
- Bake for 18 to 22 minutes, until the peppers are softened and lightly blistered.
- Let the peppers rest on the baking sheet for 5 minutes before serving.


