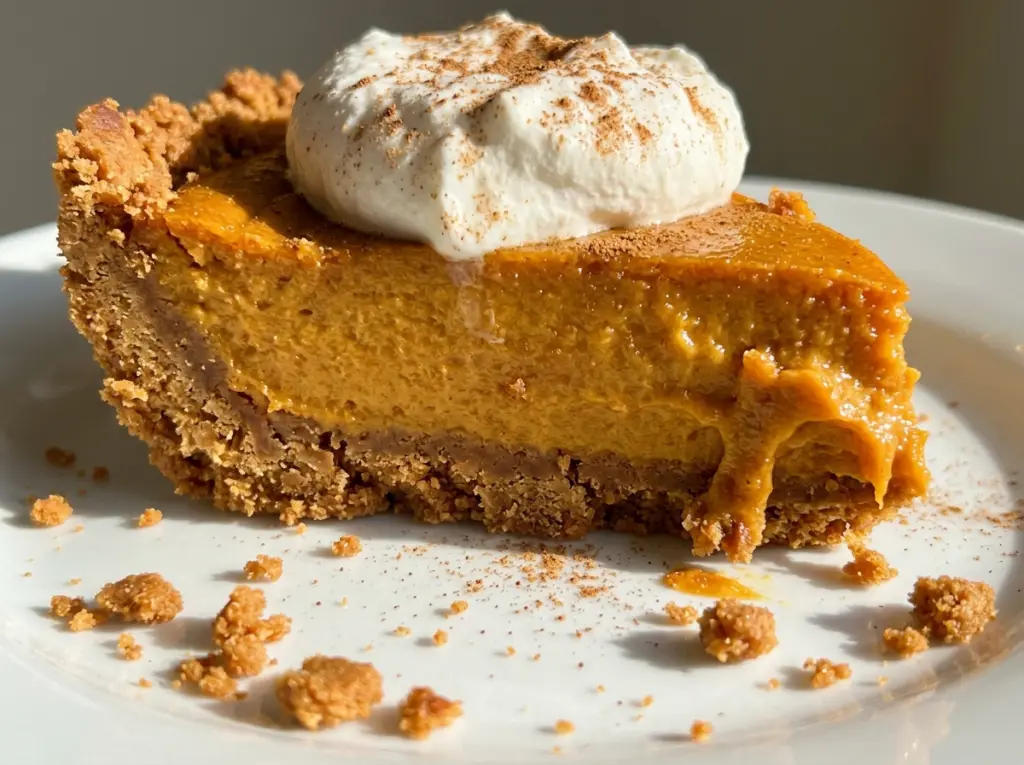
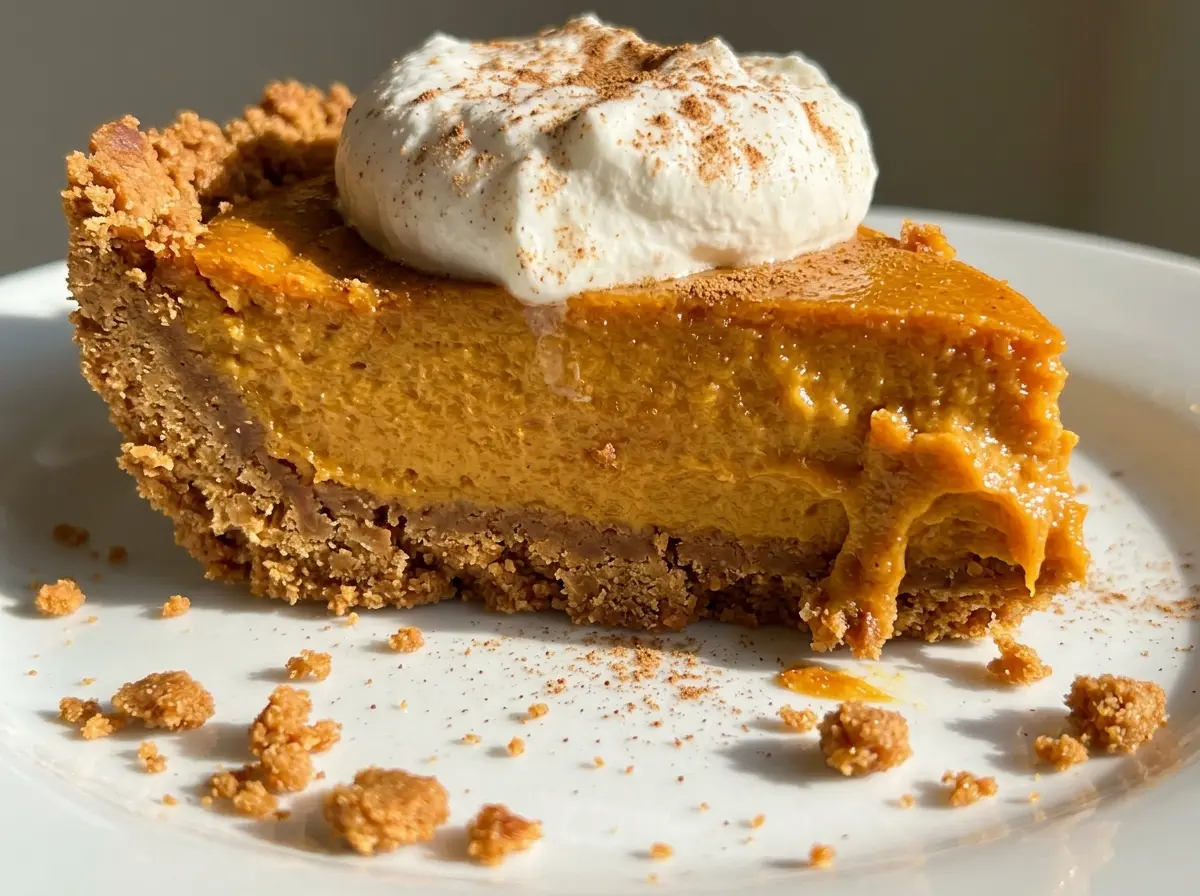
When a pumpkin pie is nearly baked, the edges can look settled while the center still moves when you nudge the pan. That little wobble is welcome here; the filling firms as it cools, while the Biscoff crust brings a warm, caramelized cookie flavor to every slice. I make this Biscoff Pumpkin Pie in a 9-inch pie plate, with a short bake for the crust before the spiced filling goes in.
The crust gets its own time in the oven so it can set before it meets the wet pumpkin filling. Then the pie starts at a higher temperature and finishes more gently, which gives the filling time to cook without asking the cookie crust to take the full bake at one heat. Let the pie cool before chilling it, and the result is a softly spiced center with a crisp-edged, buttery Biscoff base.
Kitchen Note
Give the crust its full 10 minutes to cool before adding the filling. A hot crust is harder to fill neatly, and that short pause gives you time to raise the oven temperature without rushing the next step.
Save this Biscoff Pumpkin Pie for its crisp spiced-cookie crust and smooth pumpkin filling, finished with a chill that helps every slice hold together.
Why a Biscoff Crust Needs Its Own Short Bake
Cookie crumbs and melted butter make a crust that tastes rich before the filling even goes in, but that mixture needs a chance to set. The brief bake firms the crumbs together and gives the base a head start against the moisture in the pumpkin custard. Skip that step and the bottom is more likely to feel soft rather than crisp once the pie is filled and baked.
There’s also a reason to press the crumbs firmly across the bottom and up the sides of the pie plate. A loose layer can break apart when you cut through the finished pie, while an even, compact crust gives each slice a more reliable base. Biscoff cookies already bring a sweet, spiced flavor, so the small amount of brown sugar in the crust supports that flavor rather than turning the base into a separate, sugary layer. Keep the crumb layer even, especially where the bottom meets the sides, and the filling will sit in a sturdy shell.
What Biscoff Cookies and Evaporated Milk Bring to the Filling

- Biscoff cookies — Their caramelized, spiced flavor makes this crust distinct from a plain crumb crust. Crush them finely so the melted butter can coat the crumbs evenly; a store-brand cookie with a similar crisp, spiced character can work, but the flavor won’t be exactly the same.
- Pumpkin puree — Canned puree gives the filling a consistent pumpkin base without extra sweetness or added spices. Use plain pumpkin puree rather than prepared pumpkin pie filling, which already contains sweetener and seasoning.
- Evaporated milk — This gives the filling its creamy custard texture without the extra sweetness of condensed milk. Regular evaporated milk is the right fit; swapping in sweetened condensed milk changes both the liquid balance and the sweetness.
- Brown sugar — Packed light brown sugar adds a gentle molasses note to both the crust and filling. It works with the cookie’s caramel flavor, while granulated sugar would make the sweetness taste a little sharper.
- Cinnamon, ginger, and nutmeg — The three spices give the pumpkin its familiar warmth without hiding the Biscoff flavor. Fresh, aromatic spices are worth using when yours have been sitting in the pantry for years; otherwise, ordinary ground spices work well.
- Eggs and vanilla — The eggs help the filling set into slices, and vanilla rounds out the pumpkin and spices. Use large eggs as listed so the custard sets at the intended rate.
Build the Crust and Bake the Pumpkin Filling in Two Stages
Press and Set the Biscoff Crust
Heat the oven to 350°F while you mix the finely crushed cookies with the brown sugar, then stir in the melted butter until the crumbs are evenly moistened. Press the mixture firmly over the bottom and up the sides of a 9-inch pie plate, keeping the layer as even as you can. Bake for 8 to 10 minutes, until the crust smells fragrant and looks set. If it still looks loose or powdery, give it the rest of its baking window before taking it out.
Cool the Crust and Mix the Filling
Take the crust out and let it cool for 10 minutes; during that pause, raise the oven temperature to 425°F. In a large bowl, whisk the pumpkin puree with the brown sugar, cinnamon, ginger, nutmeg, and salt until smooth. Whisk in the eggs and vanilla, then gradually whisk in the evaporated milk. The finished filling should look evenly blended, with no streaks of egg or pockets of pumpkin mixture.
Start Hot, Then Lower the Oven
Pour the filling into the cooled crust and bake at 425°F for 15 minutes. Without taking the pie out, reduce the oven temperature to 350°F and continue baking for 35 to 45 minutes. Look for set edges and a center that still has a slight wobble; the center should reach 160°F. If the crust edges are browning too quickly, cover them loosely with foil so they don’t get too dark before the filling is ready.
Cool Before Chilling and Slicing
Move the pie to a rack and let it cool until it reaches room temperature, keeping that cooling period to no more than 2 hours. Refrigerate the pie for at least 2 hours before slicing so the custard has time to firm. Cutting while it’s still warm makes the filling more likely to slump onto the plate. Once chilled, the cookie crust and pumpkin center make a clean, defined slice.
Three Small Changes for a Different Biscoff Pumpkin Pie
Make the Crust Gluten-Free
Replace the Biscoff cookies with an equal volume of finely crushed gluten-free speculoos cookies, then use the same brown sugar and melted butter. The crust keeps a similar spiced-cookie character, though the exact flavor will depend on the cookies you use.
Let the Cookie Flavor Lead
Leave the brown sugar out of the crust but keep the cookies and melted butter. The base will taste less sweet and let the caramelized cookie notes stand out; press the buttered crumbs firmly so the crust still holds together.
Make the Filling More Cinnamon-Forward
Use 1 1/4 teaspoons cinnamon and reduce the ginger to 1/4 teaspoon, leaving the nutmeg as it is. The pumpkin tastes warmer and less gingery, while the Biscoff crust still gives each bite its spiced-cookie character.
Storage and Reheating
- Refrigerator: Store covered for 3 to 4 days. The crust softens a little as it sits beneath the custard.
- Freezer: Freeze the whole pie or individual slices, wrapped tightly, for up to 1 month. Thaw in the refrigerator; expect the crust to be a little softer after thawing.
- Reheating: This pie is best served chilled or cool, so I don’t reheat it. Warming the whole pie can loosen the custard and soften the cookie crust.
Questions That Come Up When Baking Biscoff Pumpkin Pie
Biscoff Pumpkin Pie
Ingredients
Equipment
Method
- Heat the oven to 350°F.
- Stir the crushed cookies and brown sugar together in a medium bowl, then stir in the melted butter until evenly moistened.
- Press the mixture firmly over the bottom and up the sides of a 9-inch pie plate.
- Bake for 8 to 10 minutes, until fragrant and set, then remove from the oven.
- Let the crust cool for 10 minutes.
- Increase the oven temperature to 425°F.
- Whisk the pumpkin, brown sugar, cinnamon, ginger, nutmeg, and salt in a large bowl until smooth.
- Whisk in the eggs and vanilla, then gradually whisk in the evaporated milk until combined.
- Pour the filling into the cooled crust.
- Bake for 15 minutes at 425°F.
- Reduce the oven temperature to 350°F and bake for 35 to 45 minutes, until the edges are set and the center reaches 160°F but still has a slight wobble; loosely cover the crust edges with foil if they brown too quickly.
- Cool on a rack until room temperature, no more than 2 hours.
- Refrigerate for at least 2 hours before slicing.


