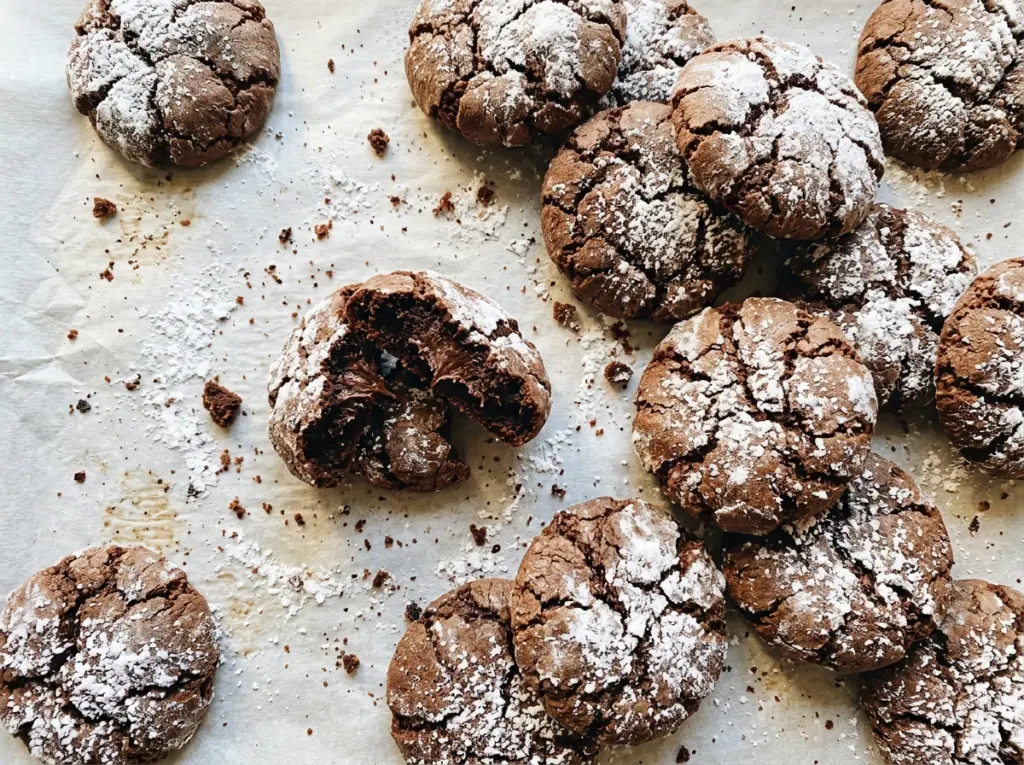
The first thing you notice when these cookies come out of the oven is the white sugar breaking into a map of dark chocolate cracks. I used to wait for the centers to look fully baked, but that was too long: the edges turned firm before the middle had a chance to stay soft. Now I pull the pan when the edges look set and the centers still look tender.
Chocolate crinkle cookies get their signature look from a generous coat of confectioners’ sugar over chilled dough. The dough needs time in the refrigerator to firm up, and once it’s ready, each ball rolls easily through the sugar before spreading in the oven. That contrast between the pale coating and cocoa-rich dough makes every crack stand out, with a soft center under the snowy top.
Kitchen Note
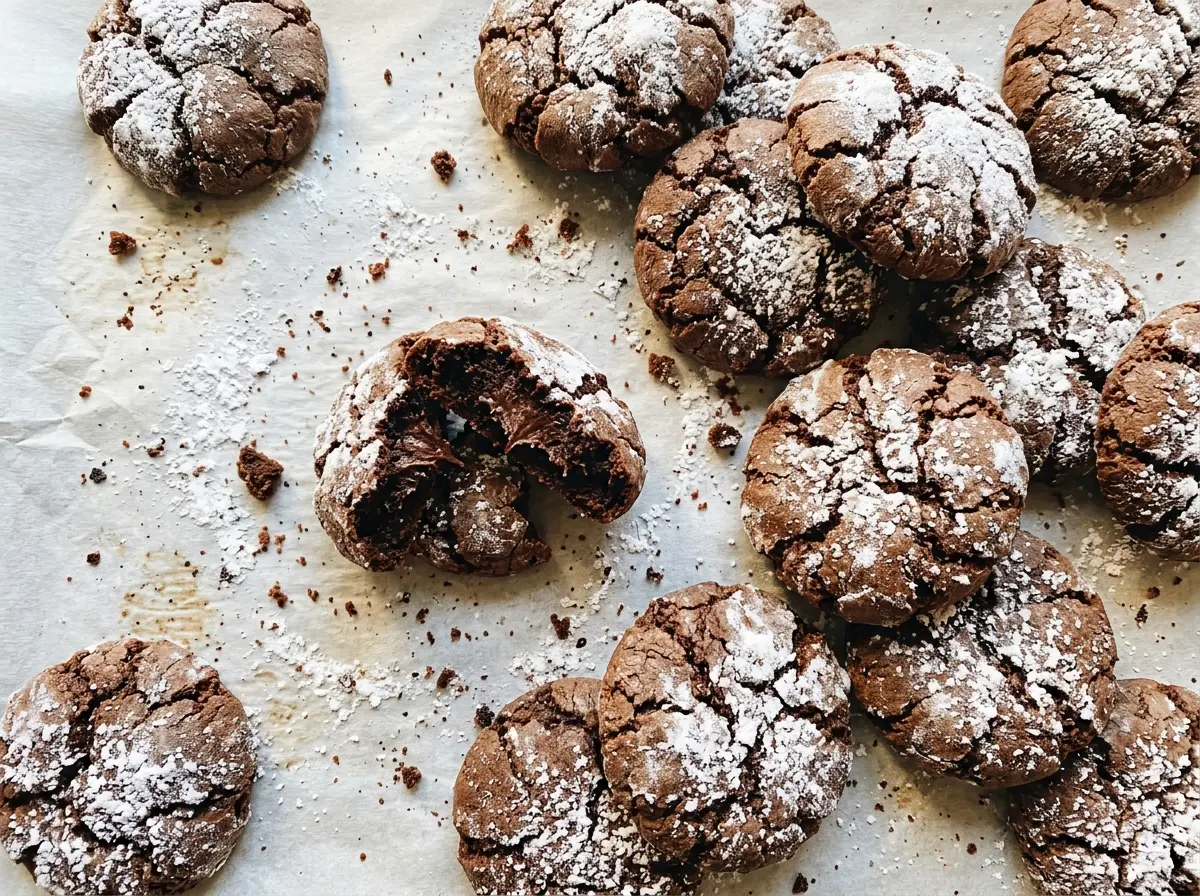
The dough should feel firm before you start portioning it; two hours in the refrigerator is the minimum, not a window to rush past. That chill makes the portions much easier to roll neatly.
Save these chocolate crinkle cookies for a cocoa-rich cookie with a snowy sugar crust and a soft middle.
Why the Sugar Crust Makes Those Chocolate Cracks Stand Out
The crinkle isn’t a decoration added after baking; it forms as the dough expands beneath its coating. In the oven, the outside begins to set while the cookie continues to rise, splitting the confectioners’ sugar into pale islands and dark cocoa-colored lines. That contrast is what gives the cookies their recognizable finish.
A thin dusting can disappear into the dough, leaving the surface brown rather than clearly crinkled. Coat each ball generously so there’s a visible layer of sugar before it goes onto the pan. The coating doesn’t need to be perfectly even, but bare spots are more likely to bake up without that snowy look. Keep the dough balls spaced about 2 inches apart, too; they need room to spread without touching. When you see cracks and set-looking edges, the cookies are ready to come out even if the centers still look soft.
What the Cocoa, Butter, and Two Sugars Each Bring

- Unsweetened cocoa powder — Cocoa provides the chocolate flavor and the dark color that shows through the cracked coating. Choose a cocoa you enjoy tasting on its own; a fresh, unsweetened powder makes a noticeable difference here. Dutch-process cocoa is a workable option if you prefer a deeper, less sharp chocolate taste.
- Butter — Softened unsalted butter creams with granulated sugar to create the base of the dough. Let it soften until it yields when pressed but hasn’t turned shiny or melted; melted butter won’t cream the same way. Unsalted butter also lets the measured salt stay in control.
- Granulated and confectioners’ sugar — Granulated sugar is beaten into the butter, while confectioners’ sugar coats the outside of the shaped dough. They aren’t interchangeable here: the finer coating gives the cookies their pale crinkle pattern, while granulated sugar builds the dough’s base.
- Eggs — Eggs help bind the cocoa-rich dough and give it structure as it bakes. Use large eggs for the balance in this batch; smaller or extra-large eggs change the amount of moisture going into the dough.
- Flour and baking powder — All-purpose flour gives the cookies enough structure to hold their shape, and baking powder helps the dough rise and crack as it bakes. Whisk them thoroughly with the cocoa and salt so the leavener is distributed throughout instead of concentrated in a few bites.
From Cocoa Dough to Cracked, Soft-Centered Cookies
Whisk the dry ingredients evenly
Whisk the flour, cocoa powder, baking powder, and salt together in a medium bowl until the mixture looks uniform, with no pale flour pockets or cocoa clumps. Cocoa can gather in little lumps, so break those up as you whisk rather than leaving them for the wet dough to absorb. An even dry mixture helps the cookies bake consistently from one portion to the next.
Cream the butter and sugar, then chill
Beat the softened butter and granulated sugar in a large bowl until creamy, about 2 minutes. Add the eggs one at a time, beating after each, then mix in the vanilla. Add the dry ingredients and mix just until no dry streaks remain; continuing to beat after the flour disappears can make the cookies tougher. Cover the bowl and refrigerate the dough until firm, at least 2 hours.
Roll and coat the dough portions
Heat the oven to 350°F and line two 18×13-inch baking sheets with parchment paper. Put the confectioners’ sugar in a shallow bowl, then scoop the dough into 24 portions of about 1 1/2 tablespoons each and roll them into balls. Coat each ball generously, then set them about 2 inches apart on the prepared sheets. If the dough starts to feel difficult to handle, work with one portion at a time and keep the rest cool.
Bake until the edges set
Bake for 10 to 12 minutes, watching for cracks across the tops and edges that look set. The centers should still look soft when the pans come out; waiting for them to look firm in the oven can leave the cooled cookies dry. Let the cookies cool on the baking sheets for 5 minutes, then transfer them to a wire rack to cool completely. They’re delicate while hot, so give them that short pause before moving them.
Two Smart Ways to Change the Chocolate Crinkles
A deeper, rounder cocoa taste
Swap in Dutch-process unsweetened cocoa powder for the natural unsweetened cocoa. Keep the amount at 1/2 cup; the cookies will taste darker and less sharp, while the baking powder remains the leavener.
A dairy-free batch
Use 1/2 cup dairy-free baking sticks in place of the unsalted butter, softened before mixing. Choose sticks rather than a soft tub spread, which can contain more water and make the dough looser; the finished cookies may have a slightly different texture.
Keeping the Cookies Fresh
- Room temperature: Store completely cooled cookies in an airtight container for up to 4 days. The sugar coating softens a little as they sit.
- Freezer: Freeze cooled cookies in an airtight freezer container, with parchment between layers, for up to 2 months. Thaw them in the closed container at room temperature to limit condensation on the coating.
- Reheating: These cookies are best at room temperature and don’t need reheating. A microwave can make them soft and sticky, so let frozen cookies thaw naturally instead.
Questions That Come Up While Baking Chocolate Crinkles
Chocolate Crinkle Cookies
Ingredients
Equipment
Method
- Whisk the flour, cocoa powder, baking powder, and salt together in a medium bowl.
- Beat the butter and granulated sugar in a large bowl until creamy, about 2 minutes.
- Beat in the eggs one at a time, then the vanilla extract.
- Mix the dry ingredients into the butter mixture just until no dry streaks remain.
- Cover and refrigerate until firm, at least 2 hours.
- Heat the oven to 350°F and line two 18x13-inch baking sheets with parchment paper.
- Put the confectioners’ sugar in a shallow bowl.
- Scoop the dough into 24 portions, about 1 1/2 tablespoons each, and roll into balls.
- Coat each generously in confectioners’ sugar and arrange on the baking sheets about 2 inches apart.
- Bake for 10 to 12 minutes, until the cookies are cracked and the edges look set while the centers remain soft.
- Cool on the baking sheets for 5 minutes, then transfer to a wire rack to cool completely.


