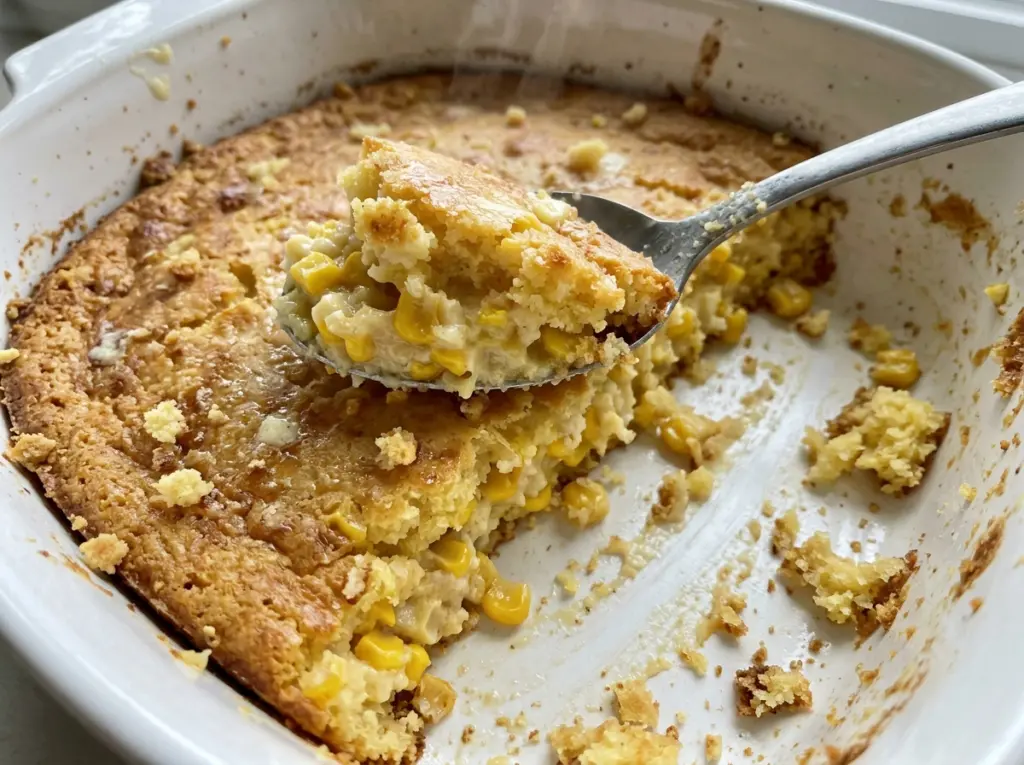
The edges turn golden before the middle does, which can make corn casserole look finished when the center still needs a little time. I watch for a top that’s evenly colored and a center that has set, not just the first bit of browning around the sides. This version bakes in a 9×13-inch dish, so there’s plenty of room for the corn mixture to cook in a steady, even layer.
Two kinds of canned corn give it the texture I want: whole kernels for little pops of sweetness, and cream-style corn for a soft, moist base. I whisk the eggs, sour cream, and melted butter together first, then stir in the corn muffin mix and corn. The batter comes together quickly, and the casserole goes straight into the oven. After a short rest, each scoop is tender and holds its shape instead of running across the plate.
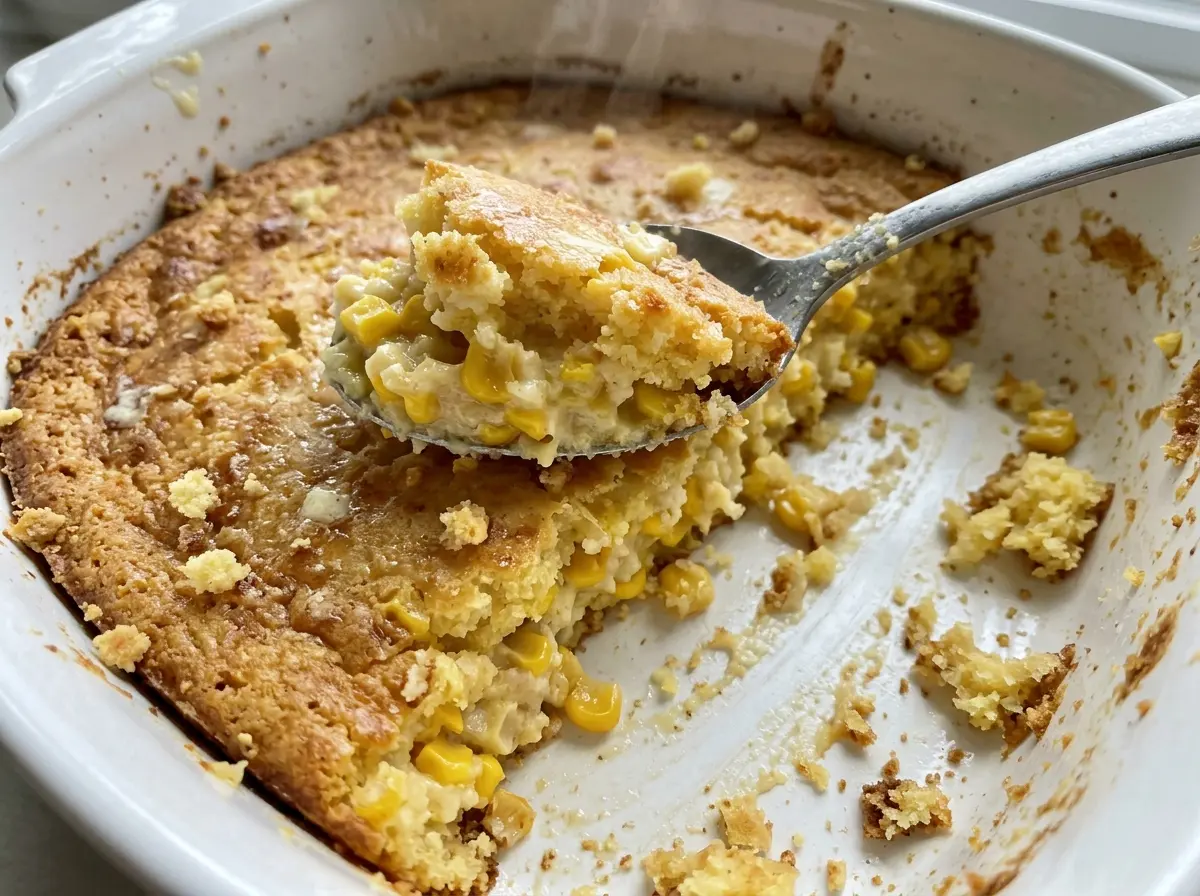
Kitchen Note
Whisk the eggs, sour cream, and melted butter until they look completely blended before adding the dry mix. If you can still see streaks of egg white, keep whisking; those streaks won’t blend themselves once the corn goes in.
Save this Corn Casserole for an easy side with a golden top, soft center, and sweet whole kernels in every scoop.
Why Two Kinds of Corn Keep This Casserole From Turning Soupy
Whole kernel corn and cream-style corn do different jobs here. The whole kernels bring texture, but the liquid packed with them is thin; leaving it in adds water that the corn muffin mix and eggs have to absorb. Drain those kernels well, and they stay distinct instead of disappearing into the soft base.
Cream-style corn is different. It comes with a thick, starchy mixture that adds moisture and helps the casserole stay tender as it bakes. Drain that can and you remove part of the ingredient that makes the batter cohesive. The two cans aren’t interchangeable, even though they both taste like corn.
Once they’re stirred into the batter, the mix should look thick and spoonable, with kernels distributed throughout. It won’t pour like a thin egg custard, and it shouldn’t have a puddle of liquid around the edges. Keeping the drained corn and the cream-style corn in their proper roles gives you a casserole that’s moist but still easy to scoop.
What Each Ingredient Brings to This Corn Casserole

- Corn muffin mix — This boxed mix brings corn flavor along with the leavening and dry ingredients that give the casserole its soft, lightly structured crumb. A standard boxed mix is fine; plain cornmeal isn’t a direct replacement because it won’t provide the same balance or lift. For a gluten-free version, use a gluten-free corn muffin mix as described below.
- Whole kernel corn — Canned corn is convenient, and an inexpensive brand works well here. Drain it thoroughly so the extra packing liquid doesn’t thin the batter. Thawed frozen kernels can stand in; drain off any liquid before adding them.
- Cream-style corn — Its thick, saucy texture supplies moisture and helps bind the corn throughout the casserole. Keep the can as it is rather than draining it. There isn’t a clean swap with plain kernels; using those alone leaves out the thickened base.
- Eggs — Eggs help the casserole set as it bakes, so the center holds together when served. Use fresh, ordinary large eggs; there’s no straightforward egg-free replacement that gives the same set in this formula.
- Sour cream — Sour cream adds tang and keeps the crumb tender. A store-brand tub works just as well as a premium one. Plain full-fat Greek yogurt is the closest simple swap and can be used in the same amount, though the casserole will taste a little less rich.
- Unsalted butter — Melted butter gives the batter a rounded, buttery taste. A neutral vegetable oil can replace it one-for-one, but the casserole will lose some of that buttery flavor. Melt the butter before mixing so it blends smoothly into the wet ingredients.
Mixing and Baking for a Set Center and Golden Top
Blend the Wet Ingredients First
Heat the oven to 350°F and lightly grease a 9×13-inch baking dish with nonstick cooking spray. In a large bowl, whisk the eggs, sour cream, and melted butter until combined. Aim for a smooth mixture without visible streaks of egg white or clumps of sour cream. A few small flecks of sour cream are fine, but the base should look even before the dry mix goes in.
Stir in the Mix and Both Kinds of Corn
Add the corn muffin mix, drained whole kernel corn, and cream-style corn to the bowl. Stir until everything is evenly mixed and there are no dry pockets of muffin mix at the bottom. The batter will be thick, with kernels showing throughout. Stop once it’s combined; you don’t need to beat it smooth.
Spread an Even Layer
Transfer the batter to the greased baking dish and spread it out so the surface is level from corner to corner. Take a moment to move any clumps of corn away from the edges, where they can leave uneven spots. An even layer helps the center and edges bake at a similar pace. Don’t worry if the surface looks rustic rather than perfectly smooth.
Bake Until the Middle Has Set
Bake for 45 to 55 minutes, until the top is golden and the center is set. The edges will look firmer first, so check the middle rather than judging by the corners alone. A thermometer inserted in the center should read at least 160°F. Let the casserole rest for 10 minutes before serving so it settles and scoops cleanly.
Easy Ways to Adapt Corn Casserole
Make It Gluten-Free With Corn Muffin Mix
Replace the regular corn muffin mix with an 8.5-ounce gluten-free corn muffin mix. Keep the other ingredients and method the same. The casserole may have a slightly different crumb depending on the mix, but it keeps the same sweet corn flavor and tender center.
Add a Little Heat With Jalapeño and Cheddar
Stir finely diced jalapeño and shredded sharp cheddar into the batter with the corn. Keep the additions modest so the mixture stays thick enough to set; the cheese adds savory richness, while jalapeño brings a fresh, peppery bite. Remove the seeds for a milder result.
Storage and Reheating
- Refrigerator: Store covered for 3 to 4 days. The chilled casserole will be firmer than it was fresh from the oven.
- Freezer: It freezes well, though the thawed texture may be a little softer. Cool it, wrap individual portions tightly, and store them in a freezer-safe container for up to 2 to 3 months. Thaw in the refrigerator before reheating.
- Reheating: Cover a portion with foil and warm it in a 325°F oven until hot throughout; for food safety, leftovers should reach 165°F. Reheating uncovered can dry the top before the center warms.
Questions That Come Up When Making Corn Casserole
Corn Casserole
Ingredients
Equipment
Method
- Heat the oven to 350°F.
- Lightly grease a 9x13-inch baking dish with nonstick cooking spray.
- In a large bowl, whisk the eggs, sour cream and melted butter until combined.
- Stir in the corn muffin mix, drained corn and cream-style corn until evenly mixed.
- Spread the mixture in the prepared dish.
- Bake for 45 to 55 minutes, until the top is golden, the center is set and a thermometer inserted in the center reads at least 160°F.
- Rest for 10 minutes before serving.


