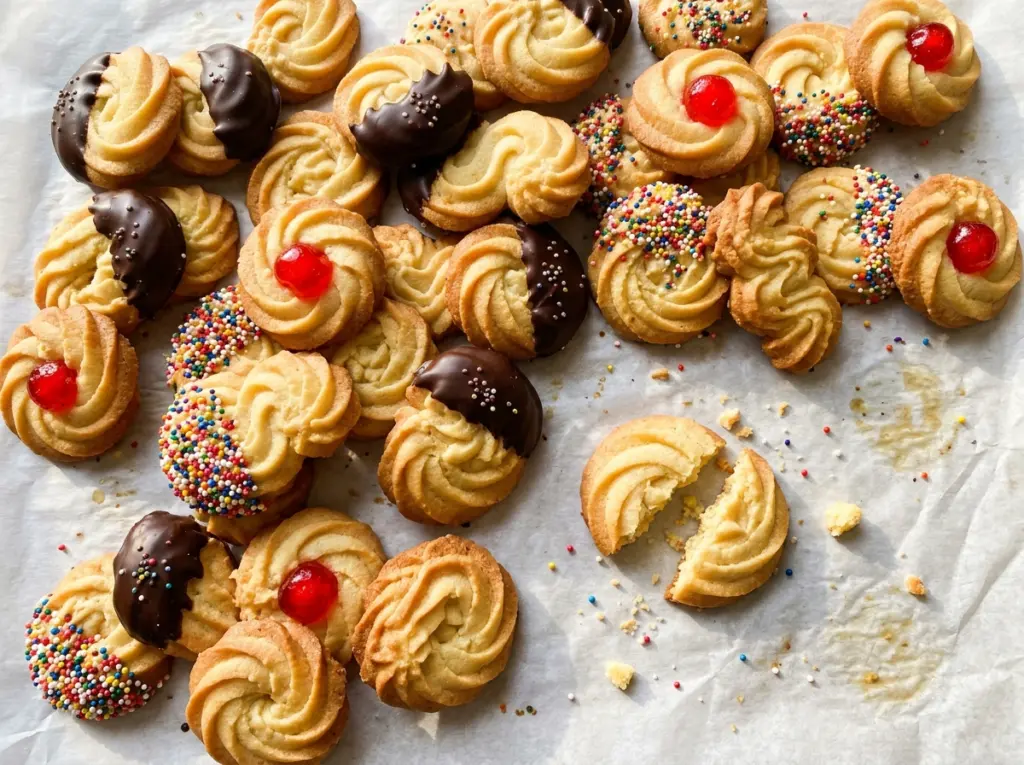
The dough should hold the ridges from the open-star tip, not slump into a smooth puddle on the parchment. That’s the little test I watch while piping these Italian butter cookies: softened butter makes the dough smooth enough to pipe, but it still needs enough body to keep each rosette defined. I pipe 12 at a time on a parchment-lined sheet, leaving room between them so the edges bake evenly.
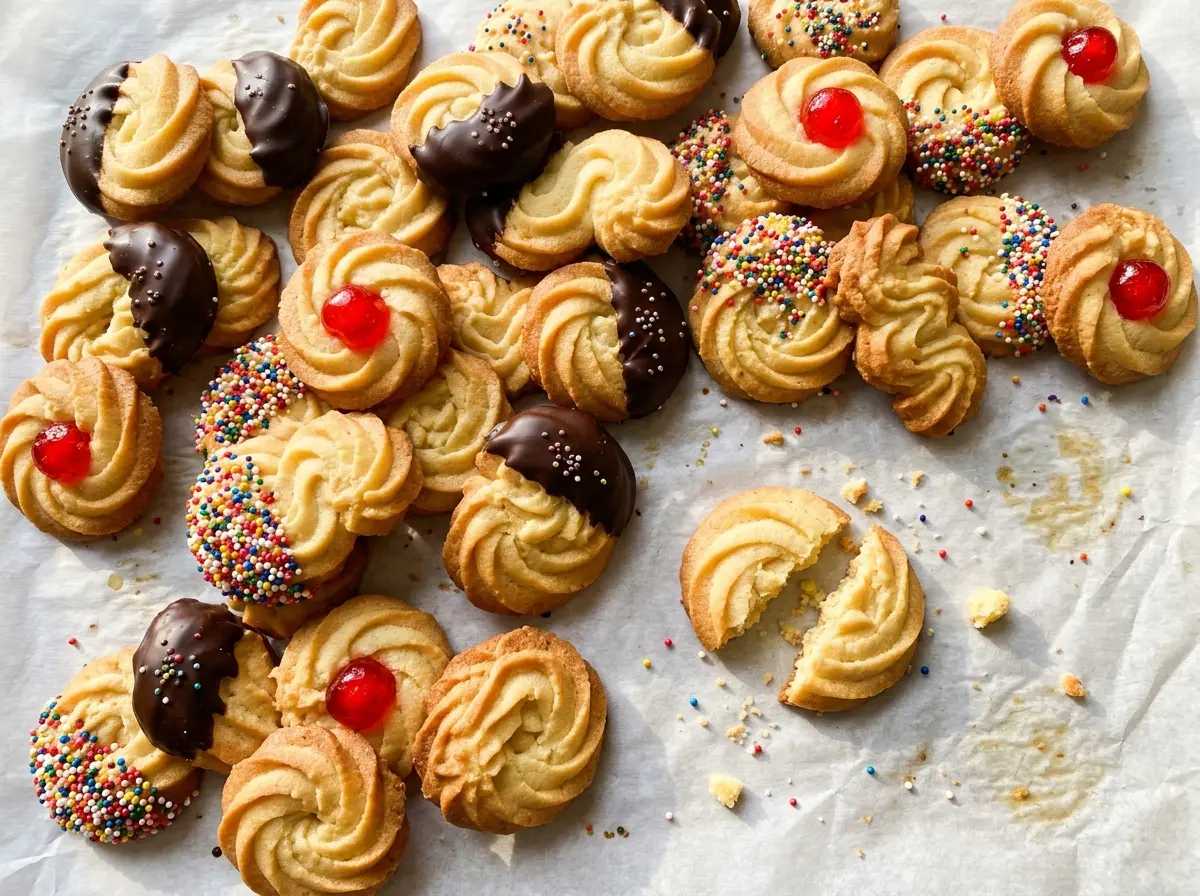
Confectioners’ sugar gives the cookies a fine, tender crumb, while the butter carries the vanilla and almond extracts through every bite. I mix the flour in on low and stop as soon as a soft dough forms; working it longer can make the cookies tougher and harder to pipe. The lightly golden edges are the cue to pull them from the oven, even while the centers still look pale. They set as they cool into buttery cookies with crisp, delicate edges.
Kitchen Note
Let the baking sheet cool completely before piping the second batch. A warm pan can soften the dough before it reaches the oven, and those neat rosette ridges won’t hold as well.
Save these Italian butter cookies for a bake when you want buttery rosettes with crisp edges and a soft, fine crumb.
Why These Rosettes Need Soft Dough, Not Extra Mixing
Piped cookies have a different job from drop cookies: the dough has to travel through a star tip and still keep the shape the tip gives it. That’s why the butter should be softened before you start. It creams smoothly with the confectioners’ sugar, and the egg at room temperature blends in without leaving the mixture looking broken or uneven. Once the flour goes in, though, the goal changes. Mix only until the dough comes together; extra beating works the flour more and can leave the finished cookies less tender.
The 1/2-inch open-star tip gives each rosette ridged sides, so piping neatly matters more than making the dough stiff. Aim for rosettes about 2 inches wide and keep them about 1 1/2 inches apart. That leaves the cookies room to bake without crowding their edges. If the dough feels difficult to squeeze through the bag, pause rather than forcing it; an overly firm dough makes it harder to pipe an even circle. The finished cookies should show lightly golden edges, while their centers stay much paler.
What Butter, Sugar, and Extracts Each Bring to These Cookies

- Unsalted butter — Butter supplies the rich taste and soft structure that make this dough pipeable. Standard supermarket butter works well; softened means pliable when pressed, not melted or greasy. There isn’t a direct swap that keeps the same buttery flavor and texture, so I stick with unsalted butter here.
- Confectioners’ sugar — Its fine texture blends into the butter smoothly and helps make a tender, delicate cookie. Granulated sugar isn’t a straight substitute: it won’t dissolve or behave the same way in this dough. Keep the confectioners’ sugar sealed so it stays free of damp clumps.
- Large egg — The egg brings the dough together and gives it enough cohesion to pipe. Using it at room temperature helps it blend evenly into the creamed butter and sugar. A smaller or larger egg changes the dough’s moisture, so use a large one for the intended consistency.
- Vanilla and almond extracts — Vanilla rounds out the buttery flavor, and just a little almond extract gives the cookies their recognizable Italian bakery-style aroma. If almond isn’t your preference, leave it out; the cookies will taste more simply of butter and vanilla. There’s no need to buy a premium almond extract for this small amount, but use an extract you enjoy smelling straight from the bottle.
- All-purpose flour — Flour gives the piped shape enough structure to hold through baking. Spoon it into the measuring cup and level the top rather than packing it down; too much flour can make the dough stiff and frustrating to pipe. For a gluten-free adaptation, use a cup-for-cup baking blend that contains xanthan gum in place of the all-purpose flour; the dough may feel a little more delicate.
- Kosher salt — The small amount keeps the butter and sugar from tasting flat. Keep it in the dough even though these are sweet cookies; without it, the flavor can come across as one-note.
From Creamed Butter to Golden Edges: The Piping Process
Cream the Butter and Confectioners’ Sugar
Heat the oven to 350°F and line an 18×13-inch rimmed baking sheet with parchment paper. Beat the softened butter and confectioners’ sugar in a large bowl for about 2 minutes, scraping down the bowl as needed. The mixture should look creamy and evenly blended, without dry sugar gathered around the sides. If butter is still firm in the center, it won’t cream as smoothly, so give it more time to soften before beating.
Mix a Soft, Smooth Dough
Beat in the large egg, vanilla extract, and almond extract until the mixture looks smooth. Add the flour and kosher salt, then mix on low just until a soft dough forms. Scrape the bowl so no streaks of flour remain at the bottom, but stop once they disappear. Mixing longer than needed can make the cookies less tender and the dough harder to pipe.
Pipe Even Rosettes
Fit a piping bag with a 1/2-inch open-star tip and fill it with the dough. Pipe 12 rosettes about 2 inches wide onto the parchment, spacing them about 1 1/2 inches apart. Keep a steady squeeze as you circle the dough so the rosettes are similar in size and bake at the same pace. If one rosette is much larger than the rest, it may need longer to bake.
Bake, Cool, and Reuse the Sheet
Bake for 10–12 minutes, until the edges are lightly golden; the centers should remain pale. Let the cookies cool on the baking sheet for 5 minutes, then transfer them to a wire rack. Allow the baking sheet to cool completely before piping the remaining dough onto the parchment. Bake that batch for 10–12 minutes and cool it the same way.
Simple Ways to Change the Flavor, Shape, or Batch Size
Make Them More Vanilla-Forward
Leave out the almond extract and keep the vanilla. The cookies will have a gentler, more straightforward buttery-vanilla taste, while the dough and piping method stay the same.
Pipe Ridged Fingers Instead of Rosettes
Use the same open-star tip to pipe short, even fingers rather than circling into rosettes. Keep the pieces close in size so they bake evenly; thinner shapes may reach lightly golden edges sooner, so watch them closely as they bake.
Bake a Gluten-Free Batch
Replace the all-purpose flour with the same amount of a cup-for-cup gluten-free baking blend that includes xanthan gum. The dough may be more delicate to pipe and the finished cookies a little more fragile, so handle them gently after baking.
Make Half a Batch
Halve each ingredient for about 12 cookies. For the egg, beat it first and use half; that’s easier to measure evenly than trying to divide an uncracked egg. Pipe the same 2-inch rosettes and bake them at the same temperature, watching for lightly golden edges.
Storage and Reheating
- Refrigerator: These cookies don’t need refrigeration, but you can store them airtight for up to 1 week; expect them to feel firmer when cold.
- Freezer: Freeze fully cooled cookies in an airtight container for up to 2 months, separating layers with parchment. Thaw them at room temperature while still covered to limit condensation on the cookies.
- Reheating: They’re best at room temperature and don’t need reheating. If chilled, let them lose their chill on the counter; microwaving can soften them unevenly.
Questions That Come Up When Making Italian Butter Cookies
Italian Butter Cookies
Ingredients
Equipment
Method
- Heat the oven to 350°F.
- Line an 18x13-inch rimmed baking sheet with parchment paper.
- Beat the butter and confectioners’ sugar in a large bowl until creamy, about 2 minutes, scraping down the bowl as needed.
- Beat in the egg, vanilla extract, and almond extract until smooth.
- Mix in the flour and salt on low just until a soft dough forms.
- Fit a piping bag with a 1/2-inch open-star tip and fill it with the dough.
- Pipe 12 rosettes about 2 inches wide onto the prepared baking sheet, spacing them about 1 1/2 inches apart.
- Bake for 10–12 minutes, until the cookie edges are lightly golden.
- Let the cookies cool on the baking sheet for 5 minutes before transferring to a wire rack.
- Let the baking sheet cool completely.
- Pipe the remaining dough onto the parchment.
- Bake for 10–12 minutes, until the cookie edges are lightly golden, then cool the cookies in the same way.


