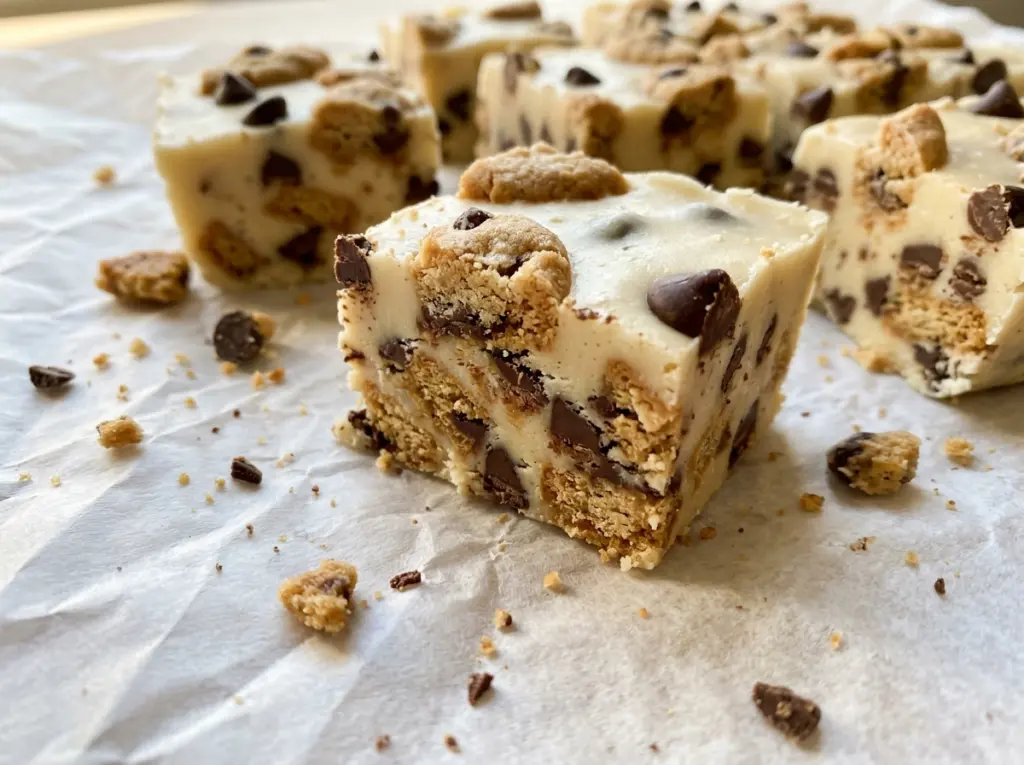
When the white chocolate chips start disappearing into the condensed milk, the mixture goes from separate pieces to a thick, glossy fudge base. Keep the heat low and your spoon moving; rushing this part can leave the chocolate scorched before everything melts smoothly. Milk and Cookies Fudge takes that creamy base and gives it the familiar chocolate-chip-cookie crunch, both inside and scattered across the top.
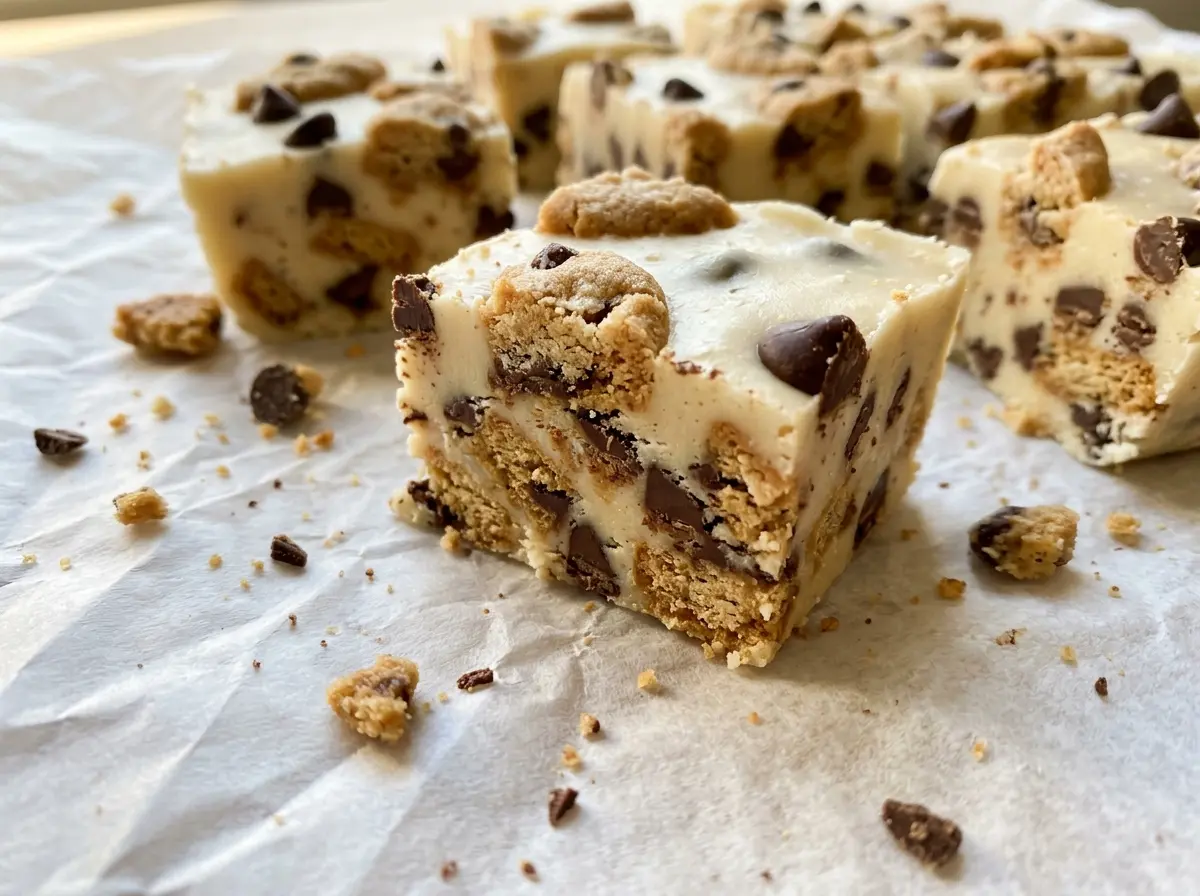
I like that the cookies don’t all get treated the same way. The pieces stirred into the fudge make each square feel like a cookie-and-cream bite, while the ones pressed on top give you a little crunch right away. Once the pan has chilled until firm, the slab lifts out cleanly and cuts into 16 pieces. Each square is rich, sweet, and dotted with real cookie pieces.
Kitchen Note
Leave parchment extending over two sides of the pan. Once the fudge is firm, those edges give you a secure grip to lift out the whole slab instead of trying to pry up the corners.
Save Milk and Cookies Fudge for a no-bake treat with a creamy white-chocolate base and cookie pieces in every square.
Why the Cookie Pieces Need Two Different Jobs
There’s a reason I divide the chopped cookies instead of stirring them all into the pan. The pieces mixed through the fudge give you cookie in the center of each bite, but they’re surrounded by the soft white-chocolate mixture, so they don’t provide the same crisp contrast as a piece on top. The finishing layer stays visible and gives every square a clear cookie crunch.
Roughly chopped pieces work better here than fine crumbs. Crumbs disappear into the fudge and can make the mixture feel more like a flavored filling than cookie-studded candy. Big chunks, on the other hand, can make the fudge harder to portion neatly. Aim for a mix of bite-size pieces, then save the smaller bits for the surface, where they’re easy to press into place. That division gives the fudge a distinct cookie texture without losing the smooth base.
It’s also worth pressing the topping gently rather than burying it. The surface should hold the cookie pieces, not swallow them. That small difference makes the finished squares look like milk-and-cookies fudge instead of plain white fudge with a few crumbs on top.
What Each Ingredient Brings to This Cookie Fudge

- Sweetened condensed milk — This thick, sweet dairy base gives the fudge body and helps it set after chilling. Use sweetened condensed milk, not a thinner milk product; the texture and sweetness depend on its concentrated consistency.
- White chocolate chips — These melt into the condensed milk and form the main structure of the fudge. A dependable baking brand is fine, but use actual white chocolate chips rather than vanilla-flavored candy coating, which can melt and set differently.
- Unsalted butter — Butter rounds out the sweetness and helps the melted mixture feel smooth. Unsalted butter keeps the small amount of salt in the recipe in your control; there’s no need to seek out a specialty brand.
- Vanilla extract — Vanilla gives the sweet base a warmer, more rounded taste. Pure extract is lovely, but the kind you already keep in the pantry works well here.
- Chocolate chip cookies — Fresh, crisp cookies make the most noticeable contrast against the creamy fudge. Store-bought cookies are convenient and consistent; roughly chop them so you get distinct pieces rather than a layer of crumbs.
How to Melt, Layer, and Chill the Fudge
Line the Pan for an Easy Lift
Line an 8-inch square baking pan with parchment paper before you start cooking. Leave overhang on two sides so the chilled fudge can be lifted out in one piece. Smooth the parchment into the corners as well as you can; deep folds can leave ridges in the sides of the slab. Set the prepared pan within reach before you melt the chocolate.
Melt the Base Slowly
Combine the sweetened condensed milk, white chocolate chips, butter, and kosher salt in a medium saucepan over low heat. Stir constantly for 5 to 8 minutes, scraping around the bottom and sides as the chips soften. The mixture is ready when it looks smooth and fully melted, with no obvious chips remaining. If the heat is too high or you stop stirring, the chocolate can scorch before the mixture turns silky.
Fold in the First Cookies
Take the saucepan off the heat before stirring in the vanilla extract and 1 cup of the chopped cookies. The mixture will be thick, so fold steadily until the cookie pieces are distributed without crushing them. Working off the burner helps keep the chocolate from taking on extra heat while you mix. Keep the remaining chopped cookies aside for the top.
Top, Chill, and Cut
Spread the fudge mixture evenly in the lined pan, then scatter the remaining 1/2 cup of chopped cookies over the surface. Gently press those pieces into the soft fudge so they stay in place without disappearing underneath it. Refrigerate the pan for at least 2 hours, until the fudge is firm. Lift it out and let it sit at room temperature for 10 minutes before cutting it into 16 pieces.
Three Cookie Swaps That Change the Character of the Fudge
Make It Gluten-Free with Gluten-Free Chocolate Chip Cookies
Replace the regular chocolate chip cookies with gluten-free chocolate chip cookies, chopping and dividing them the same way. The creamy fudge stays the same, though the cookie crunch will depend on the brand you choose.
Use Chocolate Sandwich Cookies for a Darker Bite
Swap in roughly chopped chocolate sandwich cookies in place of the chocolate chip cookies, keeping the total chopped-cookie amount the same. Their cocoa-forward wafers make the white-chocolate fudge taste less like a classic chocolate chip cookie and more like a cookies-and-cream candy.
Trade in Peanut Butter Cookies
Use roughly chopped peanut butter cookies for the same total amount. They bring a nutty, toasted note that balances the sweet white-chocolate base, with a softer cookie flavor than the original chocolate-chip version.
Storage and Reheating
- Refrigerator: Keep the fudge in an airtight container for up to 2 weeks. The pieces stay firm and the cookies soften slightly over time.
- Freezer: Freeze the cut pieces in an airtight container for up to 2 months, with parchment between layers. Thaw them in the refrigerator before serving.
- Reheating: No reheating is needed. Skip the microwave, which can make the fudge overly soft; serve it chilled or let pieces sit briefly at room temperature.
Questions I Get Asked About Milk and Cookies Fudge
Milk and Cookies Fudge
Ingredients
Equipment
Method
- Line an 8-inch square baking pan with parchment paper, leaving overhang on two sides for lifting out the fudge.
- Combine the sweetened condensed milk, white chocolate chips, butter, and salt in a medium saucepan over low heat.
- Stir constantly for 5 to 8 minutes until smooth and fully melted.
- Remove the pan from the heat.
- Stir in the vanilla extract and 1 cup of the chopped cookies.
- Spread the mixture evenly in the prepared pan.
- Scatter the remaining 1/2 cup cookies over the top.
- Gently press the cookies into the fudge.
- Refrigerate for at least 2 hours, until firm.
- Lift the fudge from the pan and let it sit at room temperature for 10 minutes before cutting into 16 pieces.


