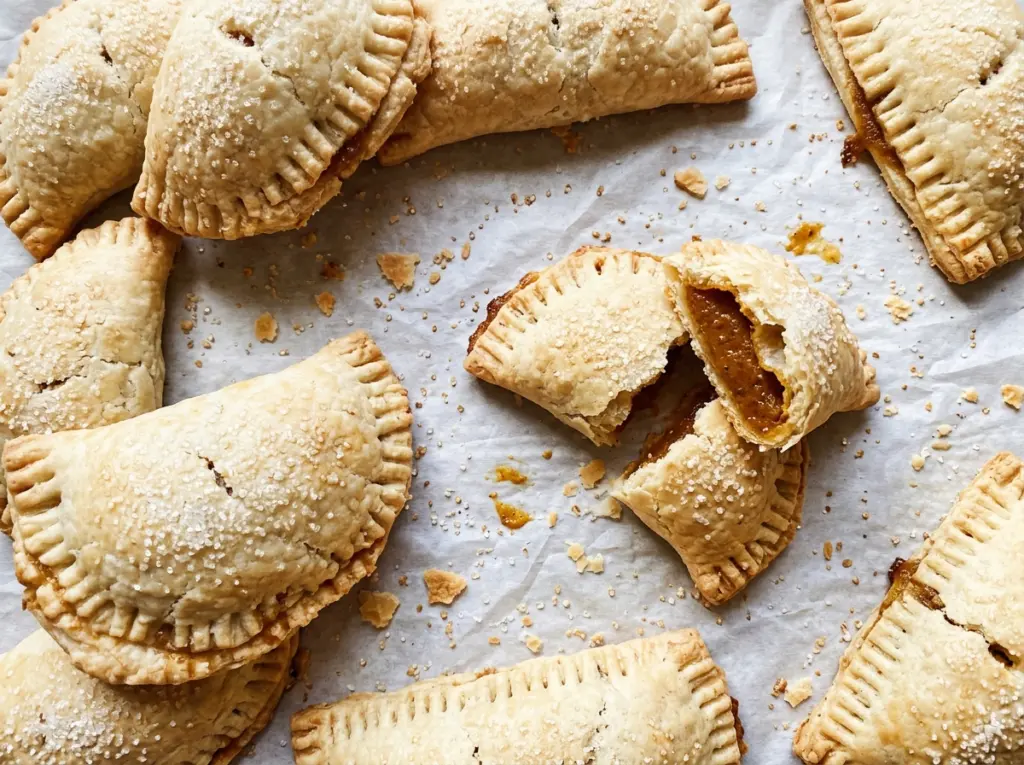
The fork leaves a neat border along each little pastry, but that crimp does more than make these hand pies look finished: it keeps the pumpkin tucked inside while the crust bakes. These pumpkin hand pies have a tender, buttery shell around a warmly spiced filling, with just enough sweetness to let the pumpkin come through.
I keep the pastry simple and cold, then give it a full rest in the refrigerator before rolling. That pause makes the dough easier to handle and gives the butter time to firm back up after mixing. The filling comes together in one bowl, so the most careful work happens when you portion it onto the pastry.
Cut into a hand-held size and baked until the crust turns golden, they’re especially good once they’ve cooled enough for the filling to settle. Each one has a flaky edge, a soft pumpkin center, and a little cinnamon in every bite.
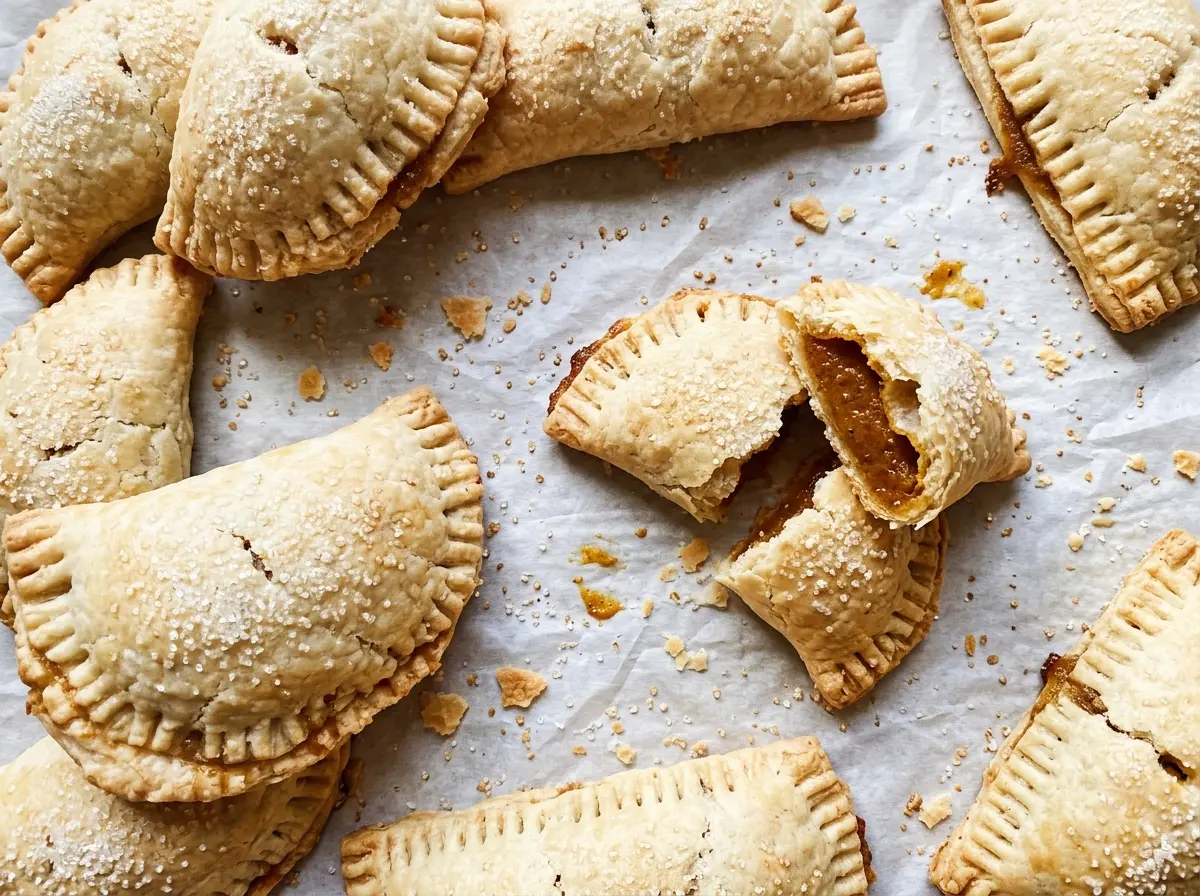
Kitchen Note
Start with five tablespoons of ice water, then add the last tablespoon only if the dough needs it. It should hold together when you press it, not feel wet or sticky.
Save these pumpkin hand pies for a bake-ahead treat with flaky pastry and a spiced pumpkin center.
Why These Hand Pies Need Vents, Not Just a Good Crimp
A tightly crimped edge helps keep the filling in, but it can’t give steam anywhere to go. Pumpkin filling heats inside a sealed pastry, and pressure can push against the top crust or find a weak spot along the seam. Cutting two small vents in each pie gives that steam an escape route as the pastry bakes.
Portioning matters just as much. The filling goes on one half of each round, with a border left clear so the top can meet the bottom and seal. Two tablespoons gives each pie a generous center without crowding the edge. If filling smears onto the rim, the dough won’t join as cleanly, so keep the water-brushed edge clear before folding.
Think of the fork crimp as the final seal, not a way to force an overfilled pie shut. Press firmly around the folded edge, then check that the pastry is joined all the way around. The vents and the clean seam do different jobs: one releases steam, and the other keeps the filling where it belongs.
What Makes the Pumpkin Filling Set Without Losing Its Spice

- Canned pumpkin puree — Use plain puree, not pumpkin pie filling, which already contains sweeteners and spices. Canned puree gives this small-batch filling a dependable consistency; the brand matters less than checking the label for plain pumpkin.
- Butter — Cold unsalted butter creates flaky layers as the pastry bakes, and a standard grocery-store butter works well here. Keep it in small, cold cubes when you cut it into the flour. A plant-based baking stick is the practical dairy-free swap, though the pastry won’t have quite the same buttery taste.
- Egg and cornstarch — Together, they help the pumpkin filling hold its shape after baking instead of flowing out when you bite into a pie. Use a large egg for the intended balance. There isn’t a dependable egg-free replacement in this filling; leaving it out changes how the center sets.
- Cinnamon, ginger, and cloves — The three spices give the pumpkin warmth without masking it. Fresh, fragrant spices make a noticeable difference, but there’s no need to buy specialty brands. Pumpkin pie spice isn’t a direct one-for-one replacement because its blend and proportions vary.
- All-purpose flour — It gives the pastry enough structure to roll, fold, and crimp. A regular all-purpose flour is the right choice; swapping in a softer pastry flour can make the hand pies more delicate to handle. For a gluten-free version, use a cup-for-cup blend made for baking instead.
From Cold Dough to Golden Pumpkin Hand Pies
Bring the pastry together, then chill it
Whisk the flour, granulated sugar, and salt in a large bowl, then cut in the cold butter with a pastry blender. Stop when the largest butter pieces are about pea-size; the mixture shouldn’t become a smooth paste. Stir in five tablespoons of ice water, adding the sixth only if needed, until the dough holds when pressed. Divide it into two disks, wrap them, and refrigerate for at least one hour.
Whisk the filling until smooth
In a medium bowl, whisk the pumpkin puree, brown sugar, egg, cornstarch, cinnamon, ginger, cloves, and salt. Keep whisking until you don’t see streaks of egg or pockets of cornstarch. A smooth mixture portions more neatly onto the pastry than one with dry clumps. Set the bowl aside while you roll the chilled dough.
Fill, fold, and crimp each round
Heat the oven to 400°F and line an 18-by-13-inch rimmed baking sheet with parchment. On a lightly floured surface, roll each disk about ⅛ inch thick and cut four 5-inch rounds from each, rerolling scraps as needed. Put two tablespoons of filling on one half of each round, brush the edges with water, fold the dough over, and crimp firmly with a fork. Arrange the pies on the pan, cut two small vents in each top, brush with milk, and refrigerate for 15 minutes.
Bake until the filling and crust are ready
Bake for 20 to 25 minutes, looking for golden-brown pastry rather than a pale, soft top. Check the center of the filling with a thermometer; it should reach 160°F. If the crust is browning but the filling hasn’t reached temperature, give the pies a little longer in the oven. Let them cool on the baking sheet for 10 minutes before serving so the filling has a chance to settle.
Two Ingredient Swaps That Change These Hand Pies
Make the pastry gluten-free
Replace the all-purpose flour with a cup-for-cup gluten-free baking blend formulated for pastry. Add the ice water gradually and stop when the dough holds together when pressed, since different blends absorb liquid differently. The crust will be a little more delicate to roll and crimp, so handle the rounds gently.
Make them dairy-free
Use cold, unsalted stick-style vegan butter in place of the butter, and brush the tops with unsweetened oat or soy milk instead of dairy milk. The egg in the filling stays as written, so this swap removes dairy but doesn’t make the pies vegan. Expect a slightly different aroma and a less buttery pastry.
Storage and Reheating
- Refrigerator: Store cooled hand pies in an airtight container for up to 3 days; the crust softens a little as it sits.
- Freezer: Freeze the cooled pies in an airtight container, with parchment between layers, for up to 2 months. Thaw them in the refrigerator before reheating.
- Reheating: Warm them in a 325°F oven until heated through and the pastry feels crisp again. Skip the microwave, which softens the crust.
Questions That Come Up When Making Pumpkin Hand Pies
Pumpkin Hand Pies
Ingredients
Equipment
Method
- In a large bowl, whisk together the flour, granulated sugar, and salt, then cut in the butter with a pastry blender until the largest pieces are pea-size.
- Stir in 5 tablespoons ice water, adding the remaining tablespoon if needed, just until the dough holds together when pressed; divide into 2 disks, wrap, and refrigerate for at least 1 hour.
- In a medium bowl, whisk together the pumpkin, brown sugar, egg, cornstarch, cinnamon, ginger, cloves, and salt until smooth.
- Heat the oven to 400°F and line an 18x13-inch rimmed baking sheet with parchment paper.
- On a lightly floured surface, roll each dough disk about 1/8 inch thick and cut out four 5-inch rounds from each, rerolling scraps as needed; place 2 tablespoons filling on one half of each round, brush the edges with water, fold over, and crimp firmly with a fork.
- Arrange the pies on the baking sheet, cut 2 small vents in each top, brush with milk, and refrigerate for 15 minutes.
- Bake for 20 to 25 minutes, until the pastry is golden brown and the center of the filling reaches 160°F.
- Cool the hand pies on the baking sheet for 10 minutes before serving.


