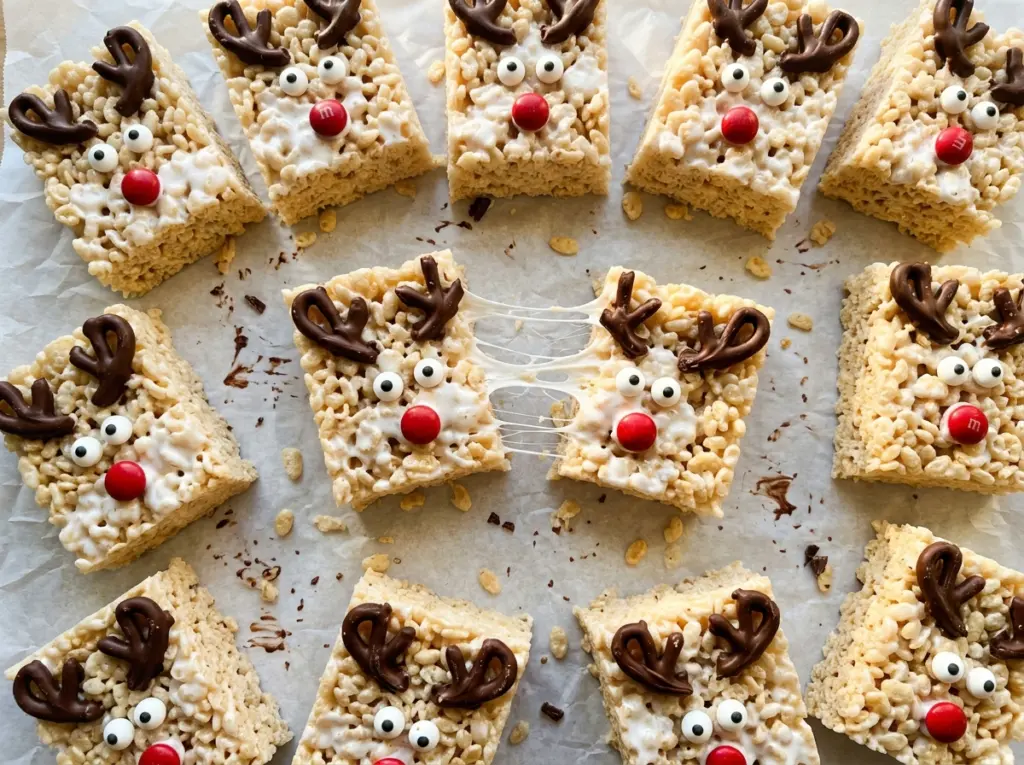
The marshmallow mixture turns from loose and glossy to thick and stretchy as soon as the cereal goes in. I used to press it down hard to get a neat, flat layer, but that made the bars dense instead of pleasantly chewy. These Reindeer Rice Krispie Treats are easier to shape when the mixture stays a little airy.
Mini marshmallows melt smoothly with butter over medium-low heat, so there’s time to stir them until no lumps remain without rushing the cereal into the pot. A lightly greased spatula helps spread the sticky mixture without packing it tight. Once the bars are set, pretzel antlers and candy faces turn each rectangle into a little reindeer, with melted chocolate holding the details in place.
The finished treats have crisp edges, a soft pull in the middle, and bright candy faces peeking out from beneath their pretzel antlers.
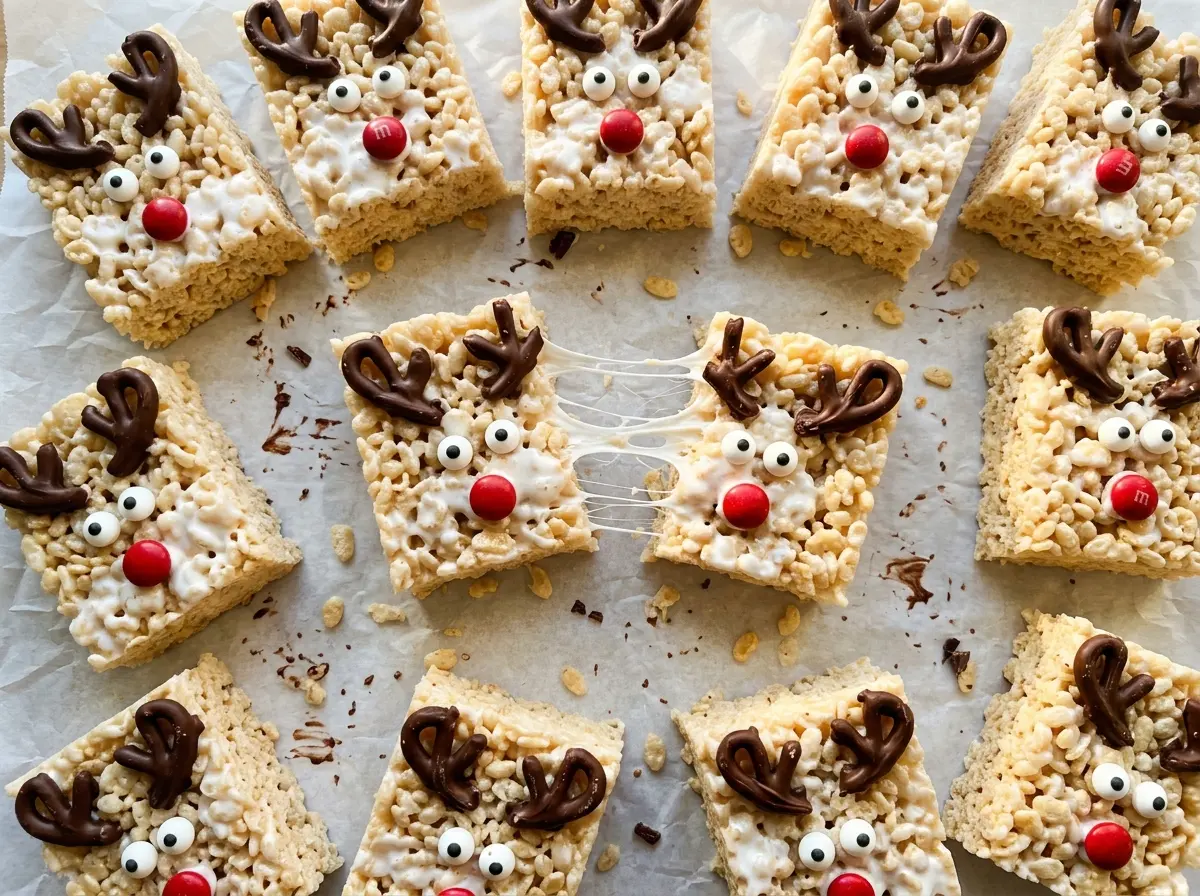
Kitchen Note
Give the slab the full 30–45 minutes to set before lifting it from the pan. If you cut while it’s still soft, the edges slump and the little rectangles are harder to decorate neatly.
Save these Reindeer Rice Krispie Treats for a holiday dessert tray: chewy cereal bars, pretzel antlers, and bright candy noses.
Why Pressing the Cereal Too Firmly Makes These Bars Tough
Rice cereal treats need enough pressure to hold together, but they don’t need to be packed like a crust. The melted marshmallow already acts as the binder; pressing harder won’t make it hold better. It squeezes the cereal together and leaves you with a denser, firmer bite.
Spread the mixture into an even layer with a lightly greased spatula, using just enough pressure to fill the corners of the 9×13-inch pan. If the spatula drags, grease it lightly again rather than leaning on it. Aim for a level surface with the cereal still looking distinct, not crushed into a solid sheet. That gentle touch also makes the slab easier to cut into rectangles once it has set.
The layer doesn’t have to look perfectly polished. Small ripples disappear under the candy faces, and an even thickness matters more than a glass-smooth top. You want bars that stay together when lifted but still give a little when you bite through them.
What the Marshmallows, Cereal, and Chocolate Each Bring

- Mini marshmallows — Their small size helps them melt evenly with the butter, so the mixture turns smooth before it’s time to add the cereal. Use a fresh bag for the softest, easiest-to-stir mixture; marshmallows that have dried out can be stubborn and lumpy. Larger marshmallows can work by weight, but they may take longer to melt.
- Crispy rice cereal — The light, crisp pieces give the bars their familiar crunch without making them heavy. Fresh cereal makes a noticeable difference here; stale cereal stays dull and loses its crisp snap even after it’s coated.
- Unsalted butter, kosher salt, and vanilla — Butter gives the marshmallows a smoother, richer base, while salt keeps the sweetness from tasting flat and vanilla rounds it out. Unsalted butter makes the salt level predictable. If salted butter is what you have, leave out the added kosher salt.
- Pretzel twists and candy decorations — Twists have two branches that read clearly as antlers, and candy eyeballs plus a red candy-coated chocolate make the faces easy to recognize. Choose pretzels that are intact rather than broken; damaged twists are more likely to snap when pressed into the bars.
- Mini chocolate chips — These melt into small, controlled dots that work as edible glue for the eyes and noses. Mini chips are easier to portion neatly than larger chips, and the chocolate only needs to become smooth—not hot—to attach the decorations.
Building the Bars and Attaching the Reindeer Faces
Set Up the Pan Before the Marshmallows Melt
Coat a 9×13-inch baking pan with cooking spray, then line it with parchment paper, leaving overhang on the long sides. Having the pan ready matters because the cereal mixture thickens as it cools and is much easier to spread while warm. Set out a lightly greased spatula for pressing the mixture into place. The parchment overhang also gives you something to hold when it’s time to lift the set slab.
Melt the Butter and Marshmallows Slowly
Melt the butter in a 6-quart pot over medium-low heat, then stir in the mini marshmallows. Keep stirring for 4–6 minutes, until the marshmallows are completely melted and the mixture looks smooth. If you still see marshmallow lumps, keep stirring over the same gentle heat rather than turning up the burner; high heat can scorch the butter before the marshmallows finish melting. Take the pot off the heat once the mixture is uniform.
Coat the Cereal and Press a Light, Even Layer
Stir in the kosher salt and vanilla, then fold in the cereal until every piece is coated. Use a folding motion to bring cereal from the bottom of the pot up through the sticky mixture, scraping the sides as you go. Transfer it to the prepared pan and spread it into an even layer with the lightly greased spatula. Press gently; if you compact the cereal, the bars will be harder and less tender.
Cut the Rectangles and Finish Each Face
Let the mixture cool for 30–45 minutes, until set, then lift it out using the parchment and cut it into 12 rectangles. Melt the mini chocolate chips in a microwave-safe bowl at 50% power in 20-second intervals, stirring between intervals until smooth. Press two pretzel twists into the top edge of each treat for antlers. Use small dots of melted chocolate to attach two candy eyeballs and one red candy nose to each bar, then leave the chocolate to set for 10–15 minutes before serving.
Easy Ways to Change the Reindeer Decorations
Make the Faces Gluten-Free
Use crispy rice cereal and pretzel twists labeled gluten-free, along with gluten-free candy decorations. The bars keep their crisp cereal texture, while the antlers may look a little different depending on the shape of the pretzels you find.
Give Every Reindeer a Different Nose
Replace the red candy-coated chocolates with candy-coated chocolates in another color. Keep the same size so each nose sits neatly on its chocolate dot; the bars taste the same, but a mix of colors makes the platter look more playful.
Storage and Reheating
- Room temperature: Store the treats in an airtight container for up to 3 days. They’re at their softest during this time.
- Refrigerator: They’ll keep in an airtight container for up to 1 week, but the cereal layer firms up when cold. Let them come back to room temperature before serving.
- Freezer: Wrap the treats individually and freeze in an airtight container for up to 6 weeks. Thaw them while wrapped at room temperature to limit condensation on the candy decorations.
- Reheating: Don’t microwave decorated treats; the chocolate can soften and the candies may slide. Let chilled or thawed bars come to room temperature instead.
Questions That Come Up While Making Reindeer Rice Krispie Treats
Reindeer Rice Krispie Treats
Ingredients
Equipment
Method
- Coat a 9x13-inch baking pan with cooking spray.
- Line the pan with parchment paper, leaving some overhang on the long sides.
- Melt the butter in a 6-quart pot over medium-low heat, then add the marshmallows and stir for 4–6 minutes, until completely melted and smooth.
- Remove the pot from the heat and stir in the salt and vanilla.
- Fold in the cereal until evenly coated.
- Transfer the mixture to the prepared pan.
- Press it into an even layer with a lightly greased spatula.
- Let cool for 30–45 minutes, until set.
- Lift the treats from the pan using the parchment and cut into 12 rectangles.
- Melt the chocolate chips in a microwave-safe bowl at 50% power in 20-second intervals, stirring between intervals, until smooth.
- Press two pretzel twists into the top edge of each treat for antlers.
- Use small dots of melted chocolate to attach two candy eyeballs and one red candy nose to each treat.
- Let the chocolate set for 10–15 minutes before serving.


