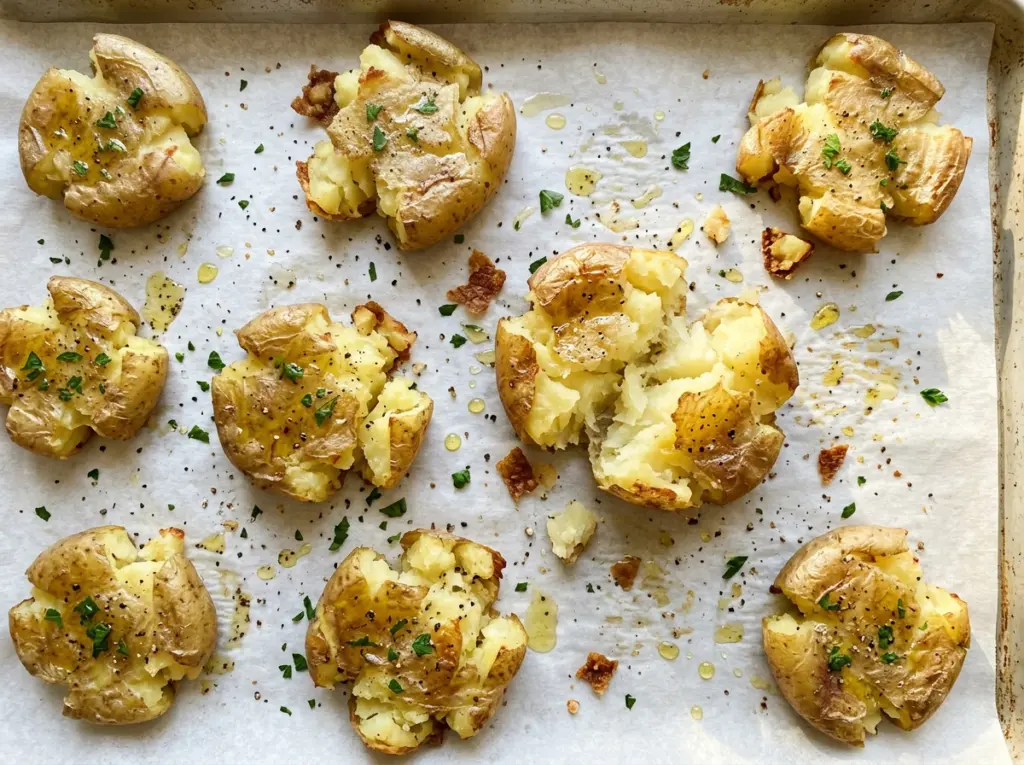
A glass comes down on a tender potato, the skin splits, and the edges turn ragged in the best way. Those rough edges are what make smashed potatoes worth the extra pot: they crisp in the oven while the middle stays soft and creamy.
I keep the potatoes small and cook them until a knife slides in easily before they go anywhere near the sheet pan. That gives each one a tender center that can be pressed without a fight. Then a generous drizzle of olive oil helps the craggy surfaces brown at 450°F. The result is simple, but the contrast between crisp edges and a fluffy center makes every bite count.
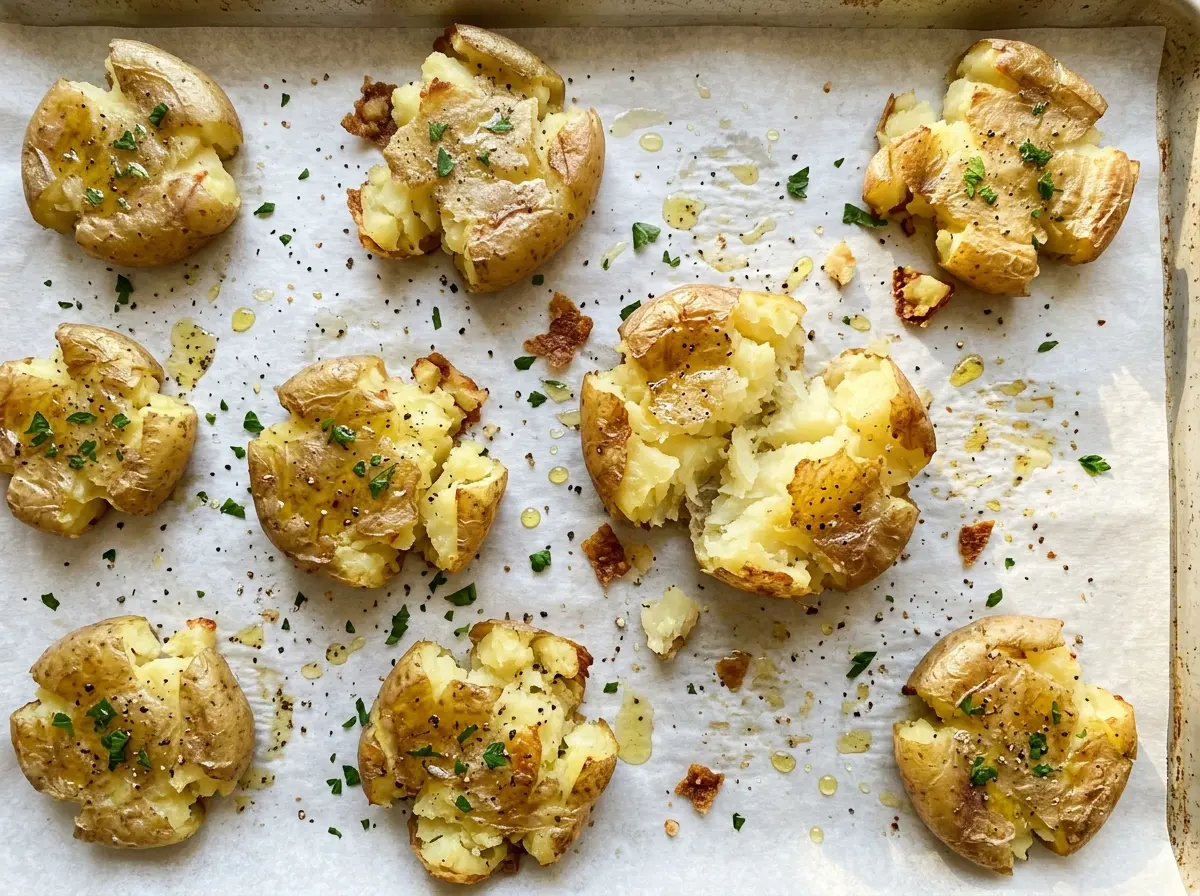
Kitchen Note
Give the drained potatoes the full 5 minutes in the colander to steam-dry. That pause lets surface moisture escape before the potatoes meet the hot pan, which helps the oil coat them instead of sliding off with a film of water.
Save these smashed potatoes for a crisp-edged side with a soft, buttery center and just a handful of pantry ingredients.
Why the Smash Should Stop at About Half an Inch
Pressing harder doesn’t automatically make a better potato. A very thin potato has less soft center to balance the crisp outside, and it can dry out before the edges brown properly. Keeping each one about 1/2 inch thick gives the middle room to stay tender while the uneven perimeter roasts into the crunchy part everyone reaches for.
Potato size matters before the smashing even starts. Yukon Golds around 1 1/2 to 2 inches wide cook at a similar pace, so you’re less likely to pull a few out while larger ones are still firm in the middle. Use the knife test rather than relying on a timer alone: it should slide easily into the potato. If the blade meets resistance, give them more time in the simmering water; firm centers are much harder to flatten gently and can leave you with uneven pieces.
Think of the glass as a press, not a masher. A steady push cracks the skin and spreads the potato without turning it into loose pieces. A few splits and rough edges are welcome, but you want each potato to hold together well enough to lift and roast on the pan.
Why Small Yukon Golds Give These Potatoes Their Creamy Middle

- Small Yukon Gold potatoes — Their naturally buttery, waxy flesh holds together under the glass while still turning tender inside. Choose potatoes that are close in size; small red potatoes are a workable substitute, though their centers taste a little less buttery.
- Olive oil — It coats the potatoes and helps their rough surfaces brown in the oven. An everyday, mild olive oil is fine here; save a peppery finishing oil for another use. A neutral plant oil can stand in if you want less olive flavor, using the same amount.
- Kosher salt — The salt seasons both the cooking water and the potatoes themselves. Dividing it gives the interiors a chance to pick up seasoning while they simmer, with another layer on the outside before roasting. Different salts vary in how much fits in a spoon, so stick with kosher salt for the listed measurement.
- Black pepper — It adds a warm, gentle bite against the potatoes’ mild flavor. Freshly ground pepper has a sharper aroma, but ordinary preground pepper works perfectly well for this tray.
The ingredients are naturally vegan, dairy-free, and gluten-free, so the potatoes need no special swap to fit those tables. The potato choice and the oil do most of the work; the seasoning stays straightforward.
From Tender Potatoes to Deeply Golden Edges
Get the Pan Hot While the Potatoes Cook
Heat the oven to 450°F and lightly oil an 18×13-inch rimmed sheet pan with 1 tablespoon of olive oil. Starting the oven while the potatoes simmer keeps the roasting stage moving without leaving the drained potatoes waiting around. Spread that thin coating over the pan so the potatoes have contact with oil where they land. Keep the rimmed pan level as you work; it makes drizzling and transferring easier.
Simmer Until a Knife Slides In Easily
Put the potatoes in a 6-quart pot with 3 quarts of water and 2 teaspoons of the kosher salt. Bring the water to a boil over high heat, then lower the heat and simmer for 15 to 20 minutes. Check a potato with a knife: the blade should slide in easily, not catch at the center. If it catches, the potatoes need more simmering before they’ll flatten without a struggle.
Drain, Press, and Season Without Mashing
Drain the potatoes and let them steam-dry in the colander for 5 minutes. Arrange them on the prepared sheet pan with a little room around each one, then gently press each potato with the bottom of a glass until it’s about 1/2 inch thick. If a potato starts to split, ease up rather than pushing it into pieces. Drizzle with the remaining 3 tablespoons olive oil, then season with the remaining 1 teaspoon kosher salt and the black pepper.
Roast Until the Edges Turn Deeply Golden
Roast for 25 to 35 minutes, watching for deeply golden, crisp edges. The potatoes should look browned around their uneven outlines, not just pale and softened. If the edges haven’t crisped by the shorter end of the range, let them continue roasting and check again. Lift one carefully to check the underside before taking the pan out; the bottoms should have color, too.
Two Smart Ways to Change the Shape or Flavor
Make the edges even more prominent
After the potatoes are tender and drained, cut each one in half before pressing, then set the cut sides against the pan. The exposed surfaces brown along with the cracked edges, giving you more crisp, flat areas in each piece. The potatoes won’t look as round and whole, but they’ll have a more pronounced contrast between browned surfaces and soft centers.
Use a milder-tasting oil
Swap the olive oil for the same amount of canola or avocado oil if you’d rather keep the potato flavor front and center. Both work for coating the pan and the potatoes; you’ll lose olive oil’s grassy note, but the browned edges still come through. Keep the listed split between oiling the pan and dressing the potatoes.
Storage and Reheating
- Refrigerator: Store leftovers in a covered container for 3 to 4 days. The edges soften as they chill, but the potatoes re-crisp well in the oven.
- Freezer: Freeze the cooled potatoes in a single layer until firm, then transfer them to a sealed freezer container for up to 1 month. They may be a little softer after thawing, so reheat them straight from frozen for the best texture.
- Reheating: Spread them on a sheet pan and heat at 450°F until hot and crisp again. The microwave warms them quickly but leaves the edges soft, so use it only if crispness isn’t the priority.
Questions That Come Up While Making Smashed Potatoes
Smashed Potatoes
Ingredients
Equipment
Method
- Heat the oven to 450°F.
- Lightly oil an 18x13-inch rimmed sheet pan with 1 tablespoon of the olive oil.
- Put the potatoes, water, and 2 teaspoons of the salt in a 6-quart pot and bring to a boil over high heat.
- Lower the heat and simmer for 15 to 20 minutes, until a knife slides easily into the potatoes.
- Drain the potatoes and let them steam-dry in the colander for 5 minutes.
- Arrange the potatoes on the prepared sheet pan.
- Gently press each potato with the bottom of a glass until about 1/2 inch thick.
- Drizzle the potatoes with the remaining 3 tablespoons olive oil.
- Season the potatoes with the remaining 1 teaspoon salt and the pepper.
- Roast for 25 to 35 minutes, until the edges are deeply golden and crisp.


