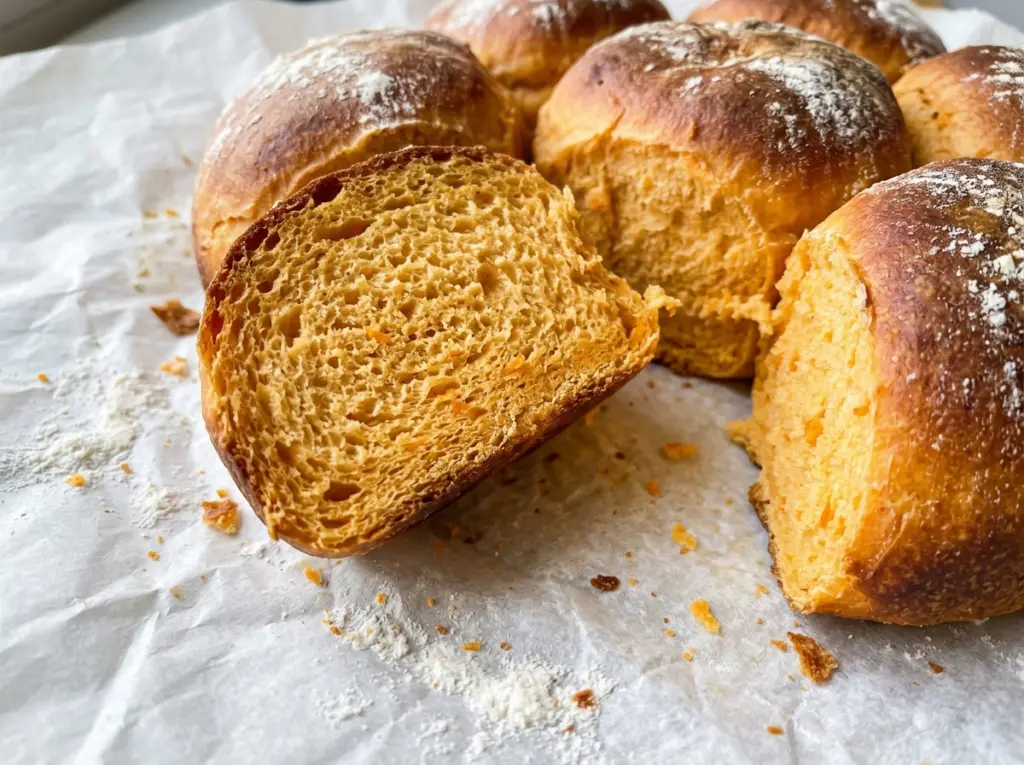
The dough starts out softer and stickier than a plain dinner-roll dough, which can make you wonder whether it needs more flour. With these sweet potato rolls, that feel is part of the point: the mashed sweet potato brings moisture and tenderness along with its gentle sweetness. Add flour too quickly and the rolls can turn heavy instead of soft.
I mix the dough until it’s smooth, then give it enough time to rise before shaping and baking. The sweet potato also gives the centers a warm golden color, while the tops brown in the oven. Let the rolls cool briefly in the pan, and they’re ready to pull apart while still warm.
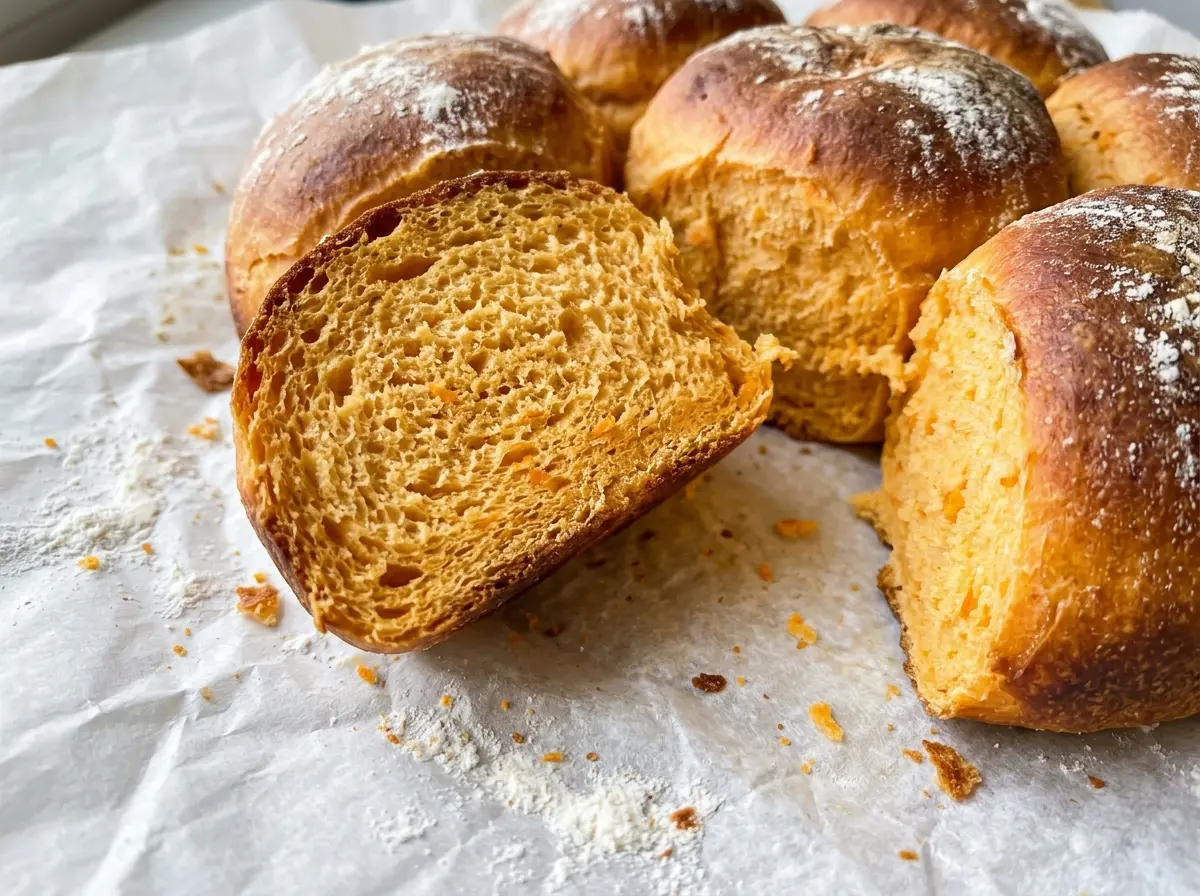
Kitchen Note
Divide the dough into 12 pieces that are as even as you can make them. Similar-sized rolls rise and bake at a similar pace, so you’re less likely to have one overbaked while another is still catching up.
Save these sweet potato rolls for a soft, lightly sweet batch of homemade dinner rolls with golden tops.
Why This Dough Should Feel Softer Than Plain Roll Dough
Mashed sweet potato adds more than color. It brings moisture and starch into the dough, so the mixture won’t feel as firm as a basic flour-and-milk roll dough at the same point in kneading. That softness is what helps the finished rolls stay tender. A dough that feels a little tacky isn’t automatically a dough that needs rescuing.
Flour absorption can shift with the moisture in the cooked sweet potato and with the flour itself. That’s why I start with the first amount of flour, then use the remaining flour gradually rather than tipping it all in. The dough should become smooth and manageable while still feeling slightly tacky. If you knead until it feels dry and stiff, you’ve gone past the texture this dough needs.
Give the dough time to develop as you knead, too. At first it may look shaggy and uneven, but it changes as the flour hydrates and the dough becomes more cohesive. Use the texture cue, not a desire to make it feel like a firm ball of bread dough.
What the Sweet Potato and Yeast Bring to These Rolls

- Mashed sweet potato — It adds moisture, color, and a mild sweetness that plain flour can’t provide. Use cooked sweet potato that’s cooled before it goes into the bowl; warm mash can interfere with the dough’s temperature. A smooth mash blends in more evenly than large chunks.
- Active dry yeast — This is the leavener that gives the dough its rise, and the short foaming rest gives you an early sign that it’s active. Check that it foams before moving on; yeast that doesn’t foam is unlikely to give you the rise you’re looking for.
- Whole milk — Milk contributes richness and helps make a soft dough. Its temperature matters when it meets the yeast mixture, so warm it within the range given in the recipe rather than using it straight from the refrigerator or heating it until hot.
- Egg — The egg contributes structure and richness. Bringing it to room temperature helps it mix more evenly into the warm liquid and sweet potato mixture.
- Unsalted butter — Melted butter gives the rolls a tender, rich crumb. Let it cool before mixing; butter that’s still hot can warm the dough more than intended.
- All-purpose flour — This gives the rolls their structure without making them as chewy as a dough built around bread flour. Add the extra flour little by little while kneading, since the sweet potato’s moisture can vary.
From Foamy Yeast to Golden, Puffy Rolls
Give the yeast its foamy start
Stir the active dry yeast and granulated sugar into warm water in a large bowl. Let the mixture stand for 5–10 minutes, until foam gathers on top. That foam is the cue to continue; a flat mixture hasn’t shown the activity this dough needs. Keep the water within 105–110°F so it’s warm without being excessively hot.
Mix in the sweet potato and build the shaggy dough
Stir the warm milk, room-temperature egg, cooled mashed sweet potato, melted and cooled butter, and salt into the yeast mixture. Mix in 3 1/2 cups flour until a shaggy dough forms. It won’t look smooth yet, and that’s fine at this stage. The remaining flour is for adjusting the dough as you knead, not something to add all at once.
Knead until smooth, then let the dough rise
Turn the dough onto a lightly floured surface and knead for 8–10 minutes. Add flour from the remaining amount a tablespoon at a time only as needed, working it in before deciding whether the dough needs more. You’re looking for dough that has become smooth and slightly tacky, rather than dry or heavily coated in flour. Lightly coat a large bowl with nonstick cooking spray, put the dough inside, cover it, and let it rise in a warm place for 1–1 1/2 hours, until doubled in size.
Shape the rolls and wait for the second rise
Lightly coat a 9×13-inch baking pan with nonstick cooking spray. Divide the risen dough into 12 equal pieces, shape each piece into a ball, and arrange the balls in the pan. Cover the rolls and let them rise in a warm place for 35–50 minutes, until they look puffy and nearly doubled. If they still look compact, give them more time within the rise window rather than putting them in the oven before they’ve puffed.
Bake until golden, then let them settle
Bake at 350°F for 20–25 minutes, until the tops are golden brown and the centers reach about 190°F. The color gives you a useful visual cue, while a thermometer lets you check the center instead of guessing from the crust. Once baked, cool the rolls in the pan for 10 minutes before serving. They’re delicate while piping hot, and that short rest makes them easier to pull apart.
Two Ways to Change the Sweet Potato Character
Use roasted sweet potato for a deeper, less watery mash
Roasted, mashed sweet potato gives the rolls a more concentrated sweet potato character than a wetter mash. Use it cooked, mashed, and cooled, just as you would the sweet potato in the main dough. Because its moisture can differ, rely on the dough’s smooth, slightly tacky feel as you add flour.
Choose white-fleshed sweet potato for a paler roll
White-fleshed sweet potato keeps the dough’s tender texture but gives the baked rolls a lighter color and a subtler sweet potato note. Cook it, mash it smoothly, and cool it before mixing. The flavor will be gentler than with orange-fleshed sweet potato, while the rolls still have their soft, enriched crumb.
Storage and Reheating
- Refrigerator: Store cooled rolls in an airtight container for up to 4 days. The refrigerator can make bread feel firmer, so let a roll come closer to room temperature before serving.
- Freezer: Freeze the fully cooled rolls in a freezer-safe airtight bag or container for up to 3 months. Thaw them while covered so the surfaces don’t dry out.
- Reheating: Warm the rolls gently in a low oven until heated through. Avoid prolonged microwave heating, which can make the crumb tough and chewy.
Questions That Come Up While Making Sweet Potato Rolls
Sweet Potato Rolls
Ingredients
Equipment
Method
- Stir the yeast and sugar into the warm water in a large bowl and let stand for 5–10 minutes, until foamy.
- Stir in the warm milk, egg, sweet potato, melted butter, and salt, then mix in 3 1/2 cups flour until a shaggy dough forms.
- Knead the dough on a lightly floured surface for 8–10 minutes, adding flour from the remaining amount a tablespoon at a time as needed, until smooth and slightly tacky.
- Lightly coat a large bowl with cooking spray, place the dough inside, cover, and let rise in a warm place for 1–1 1/2 hours, until doubled in size.
- Lightly coat a 9x13-inch baking pan with cooking spray, divide the dough into 12 equal pieces, shape into balls, and arrange them in the pan.
- Cover the rolls and let rise in a warm place for 35–50 minutes, until puffy and nearly doubled.
- Bake at 350°F for 20–25 minutes, until golden brown and the centers reach about 190°F.
- Cool the rolls in the pan for 10 minutes before serving.


