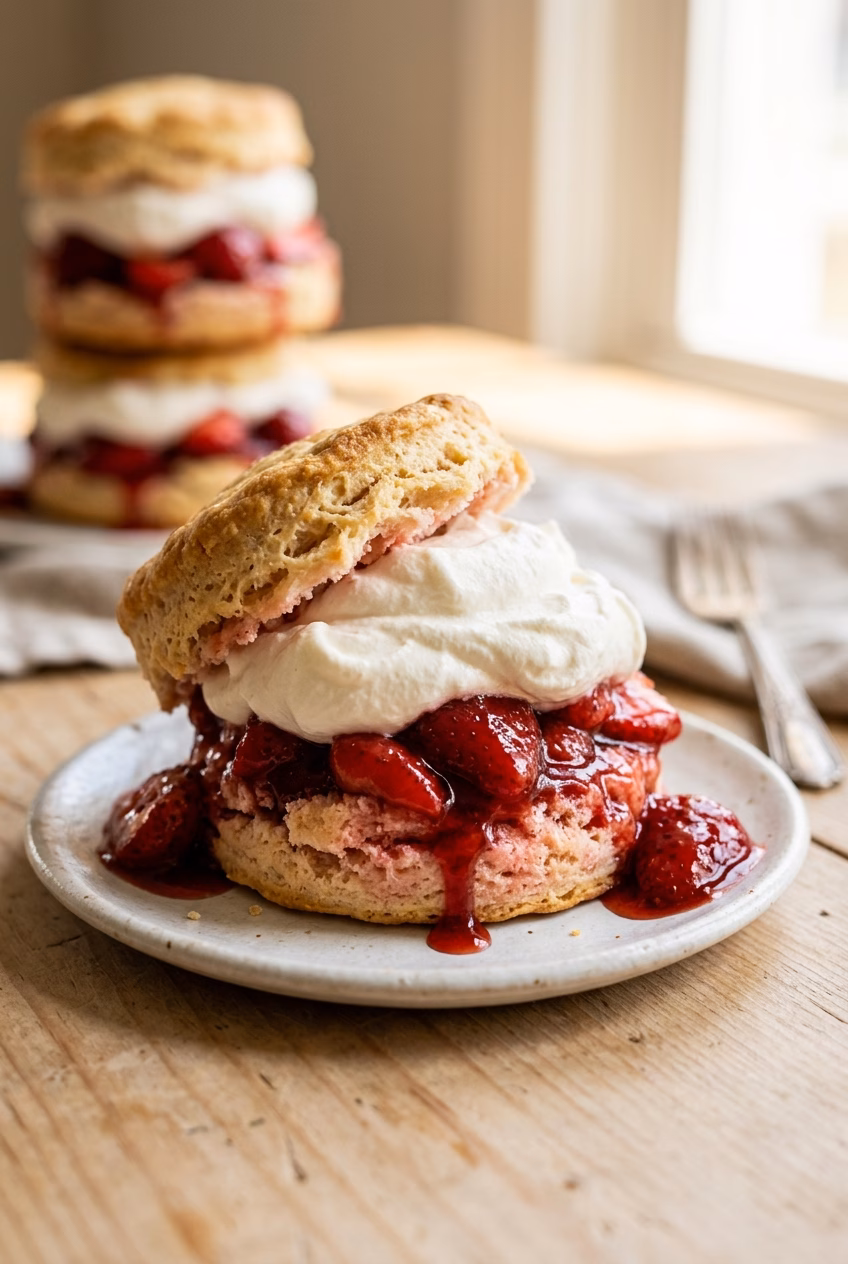
Flaky biscuits, juicy strawberries, and softly whipped cream come together in the kind of dessert that disappears fast once it hits the table. The best strawberry shortcake isn’t fussy; it depends on contrast. You want a biscuit that stays tender under the berry juice, strawberries that taste glossy and bright instead of flat, and cream that melts into the cracks without turning heavy.
This version gets there with a cold-butter biscuit and a short maceration for the berries. The strawberries need time with sugar so they give off their own syrup, and that syrup is what soaks into the shortcake without making it dry or bland. The biscuit dough stays shaggy on purpose. If you work it too much, it turns bready instead of light.
Below you’ll find the timing that matters most, plus the small handling details that keep the biscuits tall and the cream soft. Once you know those pieces, this becomes the kind of dessert you can pull together without a lot of planning.
The berries made their own syrup and soaked into the biscuit just enough. I loved that the shortcakes stayed tender underneath instead of getting soggy, and the whipped cream held its shape until the last bite.
These strawberry shortcake biscuits stay flaky, and the berry syrup soaks in without turning them dense. Save this for the next time you want a simple dessert with real homemade texture.
The Trick to Strawberry Shortcake That Doesn’t Collapse Under the Juice
The most common failure in strawberry shortcake is a biscuit that gets either dry and crumbly or mushy and flat. The fix starts with the biscuit itself. Cold butter has to stay in visible pieces so it can create little pockets of steam in the oven, which is what gives you layers instead of a dense cake-like crumb.
Just as important, the strawberries need time to macerate before assembly. If you pile on plain sliced berries, the shortcake tastes unfinished and the juice runs out too fast. Sugar pulls the natural juices from the fruit and turns them into a syrupy sauce that clings to the biscuit instead of slipping off the plate.
What Each Ingredient Is Actually Doing in This Shortcake
- Fresh strawberries — Use ripe berries with good color and aroma. Out-of-season berries can still work, but they need the sugar rest more than anything else because that is what wakes up their flavor.
- Cold heavy cream — This goes into the biscuit dough and also gets whipped for serving. In the dough, it adds fat and moisture without making the batter loose. For the whipped cream, the cold temperature helps it whip faster and hold soft peaks.
- Cold butter — This is the ingredient that makes the shortcakes flaky. If the butter melts before baking, you lose those steam pockets, so keep it cold and work quickly. If you only have salted butter, use it and reduce the added salt slightly.
- Baking powder — This gives the biscuits their lift. It needs a hot oven and minimal mixing, so the dough goes from shaggy to risen instead of tight and chewy.
- Vanilla — There are two small doses here, and both matter. One in the dough adds warmth, while the one in the whipped cream rounds out the strawberries. If you’re out, the dessert still works, but it tastes flatter.
How to Build the Biscuits So They Rise Instead of Turning Tough
Start with the strawberry syrup
Toss the sliced strawberries with sugar and leave them alone long enough to get glossy and juicy. You want a shallow pool of syrup at the bottom of the bowl, not just sugared berries. If the fruit still looks dry after 30 minutes, it probably needed a little more time or the berries were underripe.
Cut the butter in without warming it up
Work the cold butter into the flour mixture until you still see some pea-sized pieces. Those little bits matter because they melt late in the bake and create flaky layers. If the mixture turns sandy and uniform, the biscuits will bake up more like scones with a tighter crumb.
Bring the dough together with as little handling as possible
Add the cream and vanilla, then stir only until the dough barely comes together. It should look shaggy and uneven, not smooth. Overmixing develops gluten and gives you a chewy shortcake, which is the one thing you don’t want here.
Cut straight down and bake hot
Pat the dough to an even thickness and cut the rounds by pressing straight down without twisting. Twisting seals the edges and keeps the biscuits from rising cleanly. Bake until the tops and bottoms are a deep golden color, then let them cool briefly so they can split without crumbling apart.
Three Ways to Change This Without Losing What Makes It Work
Make it dairy-free
Use a thick, unsweetened coconut cream or a plant-based whipping cream for the topping, and swap the biscuit butter for a cold vegan butter stick. The biscuits will still rise and brown, but the flavor will be a little less rich and the crumb a touch more delicate.
Use blueberries or a berry mix
Blueberries, raspberries, or a mix all work with the same method. Softer berries break down faster, so shorten the macerating time a little if you want more texture and less syrup. The flavor stays bright, but the color gets deeper and a little more dramatic.
Make the biscuits a little sweeter
If you like a dessert-style biscuit, add another tablespoon of sugar to the dry ingredients. That gives the tops a softer sweetness and a slightly more tender edge, but don’t push it much further or the biscuit starts tasting like cake instead of shortcake.
Storage and Reheating
- Refrigerator: Store the biscuits, strawberries, and whipped cream separately for up to 2 days. The berries get juicier and the biscuits soften a bit, which is fine as long as you keep them apart.
- Freezer: The baked biscuits freeze well for up to 2 months. Wrap them tightly and freeze before assembling; the strawberries and whipped cream don’t freeze well for this dessert.
- Reheating: Warm the biscuits in a 300°F oven for a few minutes until just heated through. Don’t microwave them or they’ll turn rubbery and lose the crisp edges that make them worth serving.
Questions I Get Asked About This Recipe
Coconut Lime Icebox Cake with Mango Ribbons
Ingredients
Equipment
Method
- Open the refrigerated full-fat coconut cream cans without shaking, then scoop only the solid cream from the top into a chilled bowl (discard the liquid or save for smoothies). Beat with an electric stand mixer on medium-high for 2 minutes until light and fluffy; no temperature is needed.
- Add the powdered sugar, lime zest, lime juice, and vanilla extract, then beat for 30 seconds until incorporated and smooth.
- Use a vegetable peeler to shave the mangoes into long thin ribbons, working around the pit. Set the ribbons aside on paper towels to release water while you assemble the cake.
- Spread a thin layer of coconut cream on the bottom of a 9x13 pan. Lay the graham crackers in a single layer, breaking them as needed to fill gaps.
- Spread one-third of the remaining coconut cream evenly over the crackers, reaching the edges so the layer is uniform.
- Repeat with two more layers of graham crackers and coconut cream, finishing with a cream layer on top. Smooth the surface with an offset spatula.
- Refrigerate uncovered for at least 6 hours or overnight so the graham crackers absorb moisture and soften into a cake-like texture. Keep chilled; a cake pulled at about 4 hours will still have crunch.
- Just before serving, arrange the mango ribbons in loose folds across the top, scatter the toasted shredded coconut, and finish with fresh mint leaves. Slice with a sharp knife dipped in hot water and wiped clean between cuts.